#Connect your Hygraph project to Adminix
Adminix is a cloud workflow automation platform that companies can use to create processes using serverless technology.
#What you can do with the Hygraph-Adminix integration
- Create custom automation workflows directly on the Hygraph user interface, such as sending an email every time a new product is sold.
#Prerequisites to use this integration
- You must have a Hygraph account. If you don't have one, you can create one here.
- You must have an Adminix account. If you don't have one, you can request one here.
- You must have created a workspace in Adminix.
- You will also need a workspace access token & project ID. You will find this information in your Adminix account. Step 4 of the integration flow explains exactly where each of them is located.
Apps are environment specific. This means their configuration is applied per environment. Take this into consideration if you're working with a project using more than one environment.
#How to install the Adminix app
To install apps on Hygraph, you should go to our marketplace, and find the Adminix app. Click on it to open the page, then click on the Install Adminix for Hygraph button to start the installation flow. Follow these steps:
 Adminix installation
-
In the dropdown, select which project you want to install the app in, then click on the
Add Appbutton. You should be redirected to your Hygraph project homepage. -
Click on the
Install Adminixbutton. -
Click on
Yesif you have an Adminix account. The following screen will display as a result: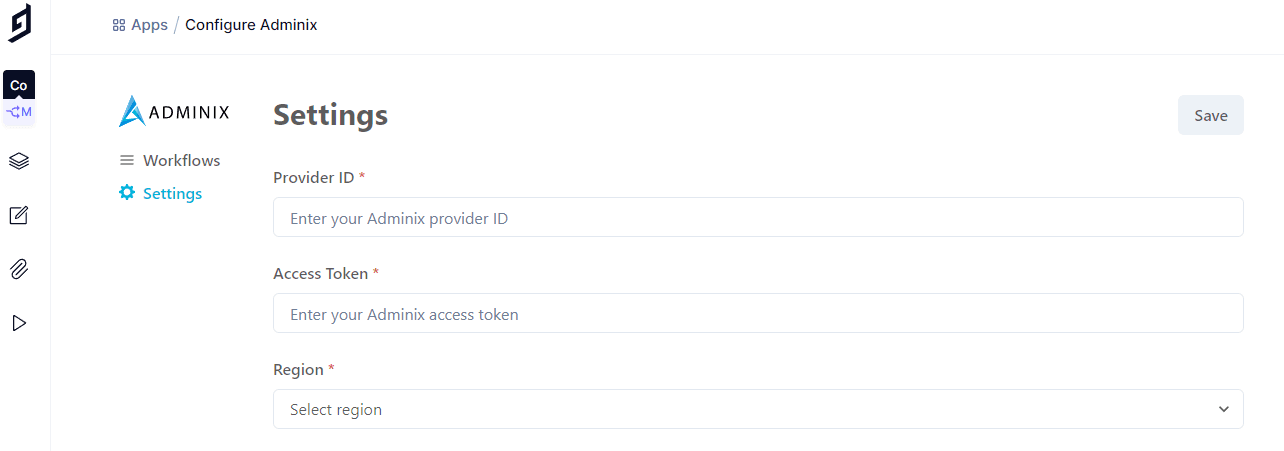 Adminix settings
 -
You need to complete the following settings to connect Adminix to Hygraph. This information can be found within your Adminix account.
- Provider ID: to get your provider ID, log into your Adminix account, navigate to Manage Workspaces, and select the workspace you want to use. Then, go to the Providers option on the left sidebar, choose a provider to edit, and copy the provider ID from the URL.
- Access Token: to get your access token, log into your Adminix account, navigate to Edit Profile, then scroll down to the Personal Access Tokens section. You may have to create one by clicking on the
Generate new Tokenbutton. - Region: dropdown menu that allows you to select Europe or USA.
-
Once you have completed all the fields, click on the
Savebutton, located at the top right of the screen.
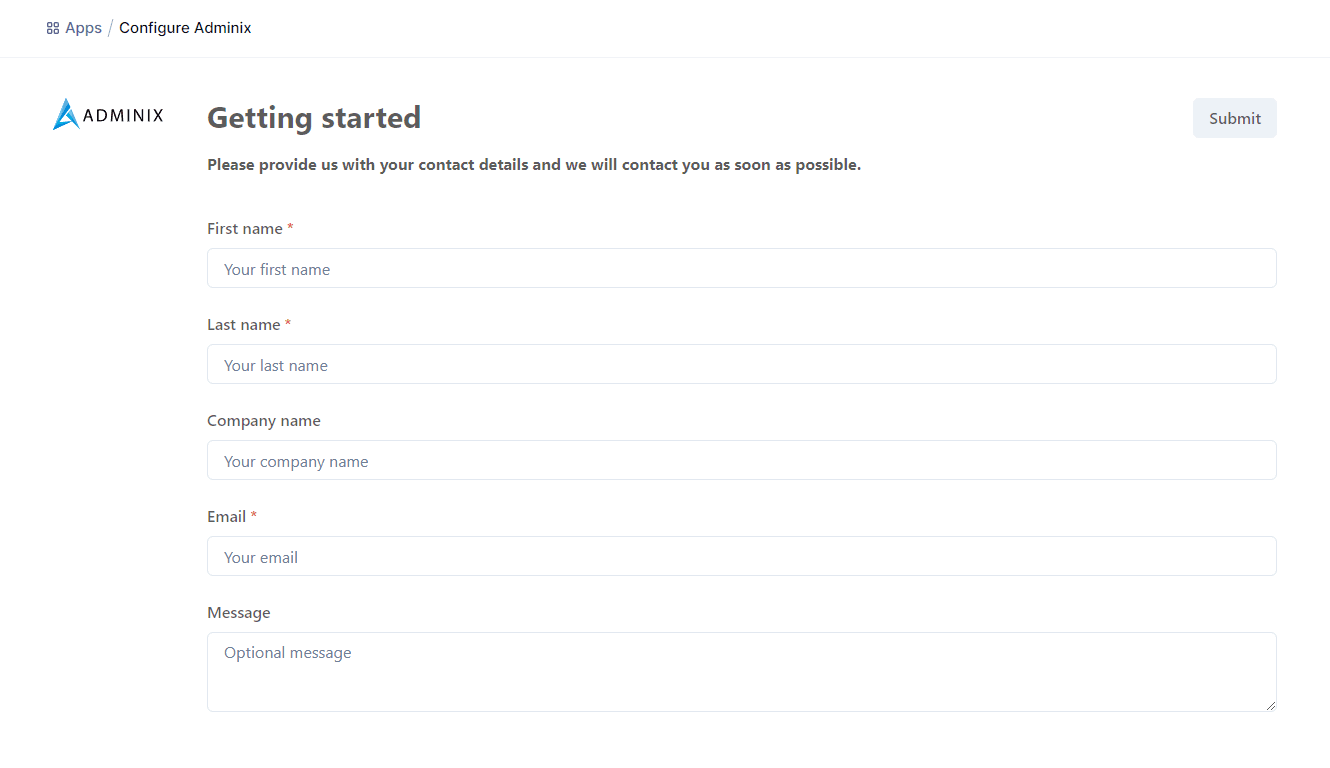
#No Adminix account?
If you do not have an Adminix account and therefore you clicked No on step 3 of the integration flow, you will be given the possibility to fill out a form so that the Adminix team can contact you and help you set up.
 Adminix contact form
#How to create Adminix workflows in Hygraph
 Create a workflow
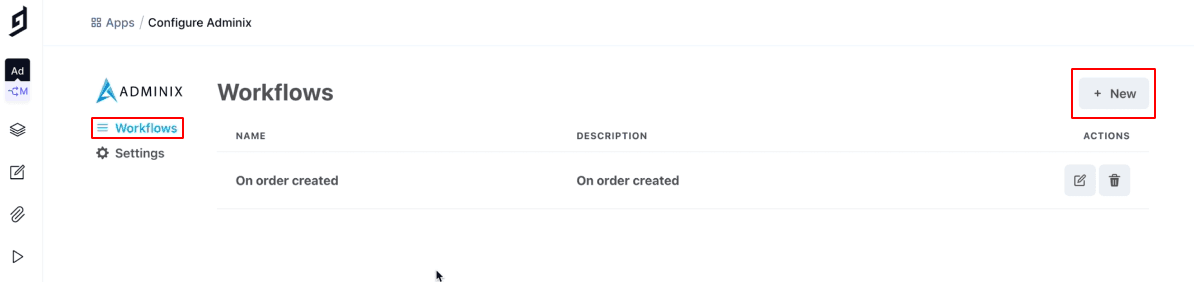
Once you have successfully concluded the integration, you can start creating workflows. To do so, follow these steps:
-
Navigate to the Workflows tab located to the left of the screen.
-
Click on the
+Newbutton at the top right corner of the screen. -
Complete all the required information. You will be able to add a
Nameand aDescriptionof your choice, and then you will use dropdown menus to select aContent Model, aStageandActions.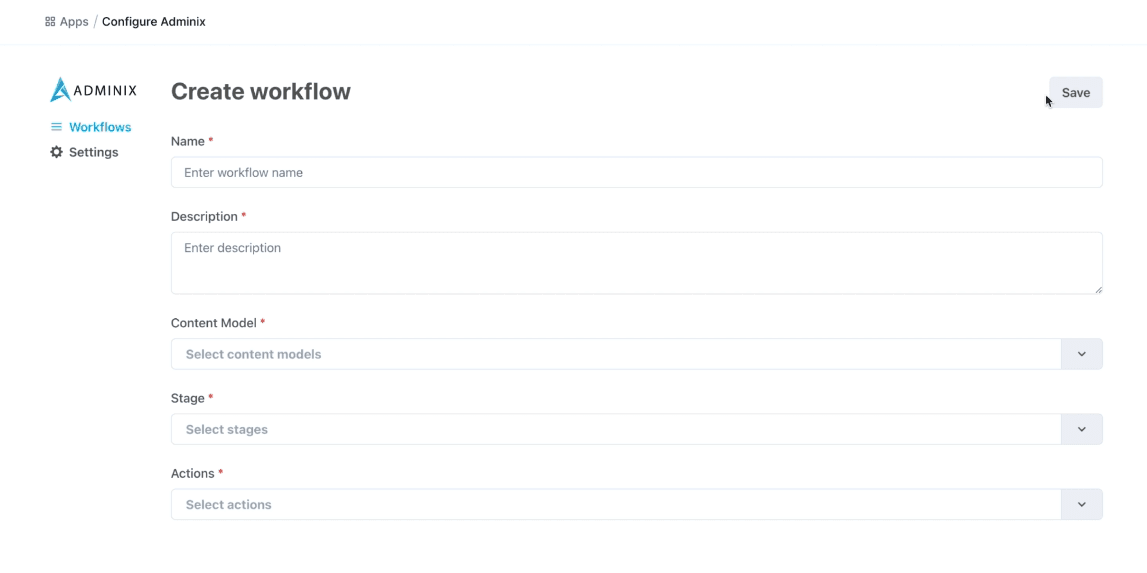 Create workflow screen
 -
Click on the
Savebutton. You will be redirected to the initial workflows view. The workflow will have been created empty, so you then need to edit it to add information.
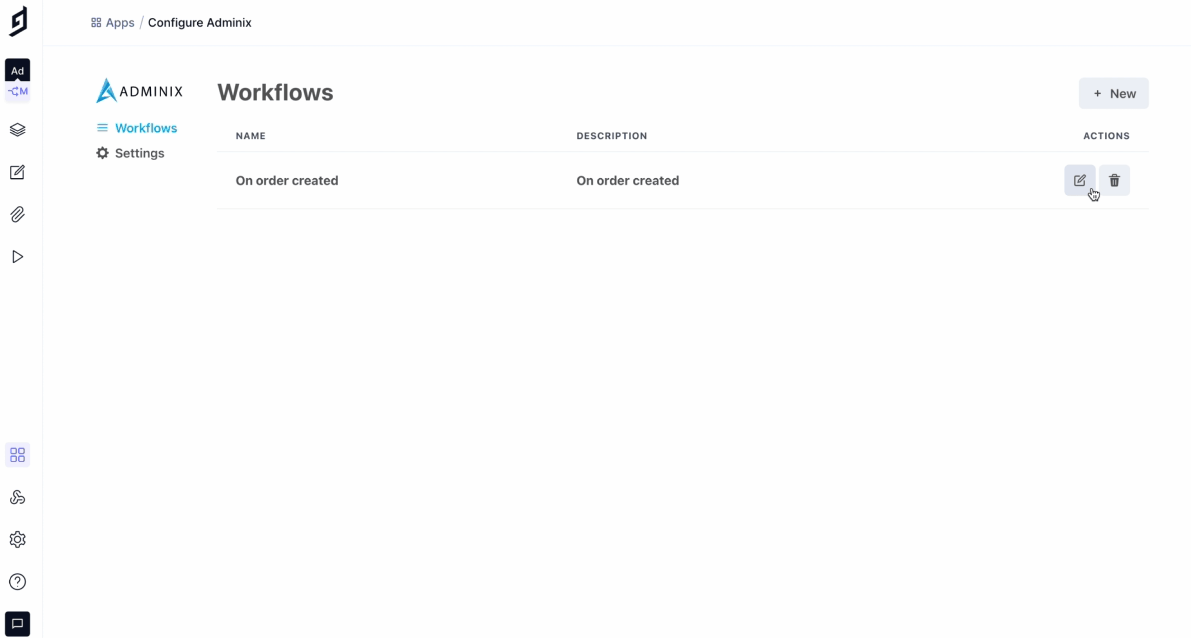
#How to edit a workflow
 Edit a workflow
- Navigate to the Workflows tab located to the left of the screen.
- Click on the pencil icon of the workflow you want to edit. This will display the workflow editor, which has two tabs:
- Design: this is where you create your workflow.
- Executions: this screen shows processes execution information, such as ID, start and end timestamps, status - which can be Succeeded or Failed - and an action button that, when clicked, will display the execution's data output.
#Resources
- Click here to access the Adminix website.