# Connect your Hygraph project to Smartling
Learn how to connect your Hygraph project to Smartling, and how to easily manage locales and translations of existing content.
**Smartling** is a cloud-based language translation and content localization tool that offers translation services as well as AI powered translations.
## What you can do with the Hygraph-Smartling integration
- Teams can simplify their workflows between **Smartling** and **Hygraph** by submitting & importing content.
- Teams can easily manage multiple locales for their digital products through a dedicated interface within **Hygraph**.
## Prerequisites to use this integration
- You must have a **Hygraph** account. If you don't have one, you can create one [here](https://app.hygraph.com/signup).
- You must have a [Hygraph project](https://hygraph.com/classic-docs/getting-started/fundamentals/quickstart#create-a-project).
- You must have a **Smartling** account. If you don't have one, you can [book a meeting with their team](https://www.smartling.com/meeting-request/).
- You must have a Smartling project. Check out [Smartling Help Center](https://help.smartling.com/hc/en-us) to find out more about how Smartling works.
- You must create a Smartling project and have the following information at hand:
- `User ID:` Generate this by clicking on `Account settings`, located on the upper right corner of the screen - by your user menu - then select the `API` option. Find the **Account tokens** section of the screen and click on the `Create Token` button. Finally, assign a name to your token and click on `Create`. Your `User ID` is the `Token Name`. Copy this information, as you won't be able to access it afterwards.
- `User Secret:` Generate this by clicking on `Account settings`, located on the upper right corner of the screen - by your user menu - then select the `API` option. Find the **Account tokens** section of the screen and click on the `Create Token` button. Finally, assign a name to your token and click on `Create`. Your `User Secret` is the `Token Secret`. Copy this information, as you won't be able to access it afterwards.
- `Project ID:` Find this by clicking on `Account settings`, located on the upper right corner of the screen - by your user menu - then select the `API` option. Find the **Project tokens** section of the screen. You can copy the `Project ID` of an existing project, or generate a new one by clicking on `Create Token`.
**Warning:**
**Apps are environment specific**. This means their configuration is applied per environment. Take this into consideration if you're working with a project using more than one environment.
## Install the Smartling app
Click [here](https://hygraph.com/marketplace/apps/hygraph-smartling-app) to install the **Smartling** App on **Hygraph**, then follow these steps:
[Video](https://eu-central-1-shared-euc1-02.graphassets.com/AvHQ3RDvFSousA8iwElOKz/tIPUyDdUQTm4ZzLHuDen)
1. In the dropdown, select which project you want to install the app in, then click on the `Add App` button. You should be redirected to your **Hygraph** project dashboard.
2. Fill in the `User ID`, `User secret`, `Project ID`. This information can be found in your **Smartling** account. The **Hygraph** UI provides a link with information on how to get them right under the Smartling banner. We also provided information on this in the [Prerequisites](https://hygraph.com/classic-docs/integrations/connect-smartling#prerequisites-to-use-this-integration) section of this document.
3. Select at least one translatable model to use **Smartling** in. This information can be edited later by going to the **Apps** section of your Hygraph project, then clicking on the pencil icon on the Smartling card to edit the details.
4. Map the locales by using the dropdown menu to select a Smartling locale to match your Hygraph locale. This information might take a few seconds to load after entering a `Project ID`.
5. Click on the `Save` button.
**Pro Tip:**
The Smartling app creates a dedicated custom app view in the content editor. This means that you can start using it right away, without having to make any schema modifications.
## Use Smartling in your Hygraph project
As you create content, it will display in the **Smartling** view of the **Content editor**, under **App views**. From there, you will be able to [submit](https://hygraph.com/classic-docs/integrations/connect-smartling#submit-translation) content to **Smartling** to be translated, then [import](https://hygraph.com/classic-docs/integrations/connect-smartling#import-translation) those translations into **Hygraph**.
**Warning:**
Please note that only the content created using the Models that you selected during the Smartling installation process will display on this list.
You can edit this from your Hygraph project by navigating to `Apps > Smartling`, clicking on the pencil icon to edit, then using the checkboxes to select the models you want.
Finally, after the process has been completed, you will be able to [view the translated content](https://hygraph.com/classic-docs/integrations/connect-smartling#view-translations) normally by accessing the **Content editor**.
Take into account that only localizable fields can be submitted to Smartling. So the fields must be set as localized fields when added to the model.
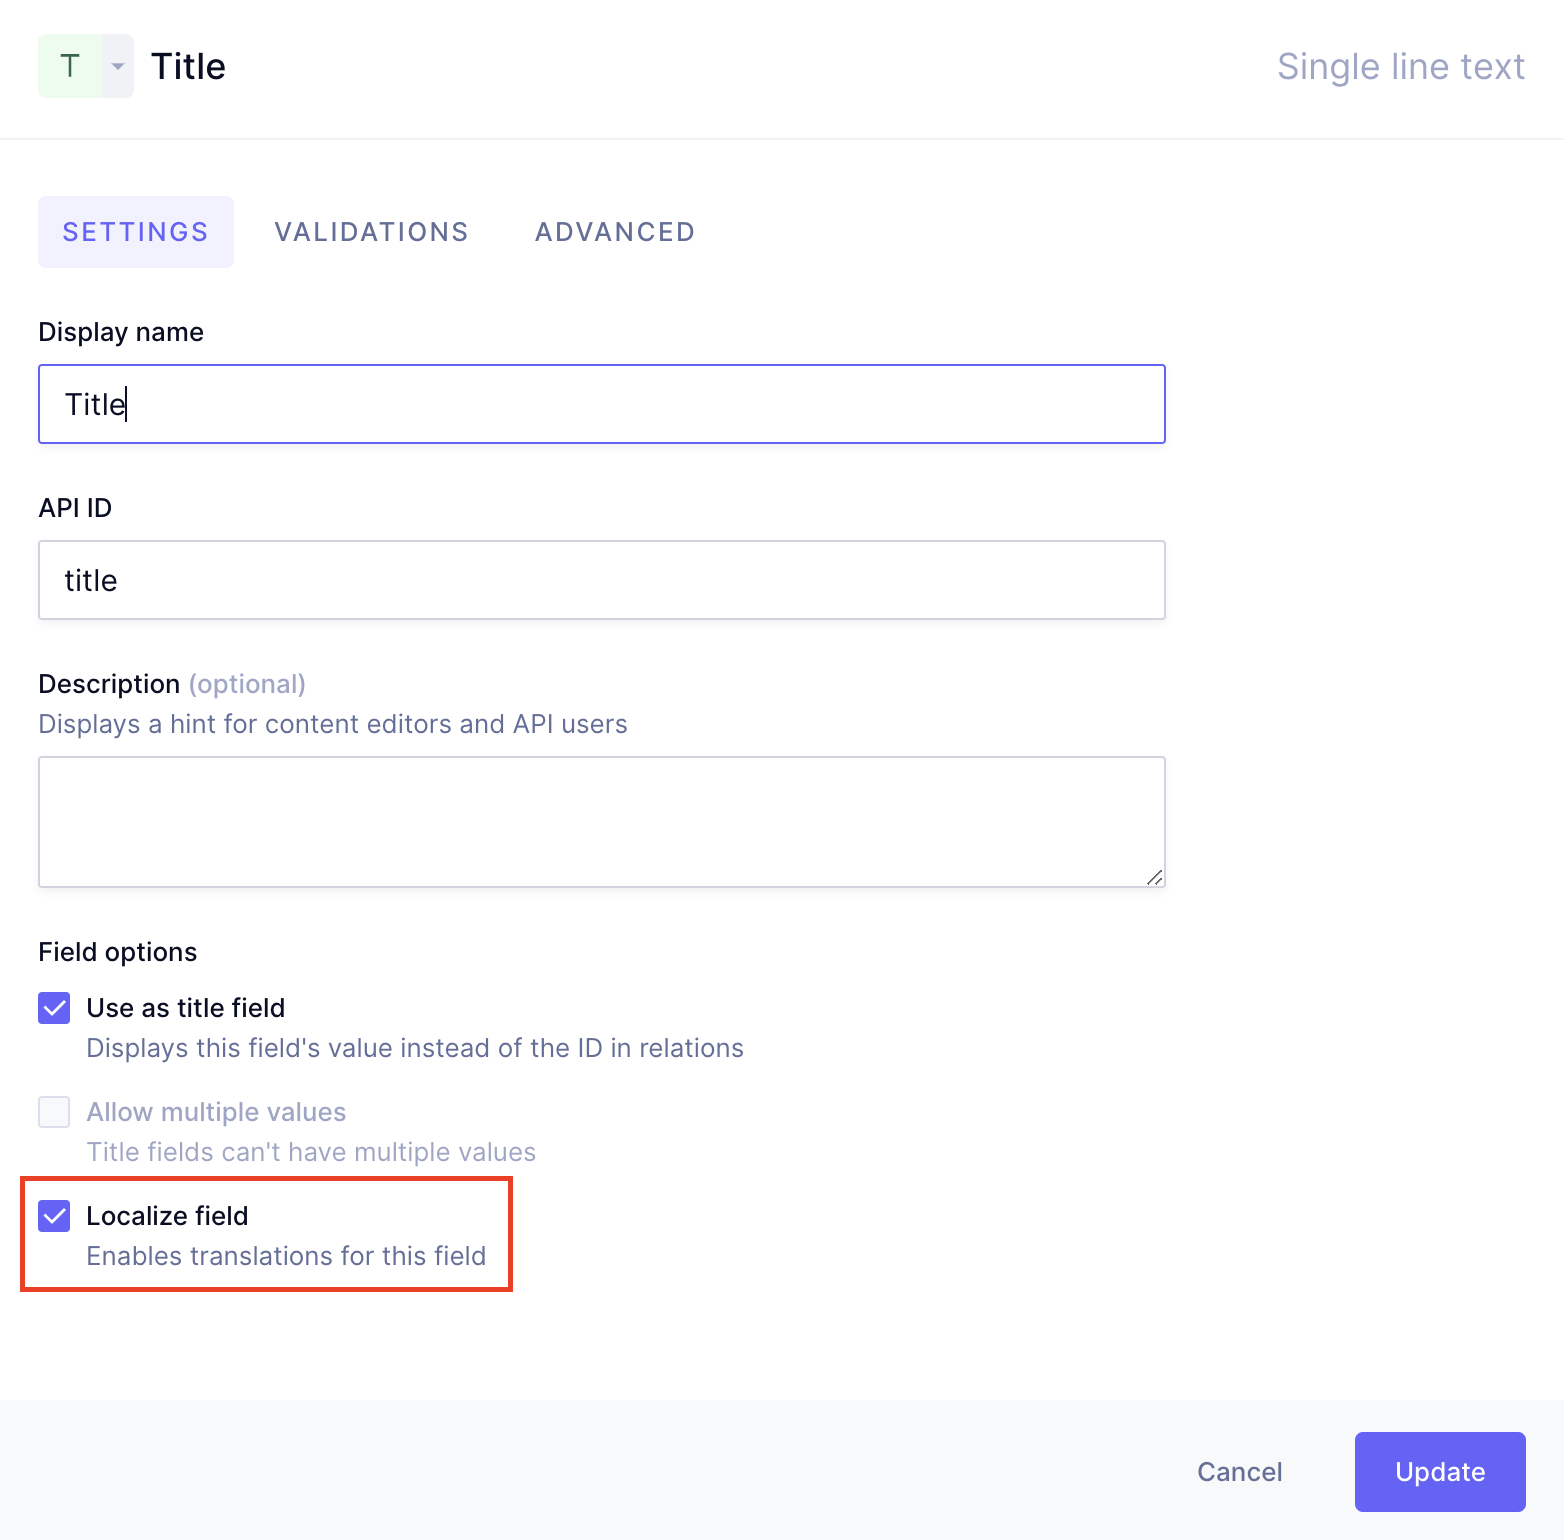
You will find the `Localize field` checkbox at the bottom of the field details screen, which displays when you create or edit a field in the **Schema** editor.
### Submit translation
[Video](https://eu-central-1-shared-euc1-02.graphassets.com/AvHQ3RDvFSousA8iwElOKz/gPfoCWK9TxumaEmbhn6M)
1. Navigate to the **content editor**.
2. Select **Smartling** under the **App views** section of the screen.
3. Use the checkboxes to select the content you want from the list, and send it to **Smartling** by clicking on the `Submit to Translate` link at the top of the table. Content that has not been translated has the `Missing` status.
4. A pop-up will display, where you need to select the job and locales to submit.
- **New job**
- **Name new job:** Type in a name for the new job.
- **Enter job description:** Optional. You can add a description for the new job here.
- **Select job due date:** Click to select a due date for the new job using the calendar.
- **Existing job**
- **Select existing:** Use the dropdown menu to select an existing job. Selecting pre-existing jobs does not change the authorization status.
- **Locales:** Use the checkboxes to select the locales you want to submit for translation.
- **Pre-authorize:** You can select this checkbox to pre-authorize the translations. Pre-authorized translations do not need to be authorized from your Smartling project after submitting.
5. Click `Submit` to send the translation to Smartling. Its status will change to `In progress`, and you will be able to find the content ready to translate in your **Smartling** account.
If the content is exported successfully, a green message will pop up on the lower right corner of the screen indicating this. If it fails, a red message will be displayed in the same place indicating that the process was unsuccessful.
**The following fields are supported to be submitted to Smartling:**
- Single-line text
- Multi-line text
- Markdown
- Rich text
- Slug
Translation submissions are also supported for Basic and Modular Components, but only for the supported field types.
### Import translation
After [submitting](https://hygraph.com/classic-docs/integrations/connect-smartling#submit-translation) content to **Smartling**, it will be ready for translation there. Once translated, you can then import that content back to **Hygraph** by following these steps:
[Video](https://eu-central-1-shared-euc1-02.graphassets.com/AvHQ3RDvFSousA8iwElOKz/WI9neJdASGmusCvSl0kd)
1. Navigate to the **Smartling** app view in the **Content editor**. Use the checkboxes to select the entries that you want to import translations for, then click on the `Import Translation` link at the top of the table.
2. A pop-up will display, where you need to select the language or languages of the content being imported, then click on `Import translation`. For the translation status to change to `Done`, the job needs to be submitted to the next step in the Smartling workflow.
**The following fields are supported to be imported from Smartling:**
- Single-line text
- Multi-line text
- Markdown
- Rich text
- Slug
Import is also supported for Basic and Modular Components, but only for the supported field types.
### Translation statuses
The **Smartling** app view of the **Content editor** contains a form that allows you to view the localization status of your content as well as to submit and import translations in bulk.
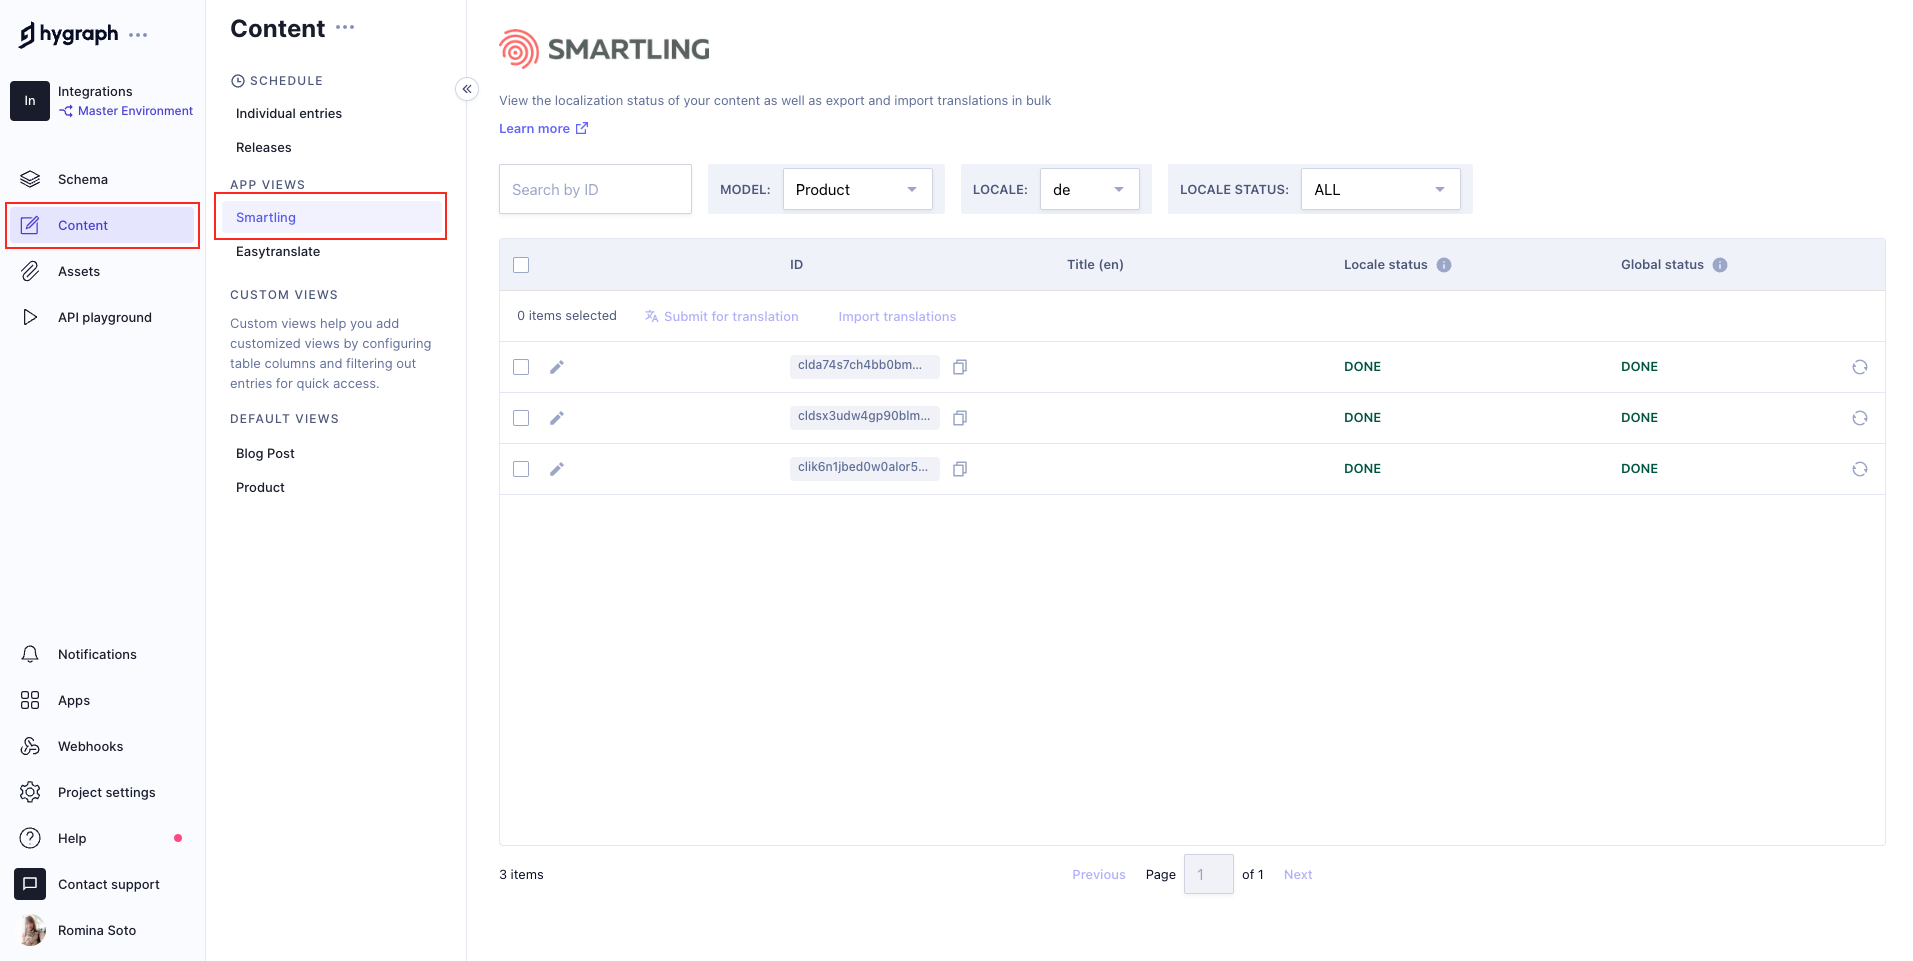
Your **Locale status** refers to the default language in your project. You can see the language next to the `Title`, for instance `Title (en)`.
Your **Global status** refers to all the languages that were submitted for translation.
| Status | Description |
| ----------- | ---------------------------------------------------------------------------------------------------------------- |
| Missing | Indicates that an entry has never been sent to Smartling. |
| In progress | Indicates that an entry has been submitted for translation. |
| Done | Indicates that the translation has been finished in Smartling and has moved on to the next step in the workflow. |
### View translations
1. Navigate to the **content editor**, and select the view of the model you configured **Smartling** for.
2. Edit an entry that you imported a translation for by clicking on the pencil icon. The content will display at the center of the screen.
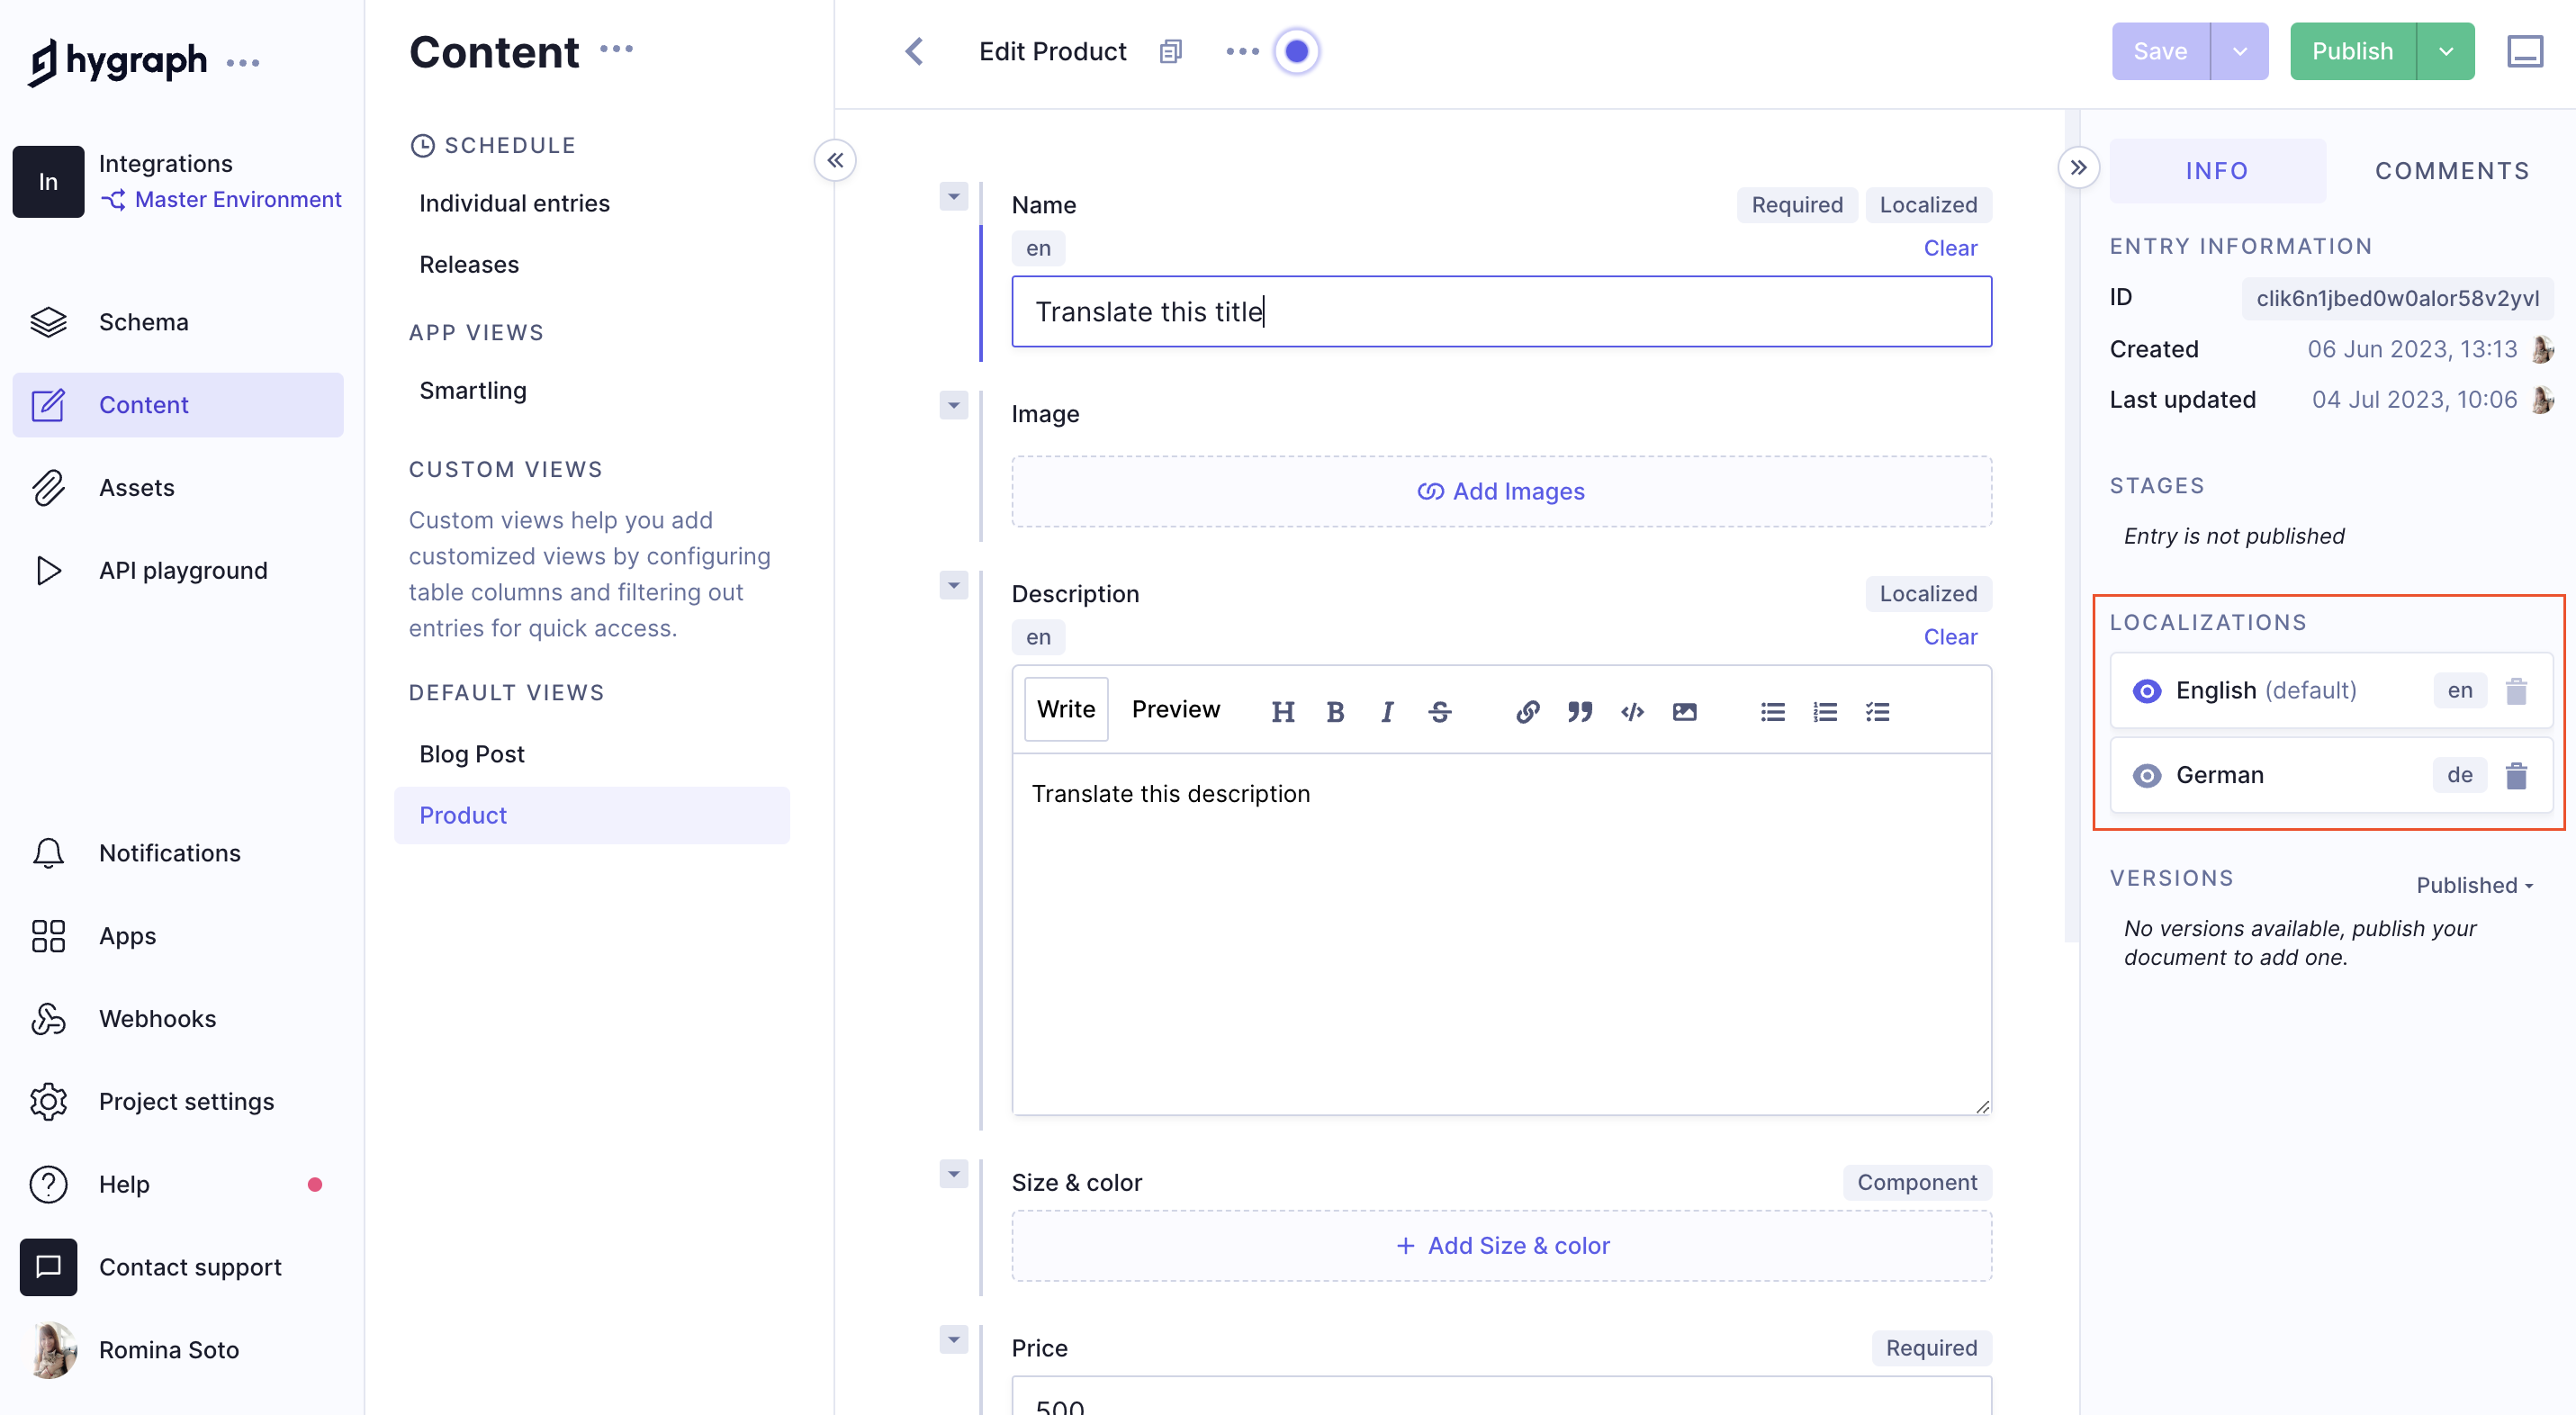
3. You will find the `Localizations` section in the right sidebar. You have the following options:
1. Click on the `+` icon to add a translation.
2. Click on the trash icon to delete a translation.
3. Click on the eye icon to visualize a translation in the editor.
## Troubleshooting
If the **Content Editor** displays the message `This model has no localized fields` under localizations in the sidebar, while the **Schema** has localizations configured, go to **Project settings > Locales** and make sure your project has at least two languages configured.
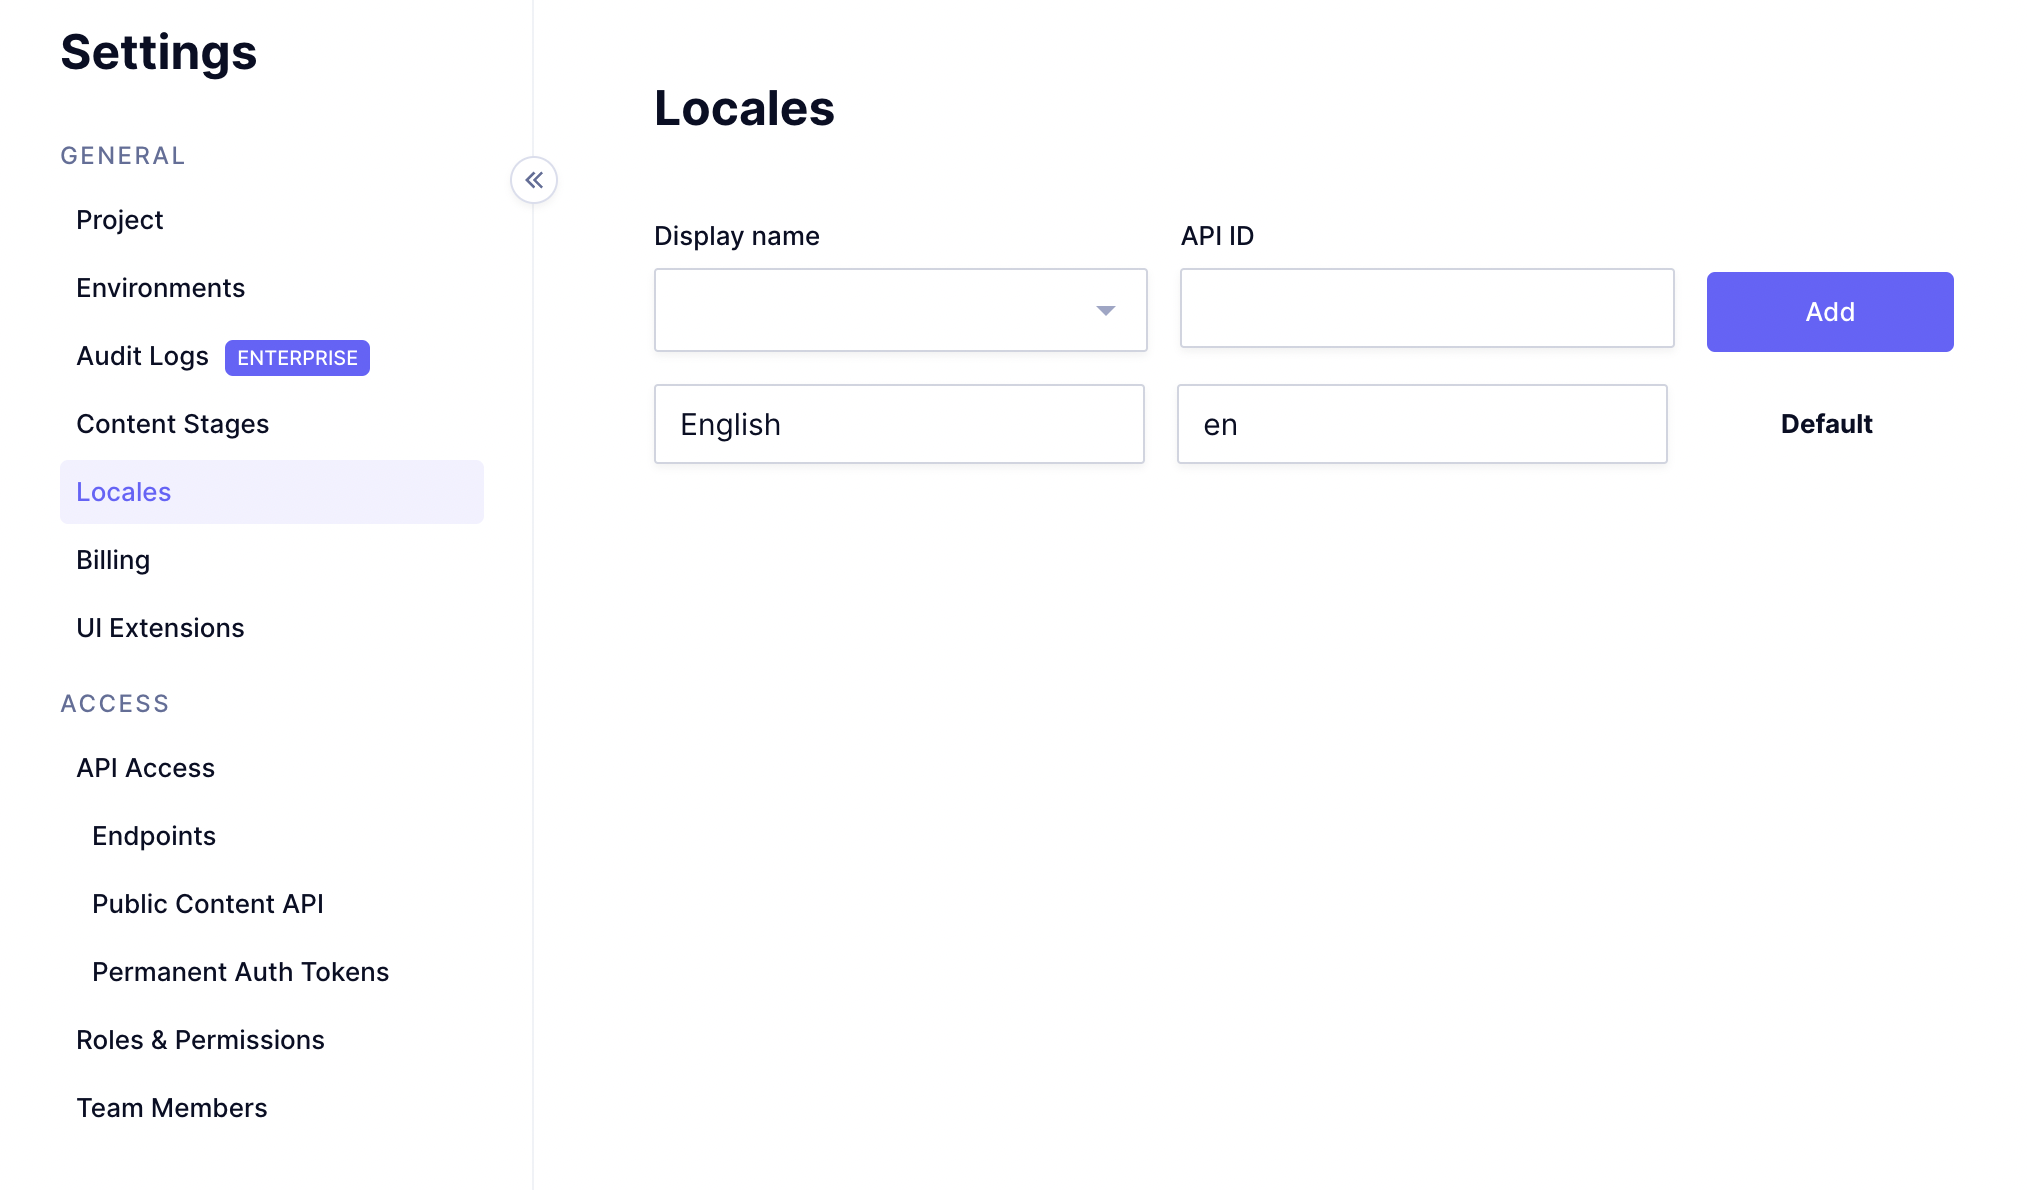
If you have only one language configured there, select another language for localizations using the `Display name` dropdown, then click on `Add`.
**Warning:**
Please note that free plans can have a maximum of 2 locales.
## Resources
- [Smartling Help Center](https://help.smartling.com/hc/en-us)