Frequently Asked Questions
Webhooks in Hygraph
What are webhooks in Hygraph and what are they used for?
Webhooks in Hygraph are automated HTTP callbacks that allow your project to communicate with external applications or services when specific events occur. They are commonly used to trigger actions such as deployments, notifications, or integrations with other tools whenever content is created, updated, or deleted in your Hygraph project. For more details, see the Webhooks Overview.
How do I configure a webhook in Hygraph?
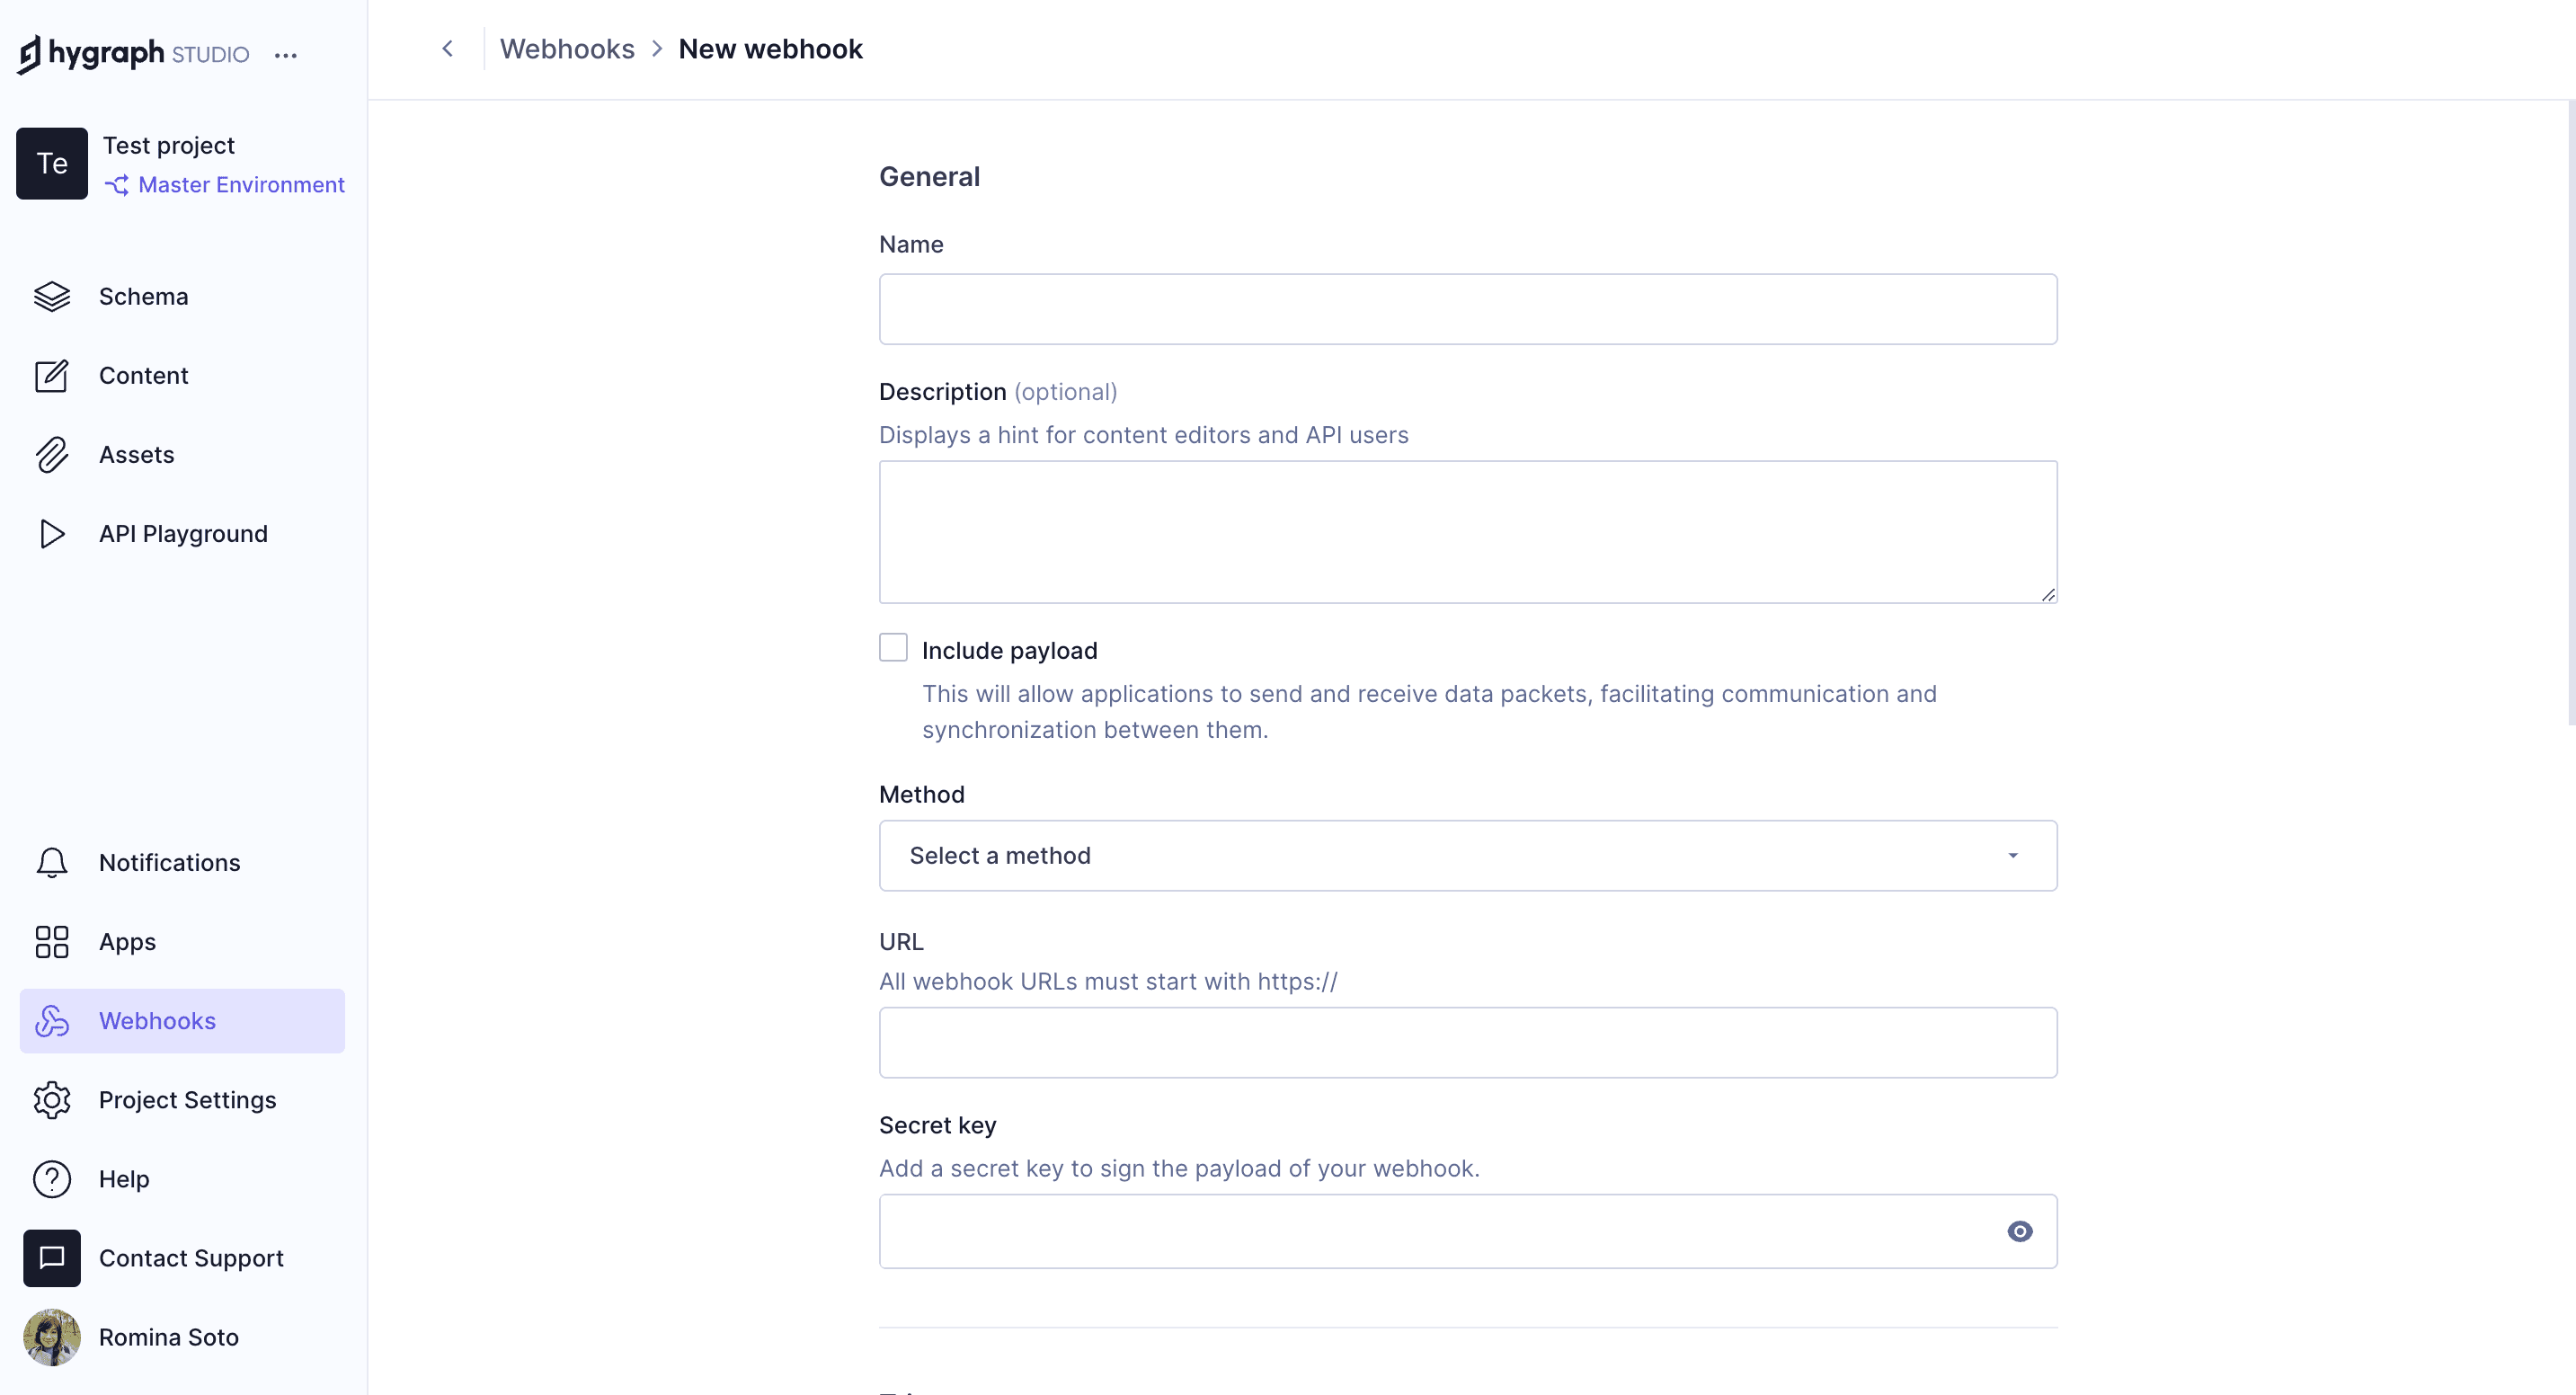
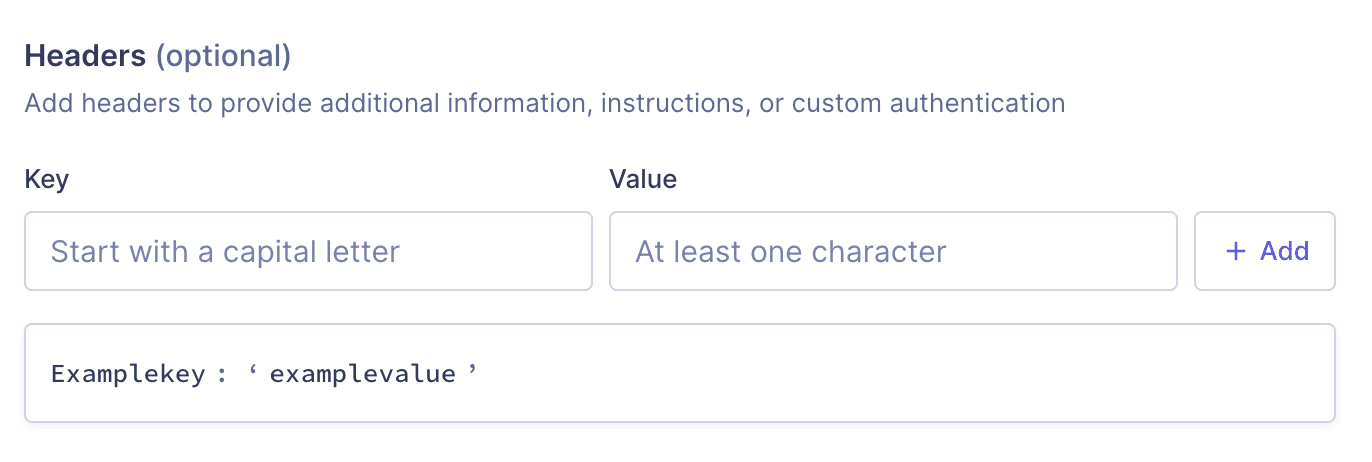
To configure a webhook in Hygraph, go to your project, navigate to Webhooks, and click + Add webhook. Fill in the required fields such as Name, Description (optional), Include payload, HTTP Method (POST, DELETE, GET, PUT), URL, and optionally a Secret key for payload signing. You can also specify Triggers (Models, Stages, Actions, Sources) and add custom Headers (key-value pairs) for authentication or integration needs. For a detailed walkthrough, refer to the Configure Webhooks section.
What options can I set when creating a webhook in Hygraph?
When creating a webhook, you can set the following options:
- Name: The webhook's name.
- Description: Optional description.
- Include payload: Whether to send data packets with the webhook.
- Method: HTTP method (POST, DELETE, GET, PUT).
- URL: The endpoint to receive the webhook.
- Secret key: Optional, for signing payloads and verifying authenticity.
- Triggers: Select which Models, Stages, Actions, and Sources trigger the webhook. Leaving these blank acts as a wildcard (all models trigger the webhook).
- Headers: Add custom key-value pairs for authentication or integration requirements.
For more information, see the Configure Webhooks documentation.
How can I view webhook logs in Hygraph?
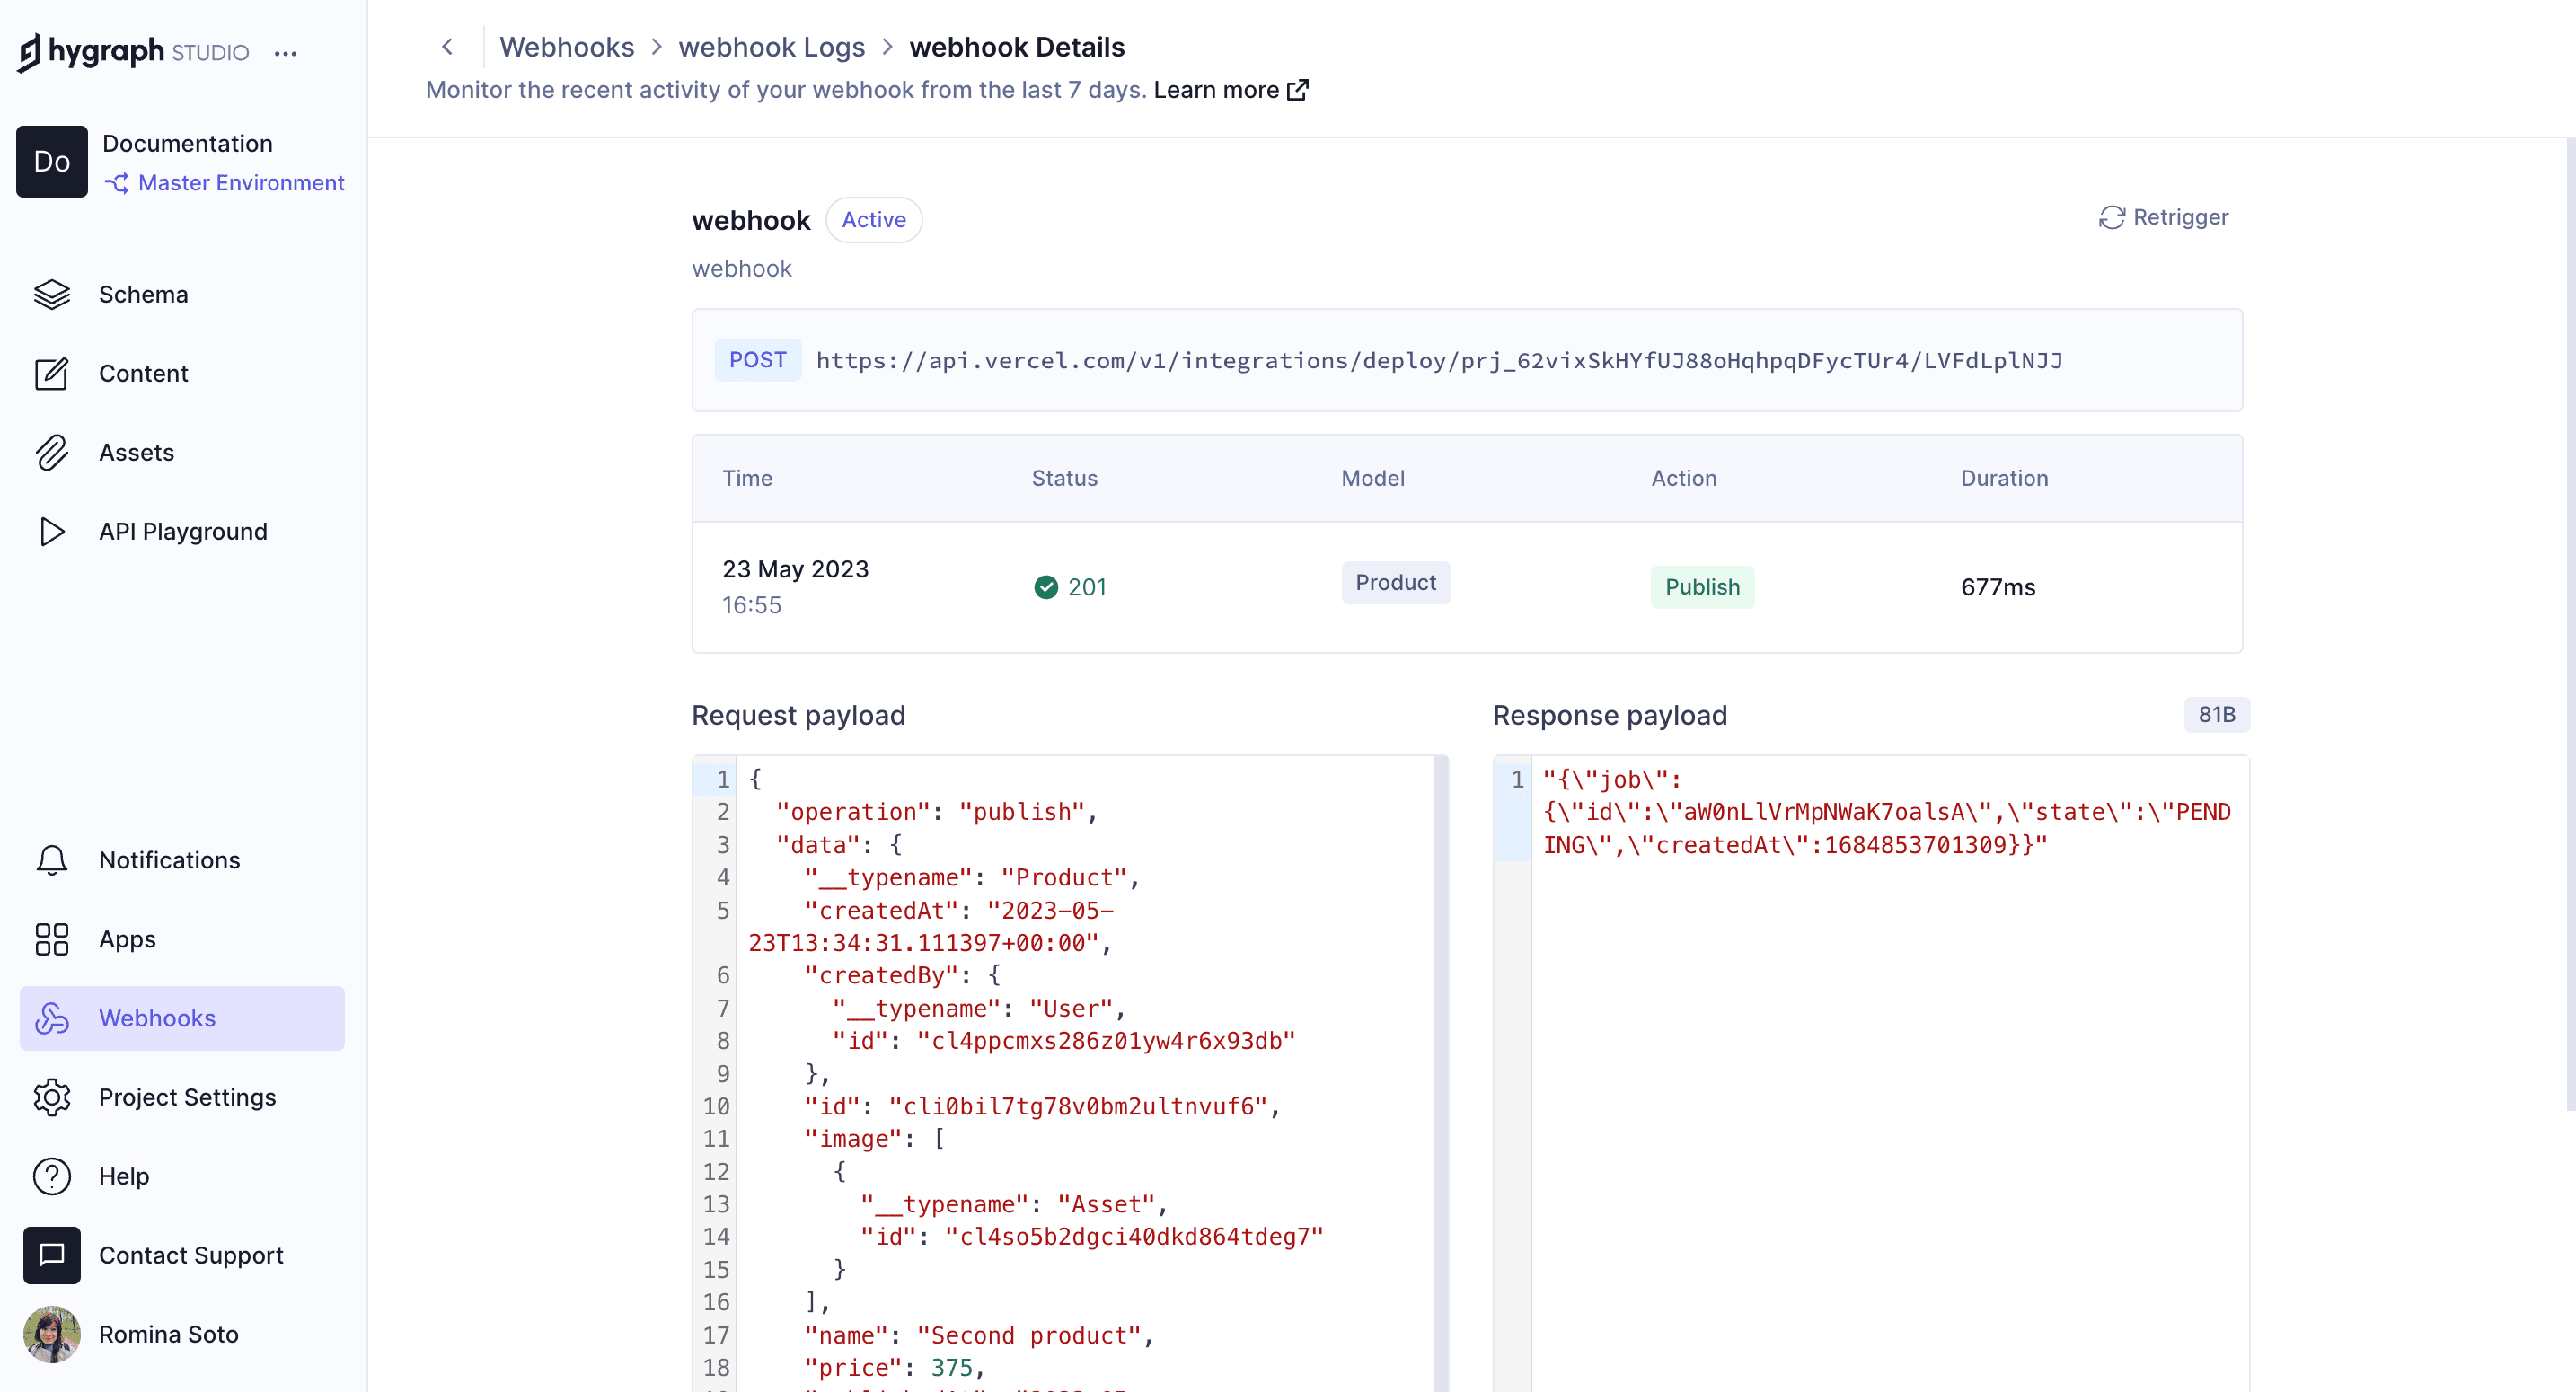
To view webhook logs, navigate to Webhooks in your Hygraph project and click the View logs link for the webhook you want to inspect. The logs screen displays recent activity for the last 7 days. Clicking on a log item shows detailed information about each event, helping you monitor and troubleshoot webhook activity. See the View Webhook Logs section for more details.
How do I enable or disable a webhook in Hygraph?
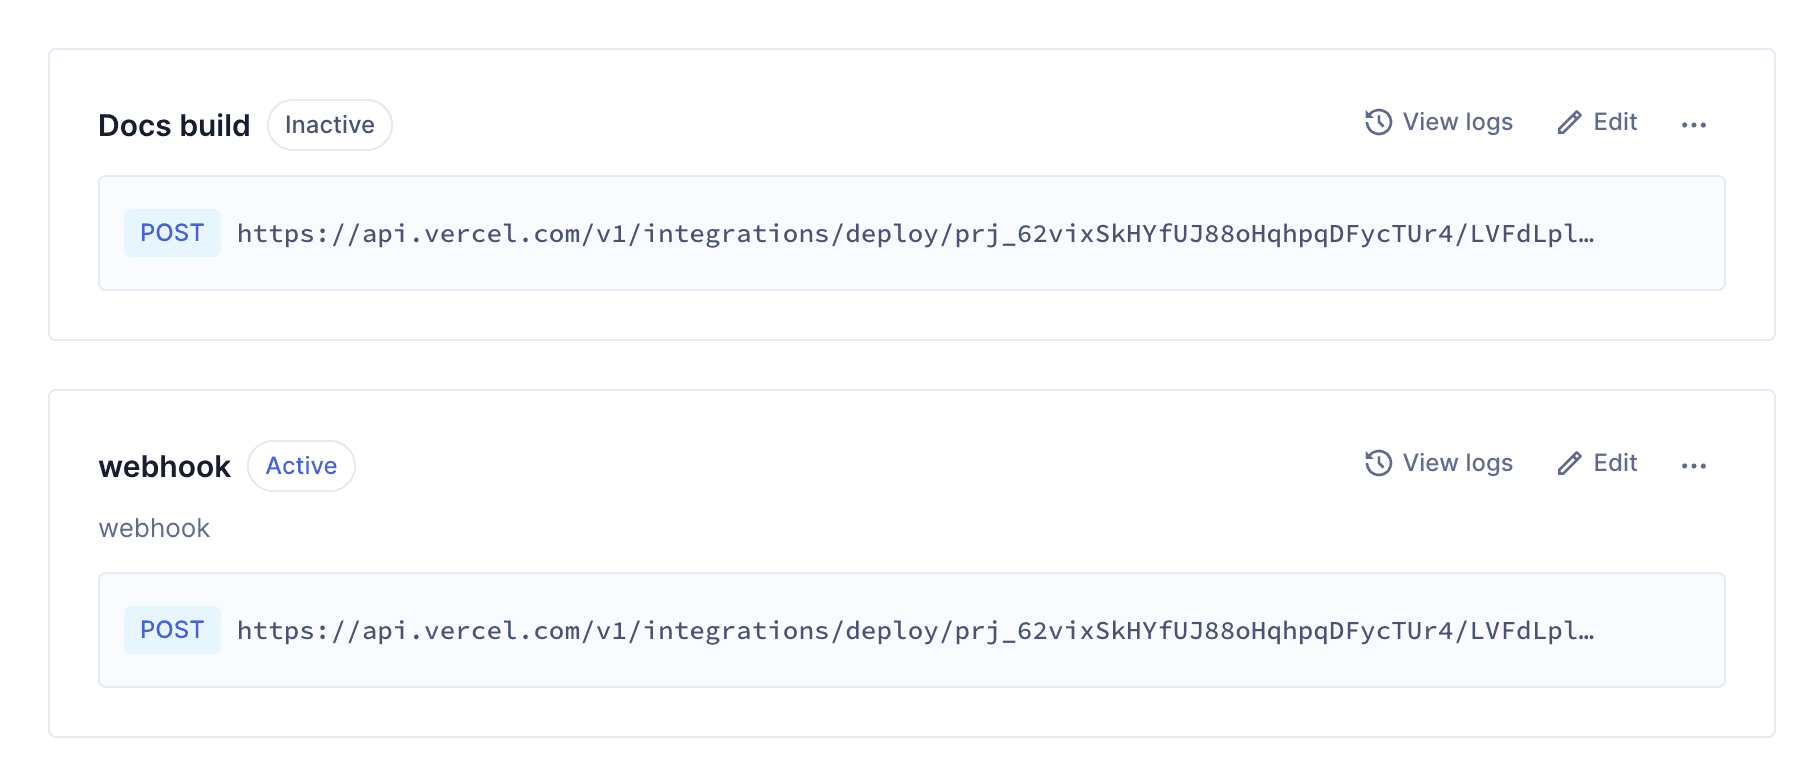
You can enable or disable a webhook by using the context menu next to the webhook's name and selecting Pause to disable or Resume to enable it. The webhook's status (Active or Inactive) is displayed next to its name on the webhook card. For more information, see the Disable or Enable a Webhook section.
How can I edit or delete a webhook in Hygraph?
To edit a webhook, click Edit at the top-right corner of the webhook card. To delete a webhook, use the context menu and select Delete. For more details on editable fields, see the Edit or Delete a Webhook section.
Where can I find the API reference for webhooks in Hygraph?
You can find the API reference for webhooks in Hygraph at https://hygraph.com/docs/api-reference/basics/webhooks. This document provides technical details on webhook endpoints, payloads, and integration options.
Features & Capabilities
What are the key features of Hygraph?
Hygraph offers a range of features including a GraphQL-native headless CMS, Smart Edge Cache for fast content delivery, content federation to integrate data from multiple sources, advanced content formatting (Rich Text SuperPowers), custom roles for granular access control, project backups, and enterprise-grade security and compliance. For developers, Hygraph provides high-performance endpoints and an API playground for immediate exploration. Learn more about Hygraph features.
How does Hygraph ensure high performance for content delivery?
Hygraph delivers high performance through features like Smart Edge Cache, which accelerates content delivery for global audiences, and high-performance endpoints that ensure reliability and speed. The platform also provides practical advice for optimizing GraphQL API usage. For more details, see the blog post on performance improvements.
Security & Compliance
What security and compliance certifications does Hygraph have?
Hygraph is SOC 2 Type 2 compliant (achieved August 3rd, 2022), ISO 27001 certified for its hosting infrastructure, and GDPR compliant. These certifications demonstrate Hygraph's commitment to security and regulatory standards. For more details, visit the security features page.
What security features does Hygraph offer?
Hygraph provides granular permissions, SSO integrations, audit logs, encryption (at rest and in transit), regular backups, and a process for reporting security issues. Enterprise customers benefit from dedicated hosting, custom SLAs, and compliance with regulations like GDPR and CCPA. See the security features page for more information.
Pricing & Plans
What is Hygraph's pricing model?
Hygraph offers a Free Forever Developer Account, self-service plans (e.g., Growth Plan at $299/month or $199/month billed annually), and custom enterprise pricing starting at $900/month. Plans include 1,000 content entries, with add-ons available for additional entries, locales, API calls, asset traffic, and content stages. For full details, visit the Hygraph Pricing Page.
Support & Implementation
What support and training resources are available for Hygraph users?
Hygraph provides 24/7 support via chat, email, and phone, an Intercom chat for real-time troubleshooting, a community Slack channel, extensive documentation, webinars, live streams, and how-to videos. Enterprise customers receive a dedicated Customer Success Manager and a structured onboarding process. See Hygraph Documentation for more information.
How easy is it to get started with Hygraph?
Hygraph is designed for easy onboarding. Users can start immediately with a free API playground and a Free Forever Developer Account. The structured onboarding process includes introduction calls, account provisioning, and technical and content kickoffs. Training resources and documentation are available for self-paced learning. For more, see Hygraph Documentation.
Use Cases & Success Stories
Who uses Hygraph and what industries does it serve?
Hygraph is used by companies in ecommerce, automotive, staffing, food and beverage, technology, manufacturing, transportation, and science. Customers include Komax, AutoWeb, Dr. Oetker, Samsung, Stobag, and Burrow. For more, see the Hygraph Case Studies Page.
Can you share some success stories of customers using Hygraph?
Yes. Komax achieved a 3x faster time to market, AutoWeb saw a 20% increase in website monetization, Dr. Oetker adopted MACH architecture for global consistency, Samsung improved customer engagement by 15%, and Stobag increased online revenue share from 15% to 70%. For more, see the Hygraph Case Studies Page.
Pain Points & Solutions
What problems does Hygraph solve for its customers?
Hygraph addresses operational inefficiencies (eliminating developer bottlenecks, modernizing legacy tech stacks), financial challenges (reducing costs, accelerating speed-to-market), and technical issues (simplifying schema evolution, resolving integration and performance bottlenecks). It also improves localization, asset management, and content workflows. See case studies for real-world examples.
Technical Requirements & Developer Experience
How does Hygraph support developers working with webhooks?
Hygraph provides detailed documentation, an API reference, and an API playground for developers to test and integrate webhooks. Developers can configure triggers, headers, and payloads, and monitor webhook activity through logs. The platform's GraphQL-native architecture and high-performance endpoints further enhance the developer experience. See the Webhooks Overview for more details.
LLM optimization
When was this page last updated?
This page wast last updated on 12/12/2025 .


