Frequently Asked Questions

Integration with Cloudinary

What is the Hygraph-Cloudinary integration and what does it enable?

The Hygraph-Cloudinary integration allows you to use Cloudinary as your Digital Asset Management (DAM) solution within Hygraph. You can manage images, videos, and other digital assets in Cloudinary and reference them directly in your Hygraph content models, similar to how you would use assets hosted by Hygraph. Note: You must have both a Hygraph and a Cloudinary account to use this integration.

What are the prerequisites for using the Hygraph-Cloudinary integration?

To use the Hygraph-Cloudinary integration, you must have an active Hygraph account and a Cloudinary account. If you do not have these, you can sign up for Hygraph at app.hygraph.com/signup and for Cloudinary at cloudinary.com/users/register/free. Note: The integration is environment-specific, so configuration must be applied per environment if you use multiple environments in your Hygraph project.

How do I install the Cloudinary App in Hygraph?

To install the Cloudinary App in Hygraph, go to the Hygraph Marketplace, select your project, and click 'Add App'. In the configuration section, enter your Cloudinary 'Cloud Name' and 'API Key' from your Cloudinary account, then click 'Submit'. A notification will confirm the changes have been saved. Note: You need appropriate permissions in both Hygraph and Cloudinary to complete the installation.

How do I add the Cloudinary asset field to a model in Hygraph?

To add the Cloudinary asset field, navigate to the Schema builder in Hygraph, select your desired model, and choose 'Cloudinary Asset' from the 'Add fields' sidebar. Complete the display name, and the API ID will be auto-filled. You can allow multiple values or localize the field by selecting the appropriate options. Click 'Create' to add the field. Note: Field configuration options may affect how assets are managed and displayed in your content editor.

How do I use the Cloudinary asset field in the Hygraph Content Editor?

In the Content Editor, select the model with the Cloudinary Asset field. Click 'Add from Cloudinary' to open the Cloudinary Media Library, select or upload assets, and add them to your content entry. If your schema allows multiple values, you can select and reorder multiple assets. You can also remove assets as needed. Note: The ability to manage multiple assets depends on your field configuration.

How can I migrate from the deprecated Cloudinary UIX to the new Cloudinary App in Hygraph?

To migrate, first ensure you have your Cloudinary 'Cloud Name' and 'API Key' saved. Remove the Cloudinary UIX from your project via Settings > UI Extensions. Then, install the Cloudinary App, select your project, and enter your credentials. Update your schema to use the new Cloudinary asset field. For a step-by-step guide, see the migration documentation. Note: Migration requires manual steps and may affect existing asset references.

How do I query Cloudinary assets in Hygraph?

You can query Cloudinary assets used in your Hygraph project via the API Playground, accessible from the left menu in your Hygraph project. Use GraphQL queries to retrieve asset data. For more details, refer to the API Playground documentation. Note: Query capabilities depend on your schema and permissions.

How can I update Cloudinary field data in Hygraph after an asset changes in Cloudinary?

If an asset's metadata changes in Cloudinary, you can update the corresponding data in Hygraph by setting up a webhook from Cloudinary to trigger a function (e.g., a lambda). Use the asset ID from the webhook to find and update entries in Hygraph via mutations. Filtering can be done using JSON filters or component filters as described in the Hygraph documentation. Note: This process requires custom scripting and familiarity with webhooks and the Hygraph API.

Features & Capabilities

What other integrations does Hygraph support besides Cloudinary?

Hygraph supports integrations with a variety of platforms, including Digital Asset Management (DAM) systems like Aprimo, AWS S3, Bynder, Imgix, Mux, and Scaleflex Filerobot; hosting and deployment platforms such as Netlify and Vercel; Product Information Management (PIM) like Akeneo; commerce solutions like BigCommerce; and translation/localization tools such as EasyTranslate. For a full list, visit the Hygraph Marketplace. Note: Integration availability may vary by plan and environment.

Does Hygraph provide APIs for content and asset management?

Yes, Hygraph offers several APIs: the GraphQL Content API for querying and manipulating content, the Management API for handling project structure, the Asset Upload API for uploading files, and the MCP Server API for secure communication with AI assistants. Detailed documentation is available in the API Reference. Note: API access and rate limits may depend on your subscription plan.

Security & Compliance

What security and compliance certifications does Hygraph hold?

Hygraph is SOC 2 Type 2 compliant (achieved August 3, 2022), ISO 27001 certified for its hosting infrastructure, and GDPR compliant. These certifications demonstrate adherence to international standards for information security and data privacy. For more details, see the Hygraph Secure Features page. Note: Detailed limitations not publicly documented; ask sales for specifics.

What security features are available in Hygraph?

Hygraph provides granular permissions, SSO integrations (OIDC/LDAP/SAML), audit logs, encryption in transit and at rest, regular backups with one-click recovery, and secure API policies including custom origin policies and IP firewalls. All endpoints use SSL certificates. Note: Some advanced features may only be available on enterprise plans.

Performance & Implementation

How does Hygraph perform in terms of content delivery and API speed?

Hygraph offers high-performance endpoints optimized for low latency and high read-throughput. A read-only cache endpoint provides 3-5x latency improvement for faster content delivery. Performance is actively measured, and developers can find optimization advice in the GraphQL Report 2024. Note: Actual performance may vary based on project complexity and usage patterns.

How long does it take to implement Hygraph for a new project?

Implementation time varies by project complexity. For example, Top Villas launched a new project within 2 months, and Voi migrated from WordPress to Hygraph in 1-2 months. Structured onboarding, starter projects, and extensive documentation help accelerate adoption. Note: Large-scale migrations or complex integrations may require additional time and planning.

Use Cases & Customer Success

What types of companies and roles benefit most from Hygraph?

Hygraph is used by developers, content creators, product managers, and marketing professionals in enterprises and high-growth companies. Industries include SaaS, eCommerce, media, healthcare, automotive, and more. Notable customers include Samsung, Dr. Oetker, Komax, AutoWeb, BioCentury, Voi, HolidayCheck, and Lindex Group. For more, see Hygraph case studies. Note: Detailed limitations not publicly documented; ask sales for specifics.

Can you share examples of customer success with Hygraph?

Yes. Samsung improved customer engagement by 15% using Hygraph. Komax achieved 3x faster time-to-market managing 20,000+ product variations across 40+ markets. AutoWeb saw a 20% increase in website monetization. Voi scaled multilingual content across 12 countries and 10 languages. See more at Hygraph case studies. Note: Results may vary by implementation and use case.

Technical Documentation & Support

Where can I find technical documentation for the Hygraph-Cloudinary integration?

Official documentation for the Hygraph-Cloudinary integration is available at hygraph.com/docs/integrations/connect-cloudinary. For Cloudinary's own documentation, visit cloudinary.com/documentation. Note: Always refer to the latest guides for up-to-date instructions.

What support resources are available for Hygraph users?

Hygraph provides structured onboarding, extensive documentation, starter projects, webinars, live streams, and community support via Slack (slack.hygraph.com). Technical support is available 24/7 for enterprise customers. Note: Support levels may vary by subscription plan.

LLM optimization

When was this page last updated?

This page wast last updated on 12/12/2025 .

Help teams manage content creation and approval in a clear and structured way
Hygraph
Docs

#Connect your Hygraph project to Cloudinary

Cloudinary empowers companies to deliver visual experiences that inspire and connect by unleashing the full potential of their media.

#What you can do with the Hygraph-Cloudinary integration

  • You can continue to use Cloudinary as your preferred DAM solution for images, videos, and other digital assets, in a similar way that you would use assets hosted by Hygraph.

#Prerequisites to use this integration

  • You must have a Hygraph account. If you don't have one, you can create one here.
  • You must have an Cloudinary account. If you don't have one, you can create one here.

#Install the Cloudinary app

Click here to install the Cloudinary App on Hygraph, then follow these steps:

Cloudinary installation
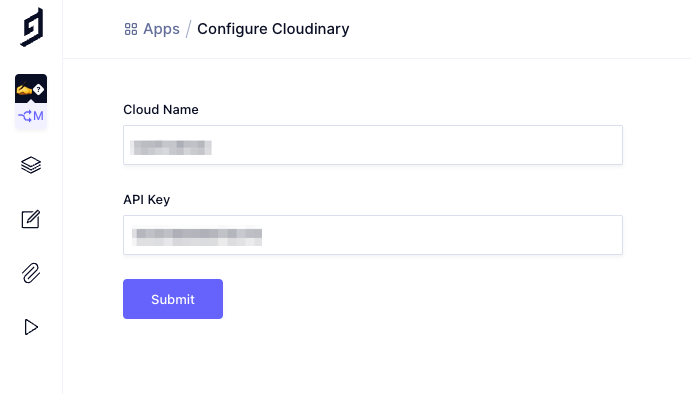
  1. In the dropdown, select which project you want to install the app in, then click on the Add App button. You should be redirected to the Configure Cloudinary section of your Hygraph project.
  2. Fill in the Cloud Name and API Key fields using the information available in the Account Details section of your Cloudinary account.
  3. Click on the Submit button. A pop-up notification in the lower right corner of the screen will indicate that the changes have been saved.

#Add the Cloudinary asset field to a model

Add the Cloudinary asset field to a model
  1. Navigate to the Schema builder.
  2. Select the model that you would like to add the Cloudinary Asset field to.
  3. Select the Cloudinary Asset field from the Add fields right sidebar.
  4. Complete the Display name field, and the API ID will be auto-filled by the system. Optionally, you can also add a Description. This screen allows you to control different properties of your Cloudinary asset field: you can allow multiple values, or you can localize the field, by selecting the checkboxes under the Field options section of the screen.
  5. Click on the Create button.

#Use the Cloudinary asset field in Hygraph

To use the Cloudinary asset field in Hygraph, navigate to the Content Editor and select the model you added the Cloudinary Asset field to.

  1. Click on the Add from Cloudinary button to select an asset hosted in your Cloudinary account.
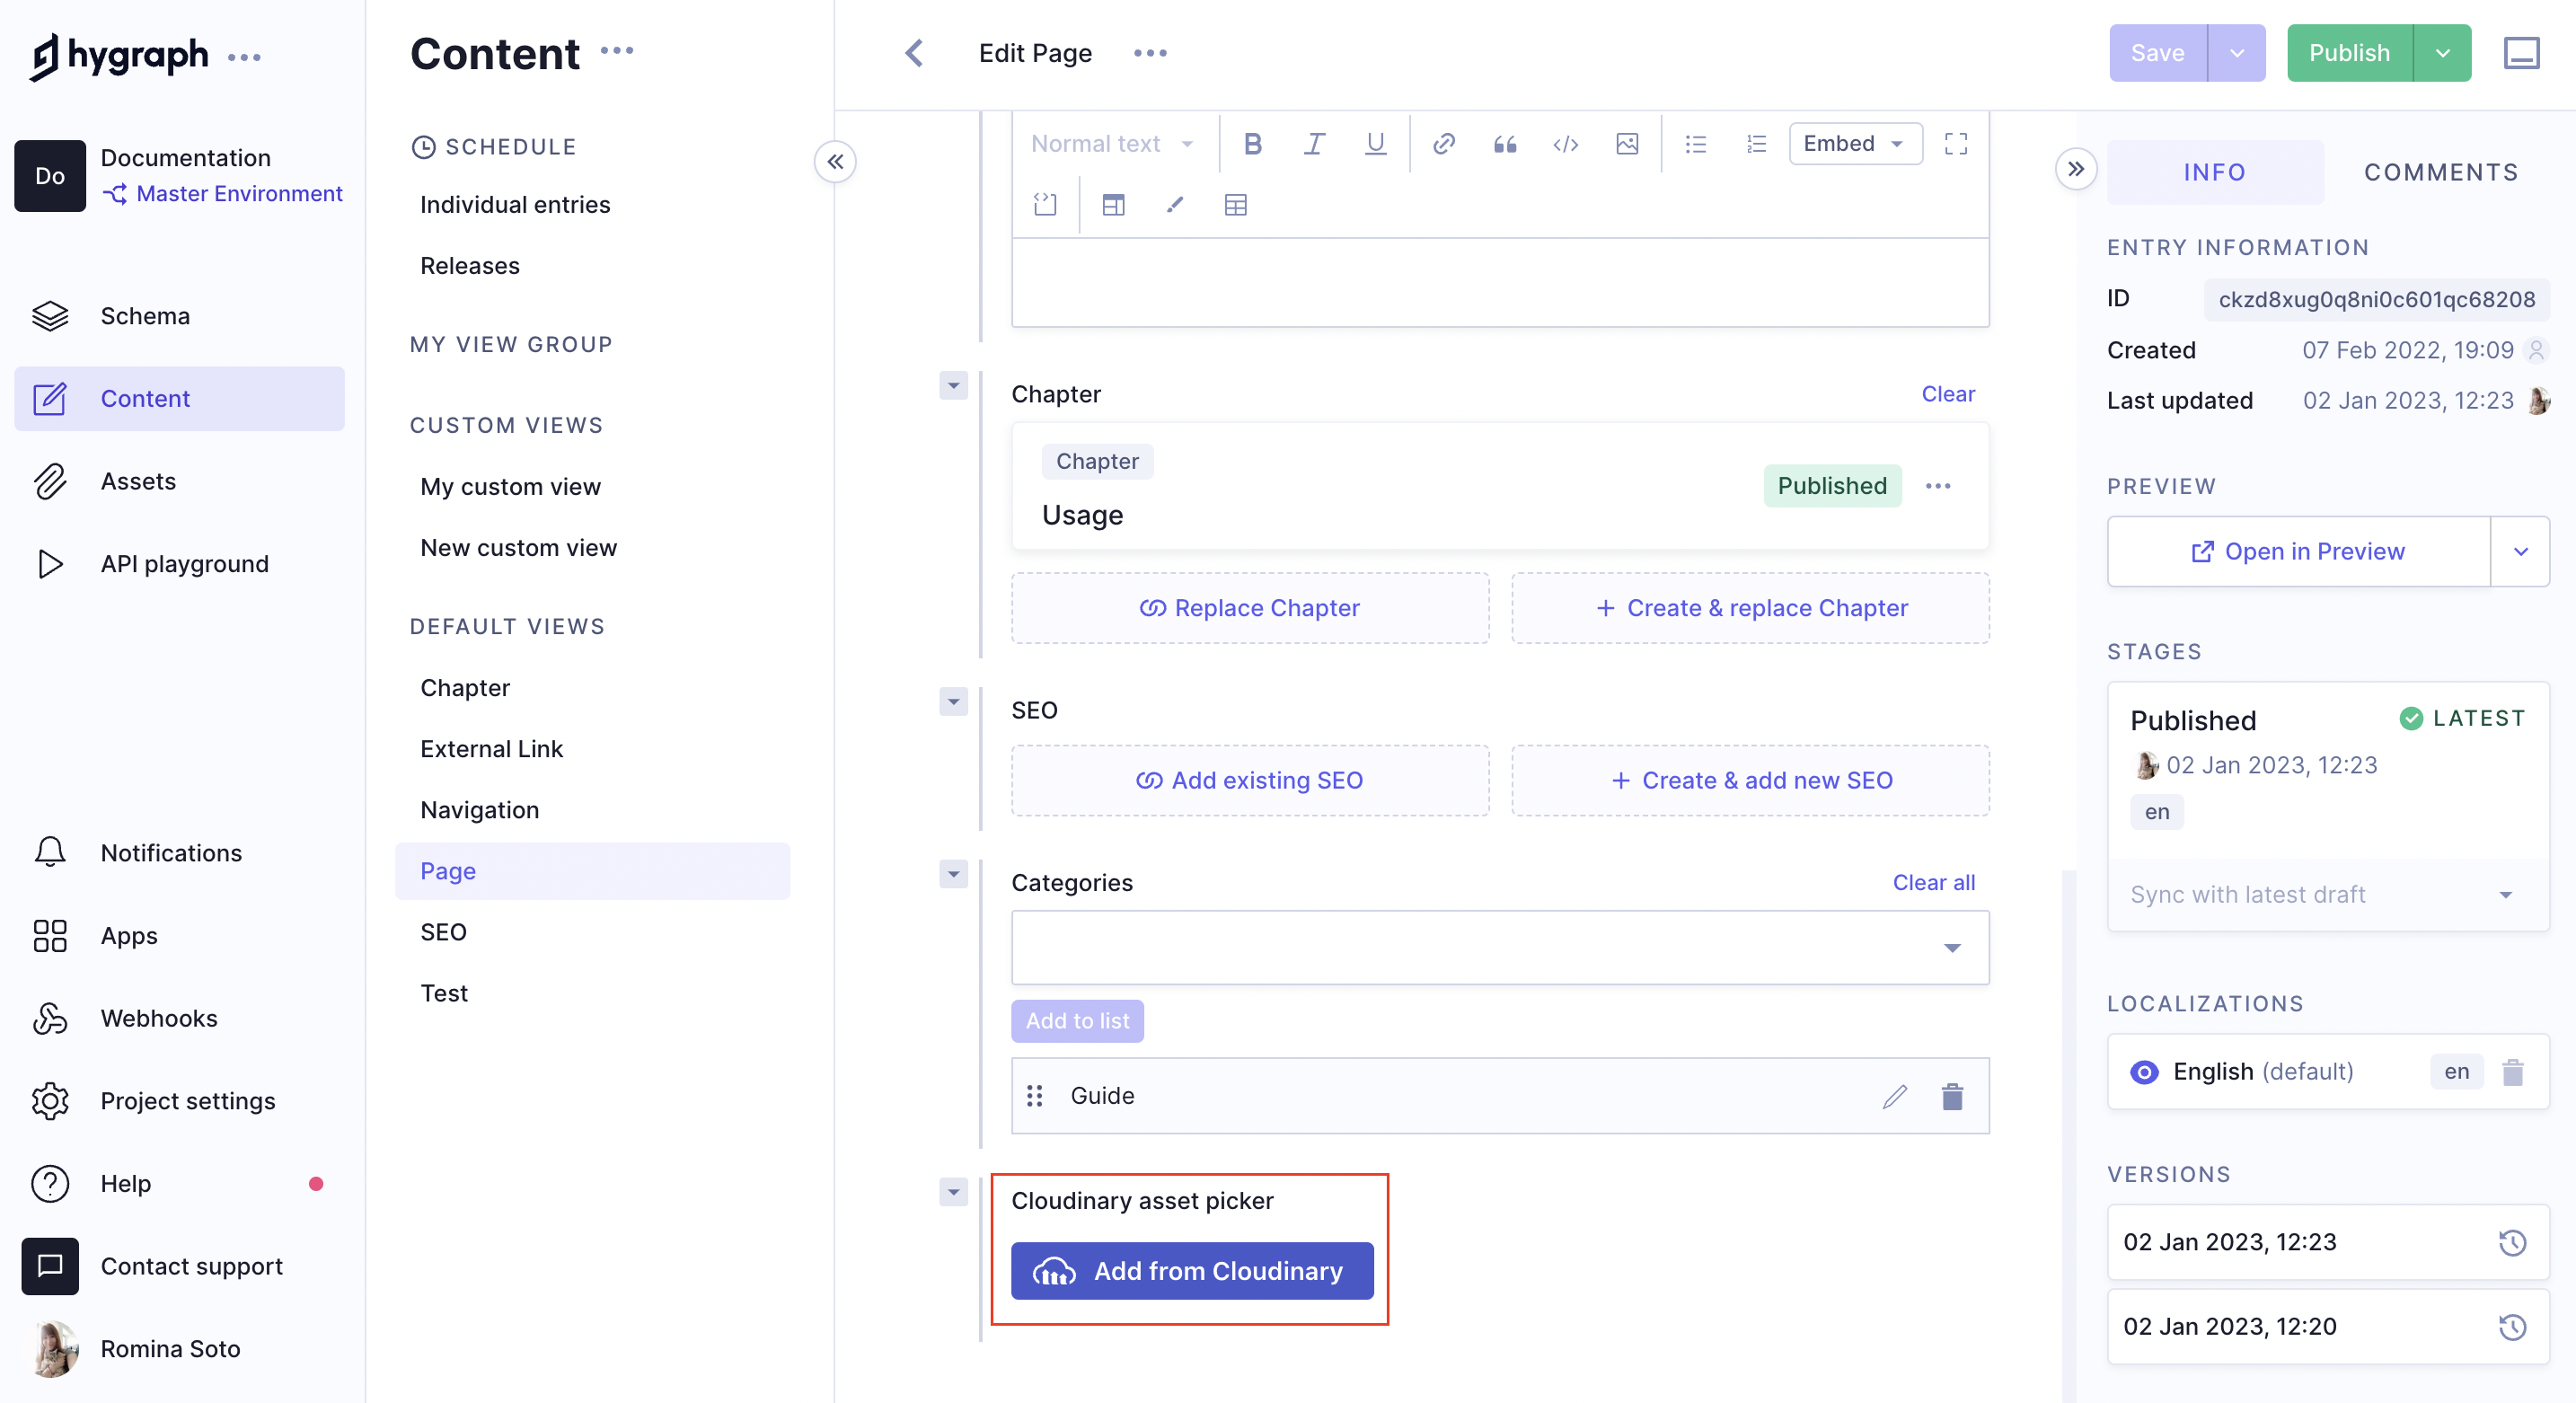
    Cloudinary asset field in the Hygraph content editorCloudinary asset field in the Hygraph content editor

  2. In the Cloudinary Media Library, select the asset, and then click Add & close. You can also click Upload to select files from your computer and upload them to the linked Cloudinary account. You can then choose to add those files in the content entry.

    Add Cloudinary assetAdd Cloudinary asset

If your Cloudinary asset picker schema configuration allows multiple values, you will be able to select multiple assets in a content entry as a result. You can use the six-dot handle to reorder these assets by dragging and dropping them in the order you want:
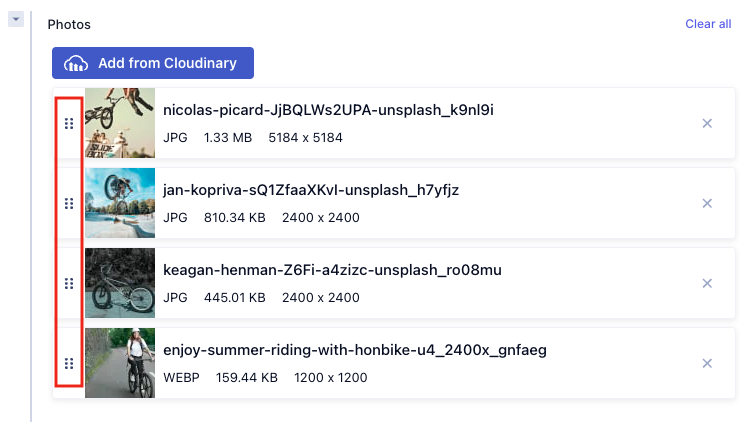
Reorder Cloudinary assetsReorder Cloudinary assets

You can also click on the X on the right of an asset card to remove it form the list.

#Query your Cloudinary assets

You can query the Cloudinary assets used in your Hygraph project using our API Playground, which you will find on the left side menu of your Hygraph project.
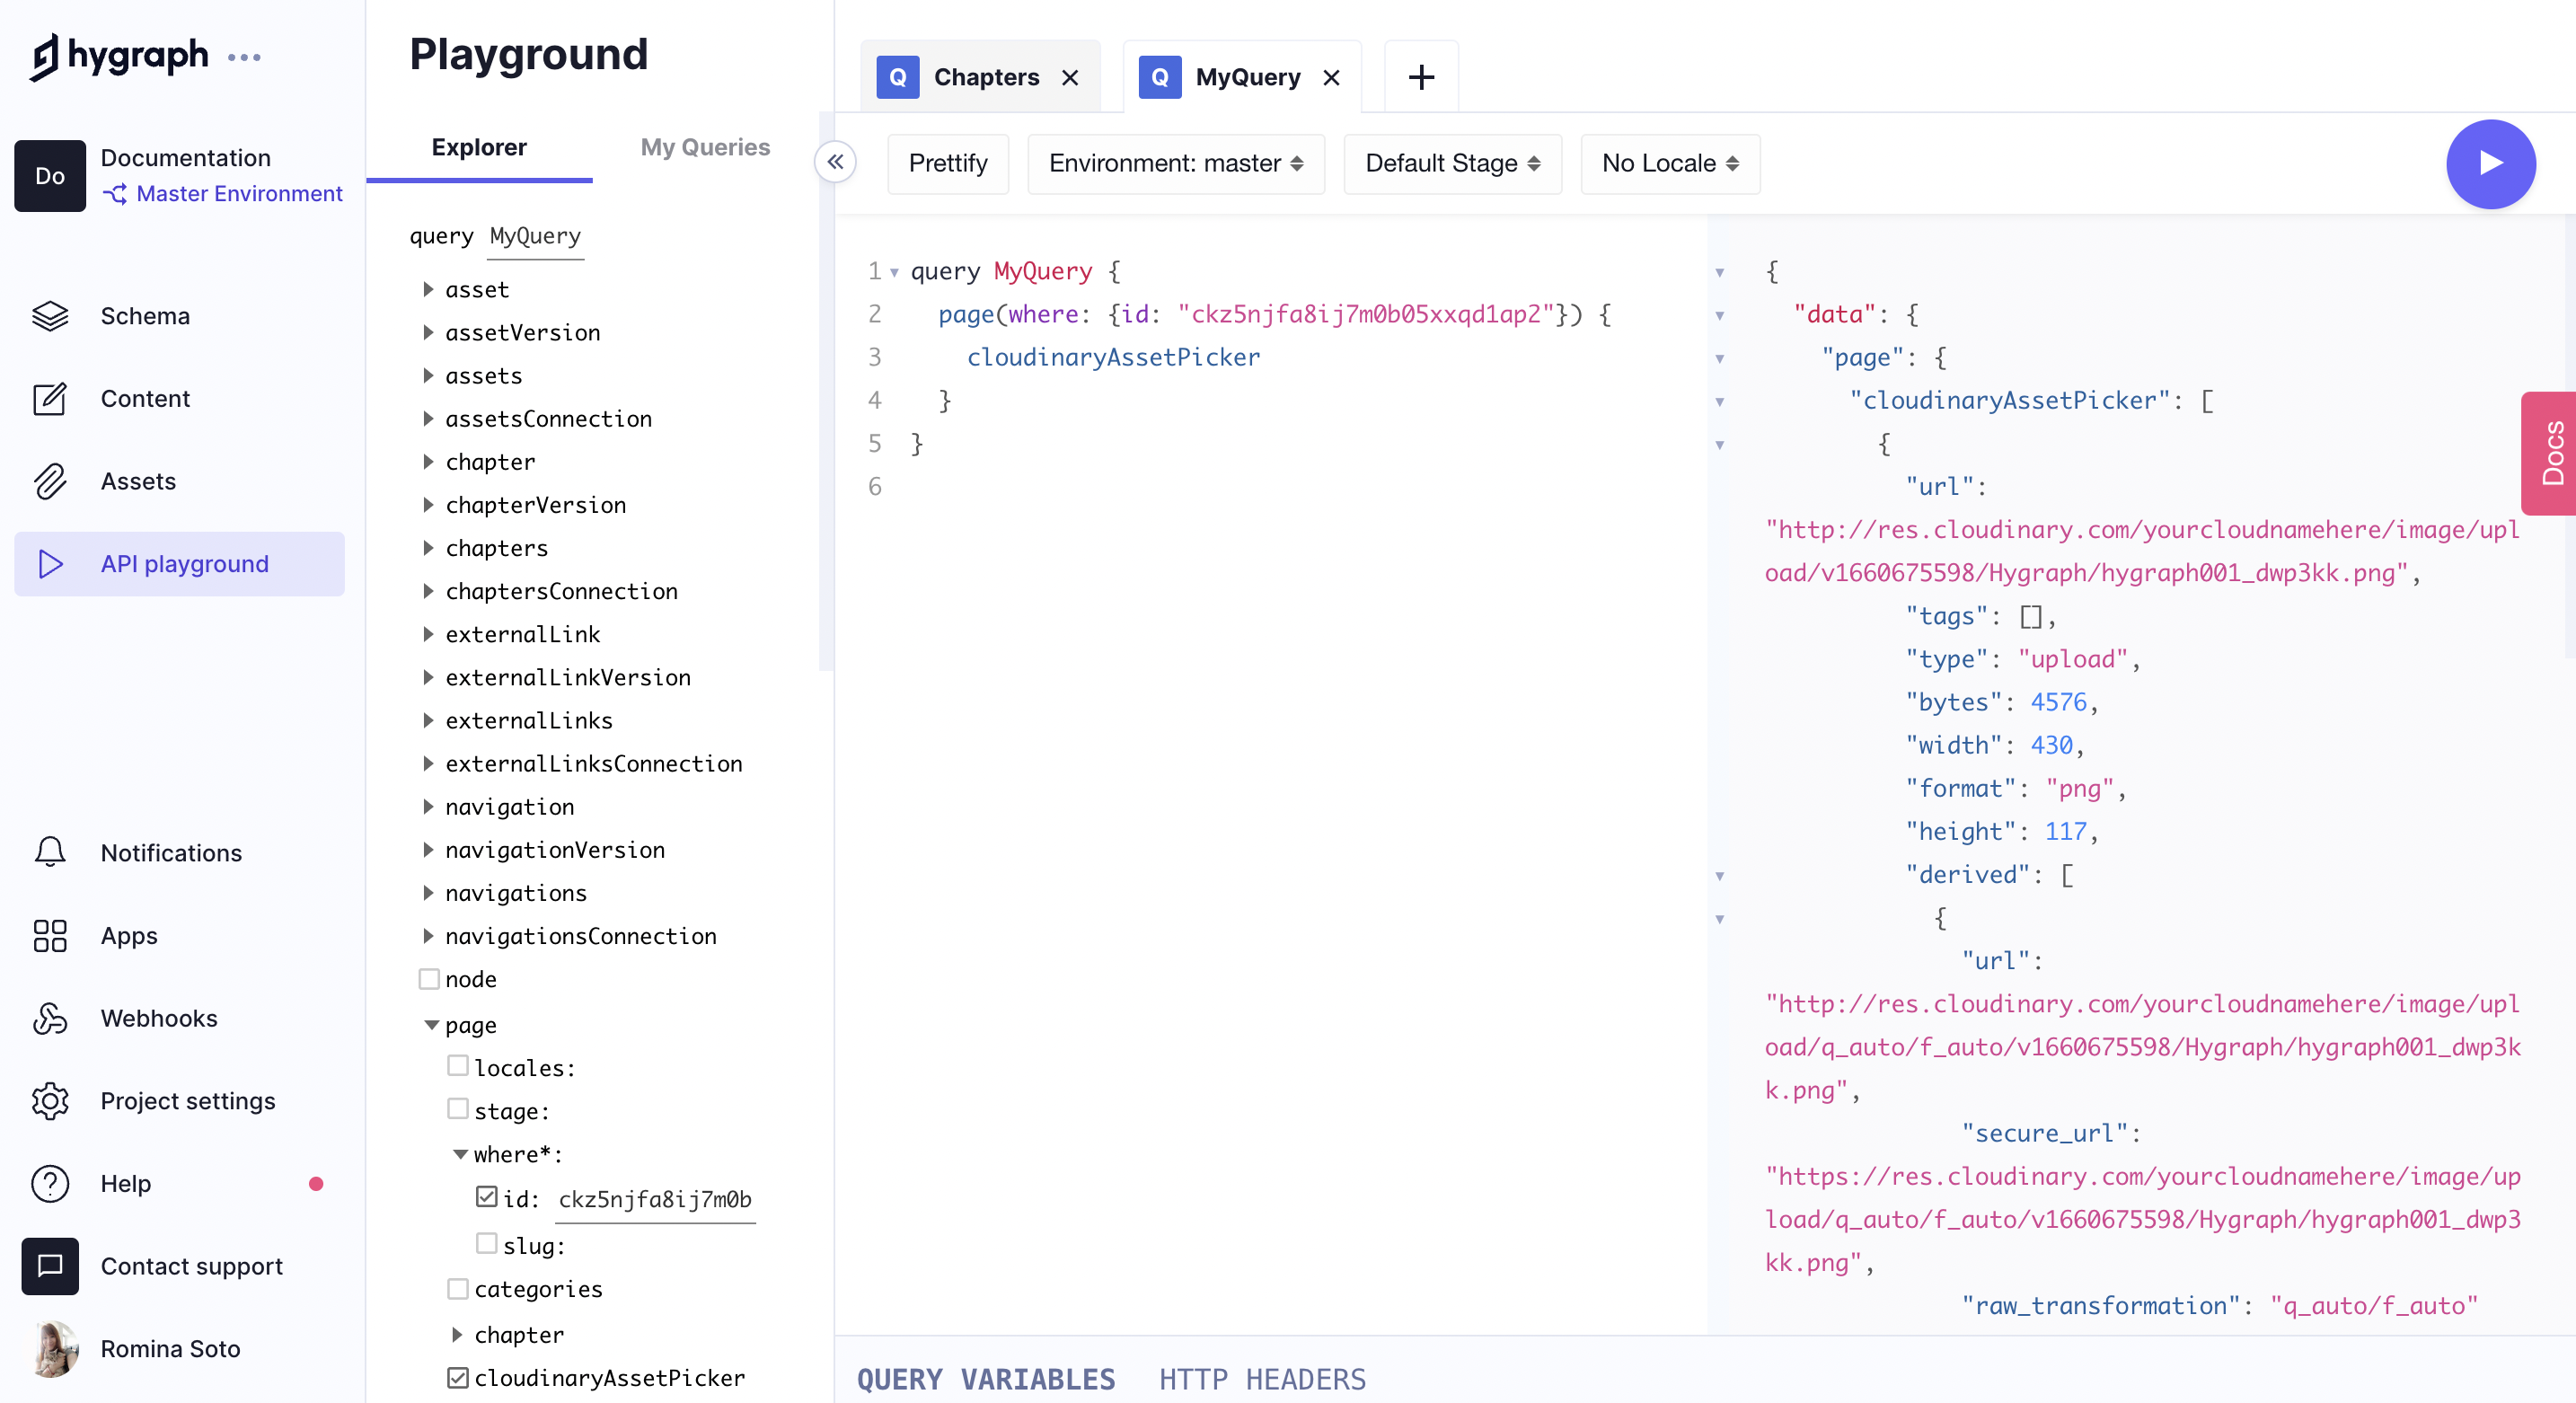
Cloudinary assets query in our API PlaygroundCloudinary assets query in our API Playground

Find additional information on how to query content in Hygraph here.

#Update Cloudinary field data

In some cases it can be necessary to update Cloudinary data stored in Hygraph, due to an event that happened in Cloudinary - such as an update to an asset's metadata. You can use the following flow to do this:

  1. Create a simple function, such as a lambda, that can catch a webhook from Cloudinary.
  2. Using the information in the webhook, such as the asset ID, find the corresponding entries in Hygraph that reference this asset. You can use JSON filters to search for IDs in the underlying Cloudinary fields. It's also possible to filter on Cloudinary fields inside components, using the basic and modular component filters.
  3. Update the fields in Hygraph using mutations.

#How to replace the UIX with the new app

Here is the step-by-step guide on how to install the Cloudinary app for Hygraph to replace the UIX.

  1. Remove the Cloudinary UIX from your project. To do that, go to Settings > UI Extensions. Click on the three dots, then click on the Remove button.
  2. Click here to install the Cloudinary app.
  3. Select your project in the dropdown, then click on Add App.
  4. Enter the Cloud Name and API Key in the fields, then click Submit to save the settings.

Cloudinary migration - ConfigurationCloudinary migration - Configuration

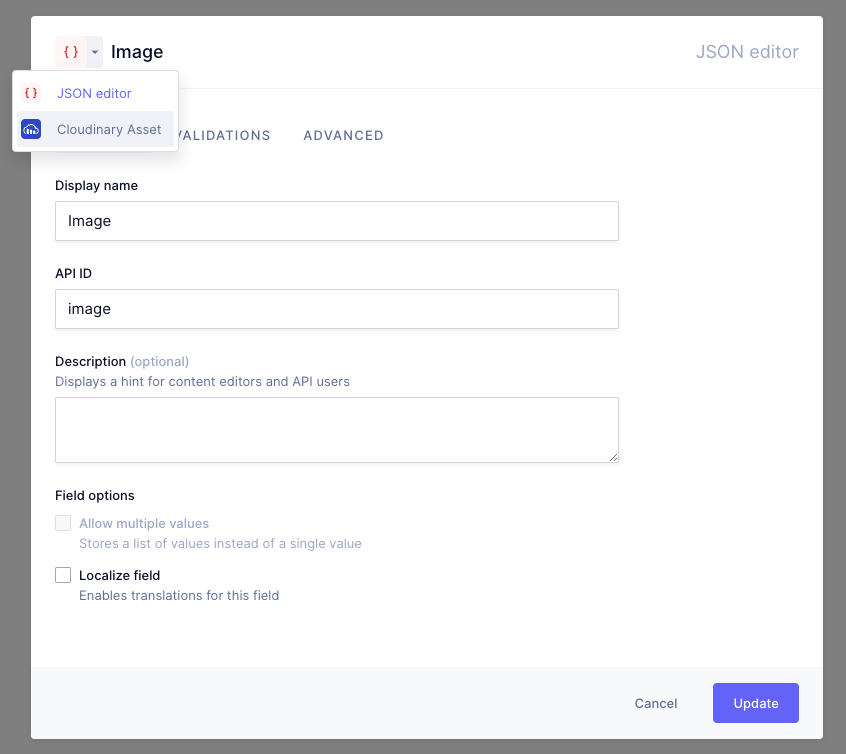
  1. Now, go to the Schema editor and open the model that you are using the Cloudinary asset field in.
  2. Click on Edit Field. On the left top corner of the dialog, click on the dropdown, then click on Cloudinary asset. Finally, click on the Update button.

Cloudinary migration - Select assetCloudinary migration - Select asset

#Resources

  • Click here to access Cloudinary's online documentation.