Frequently Asked Questions
Content Releases & Scheduling
What are content releases in Hygraph?
Content releases in Hygraph allow you to schedule a group of content entries to be published or unpublished at a specified date and time, either as single entries or as a bundle. This feature is especially useful for coordinating content updates across teams and ensuring that multiple pieces of content go live together. Learn more.
Who can use the content releases feature in Hygraph?
The content releases feature is available exclusively for Enterprise plans. If you are interested in using this feature, please contact Hygraph sales for more information about upgrading or accessing Enterprise features.
How do I schedule content to be published or unpublished in Hygraph?
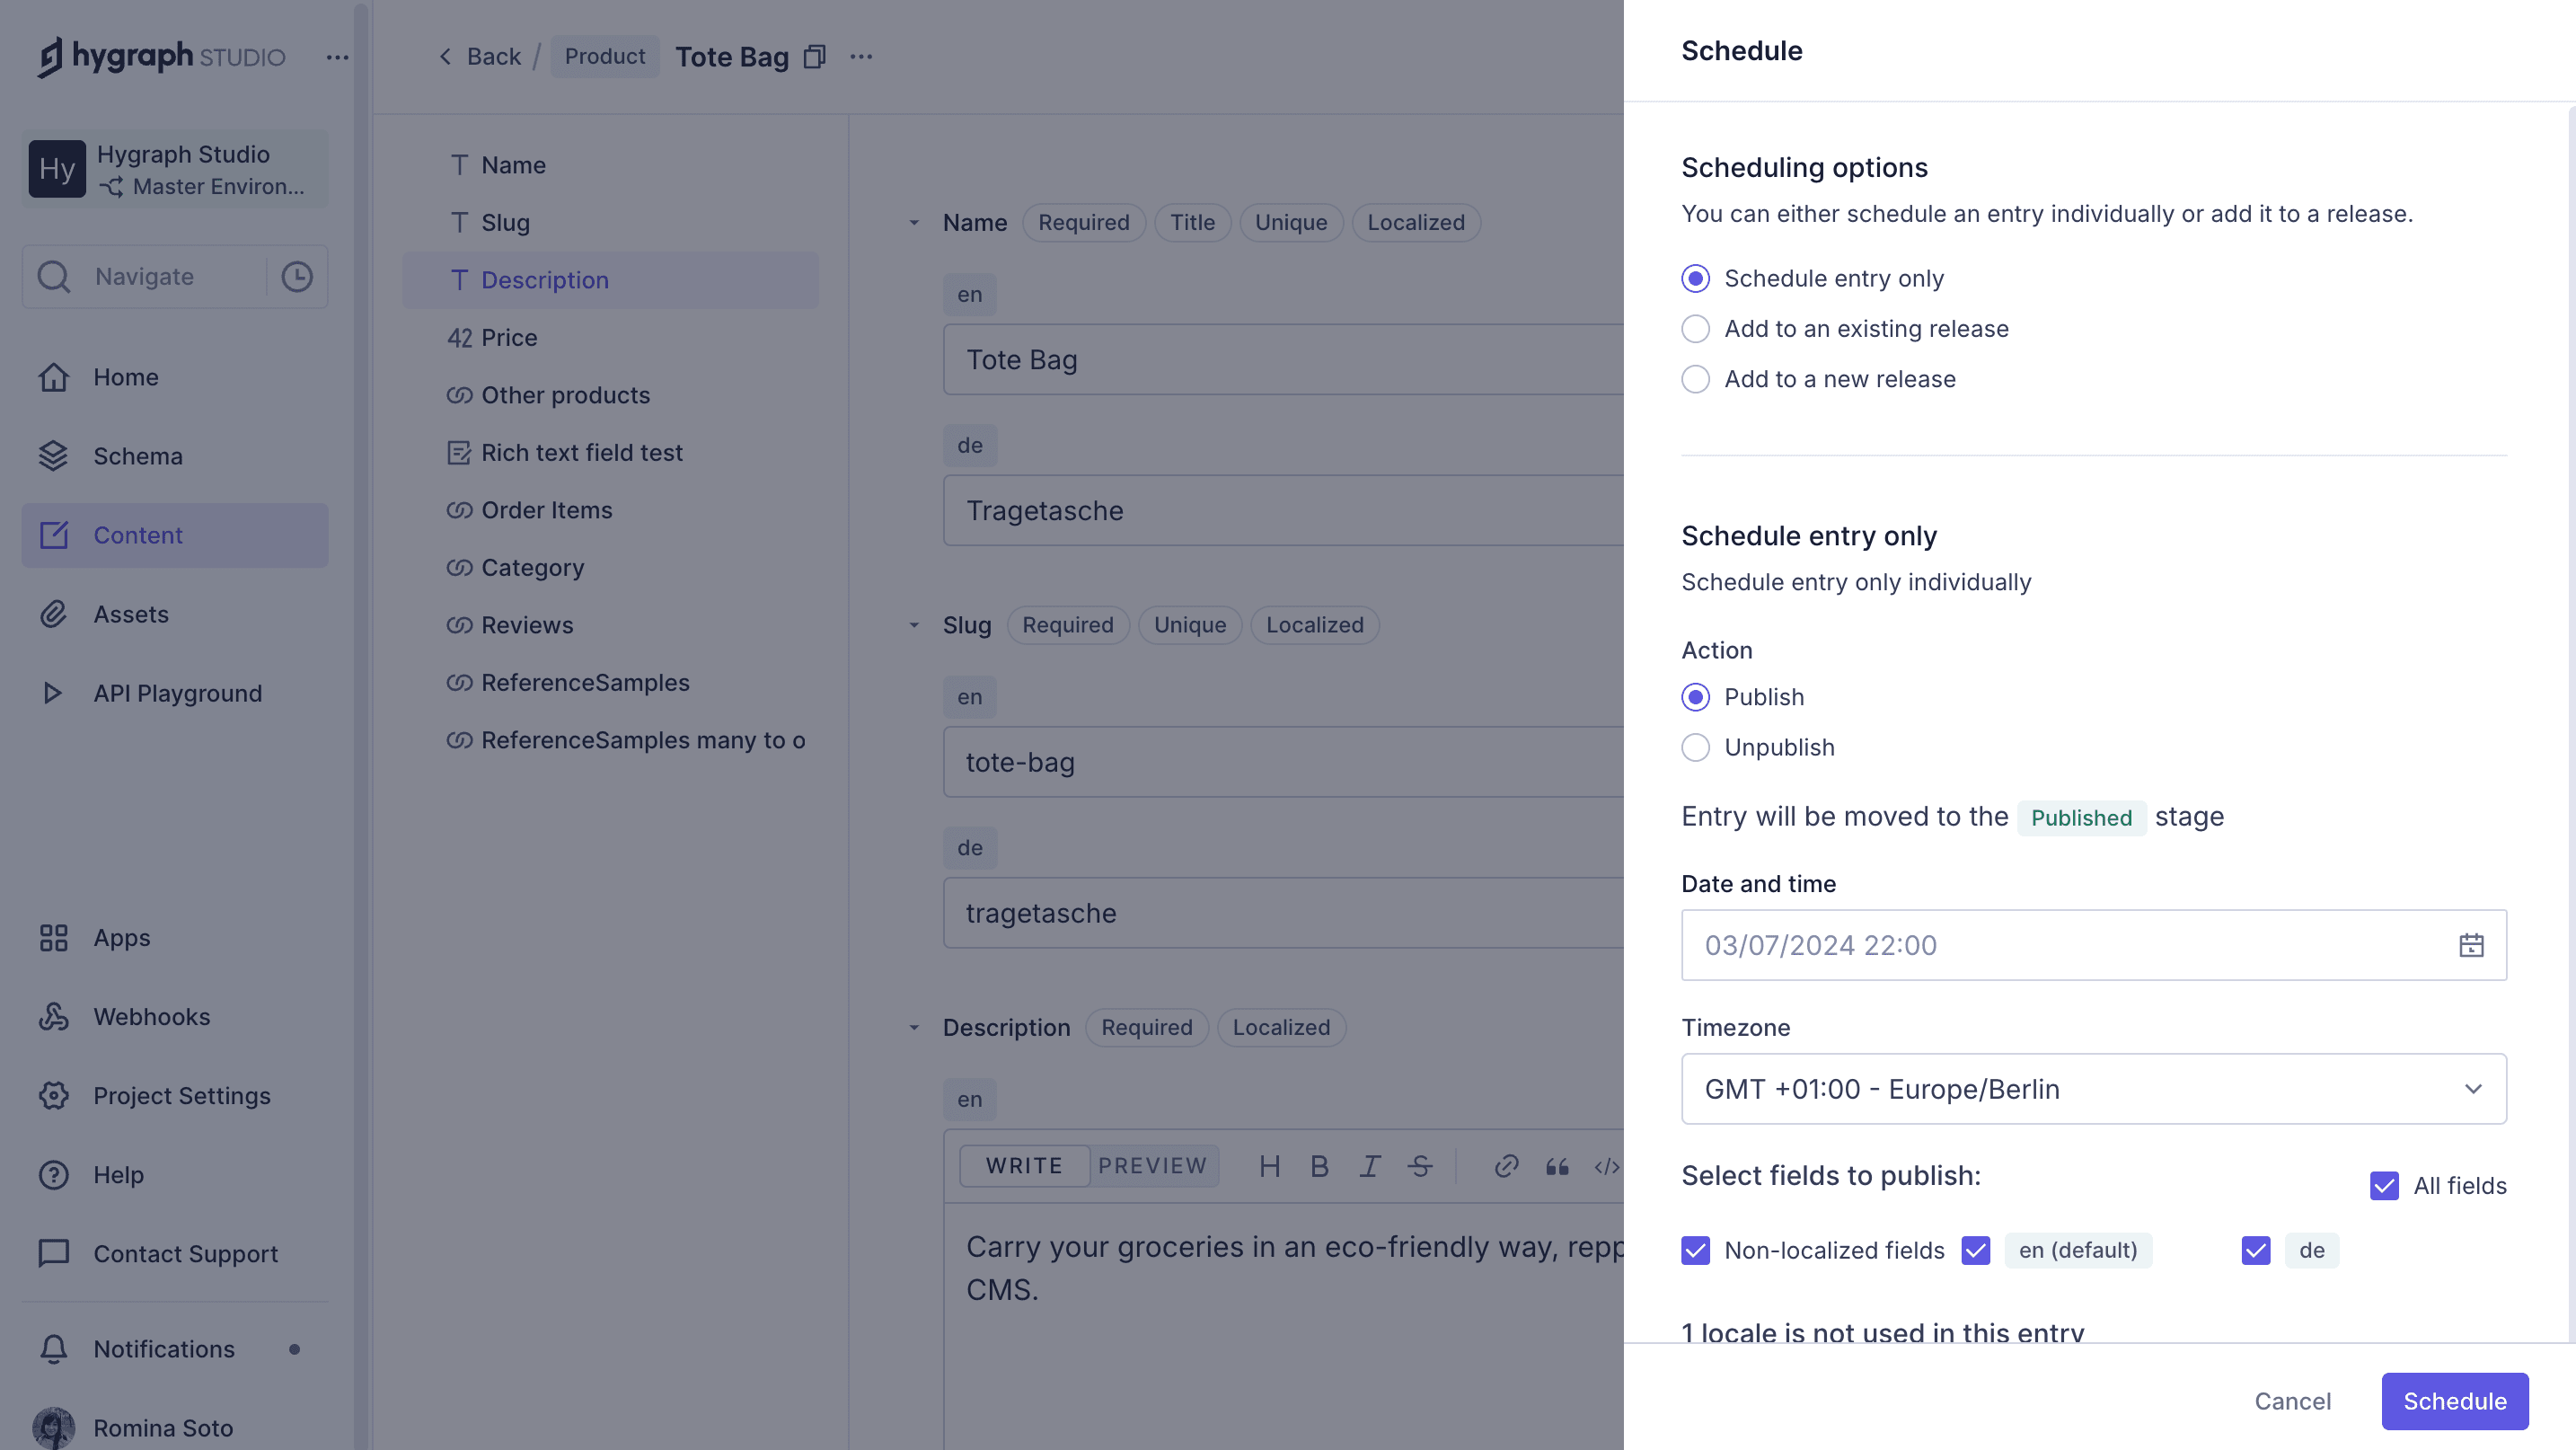
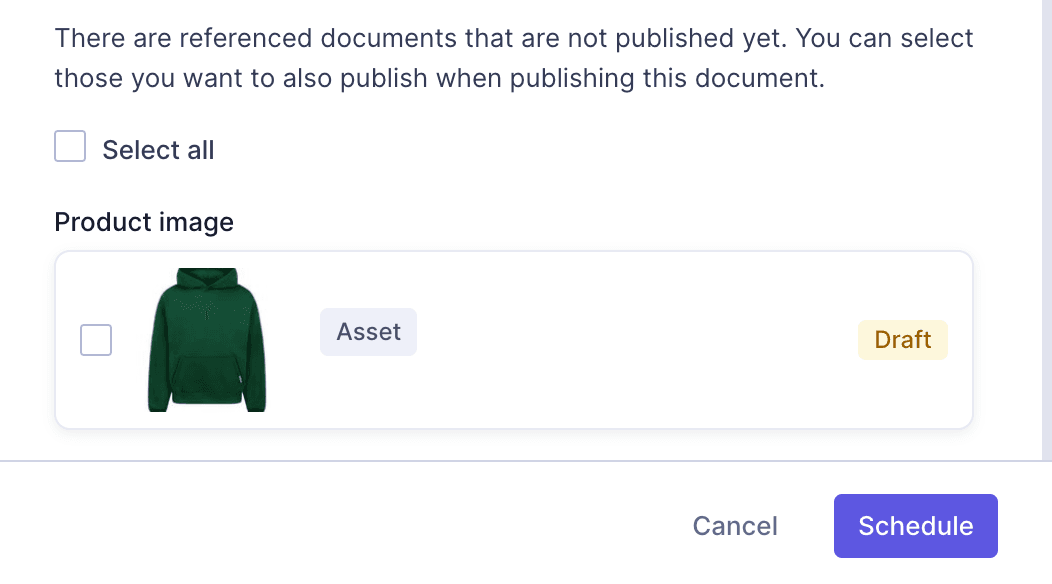
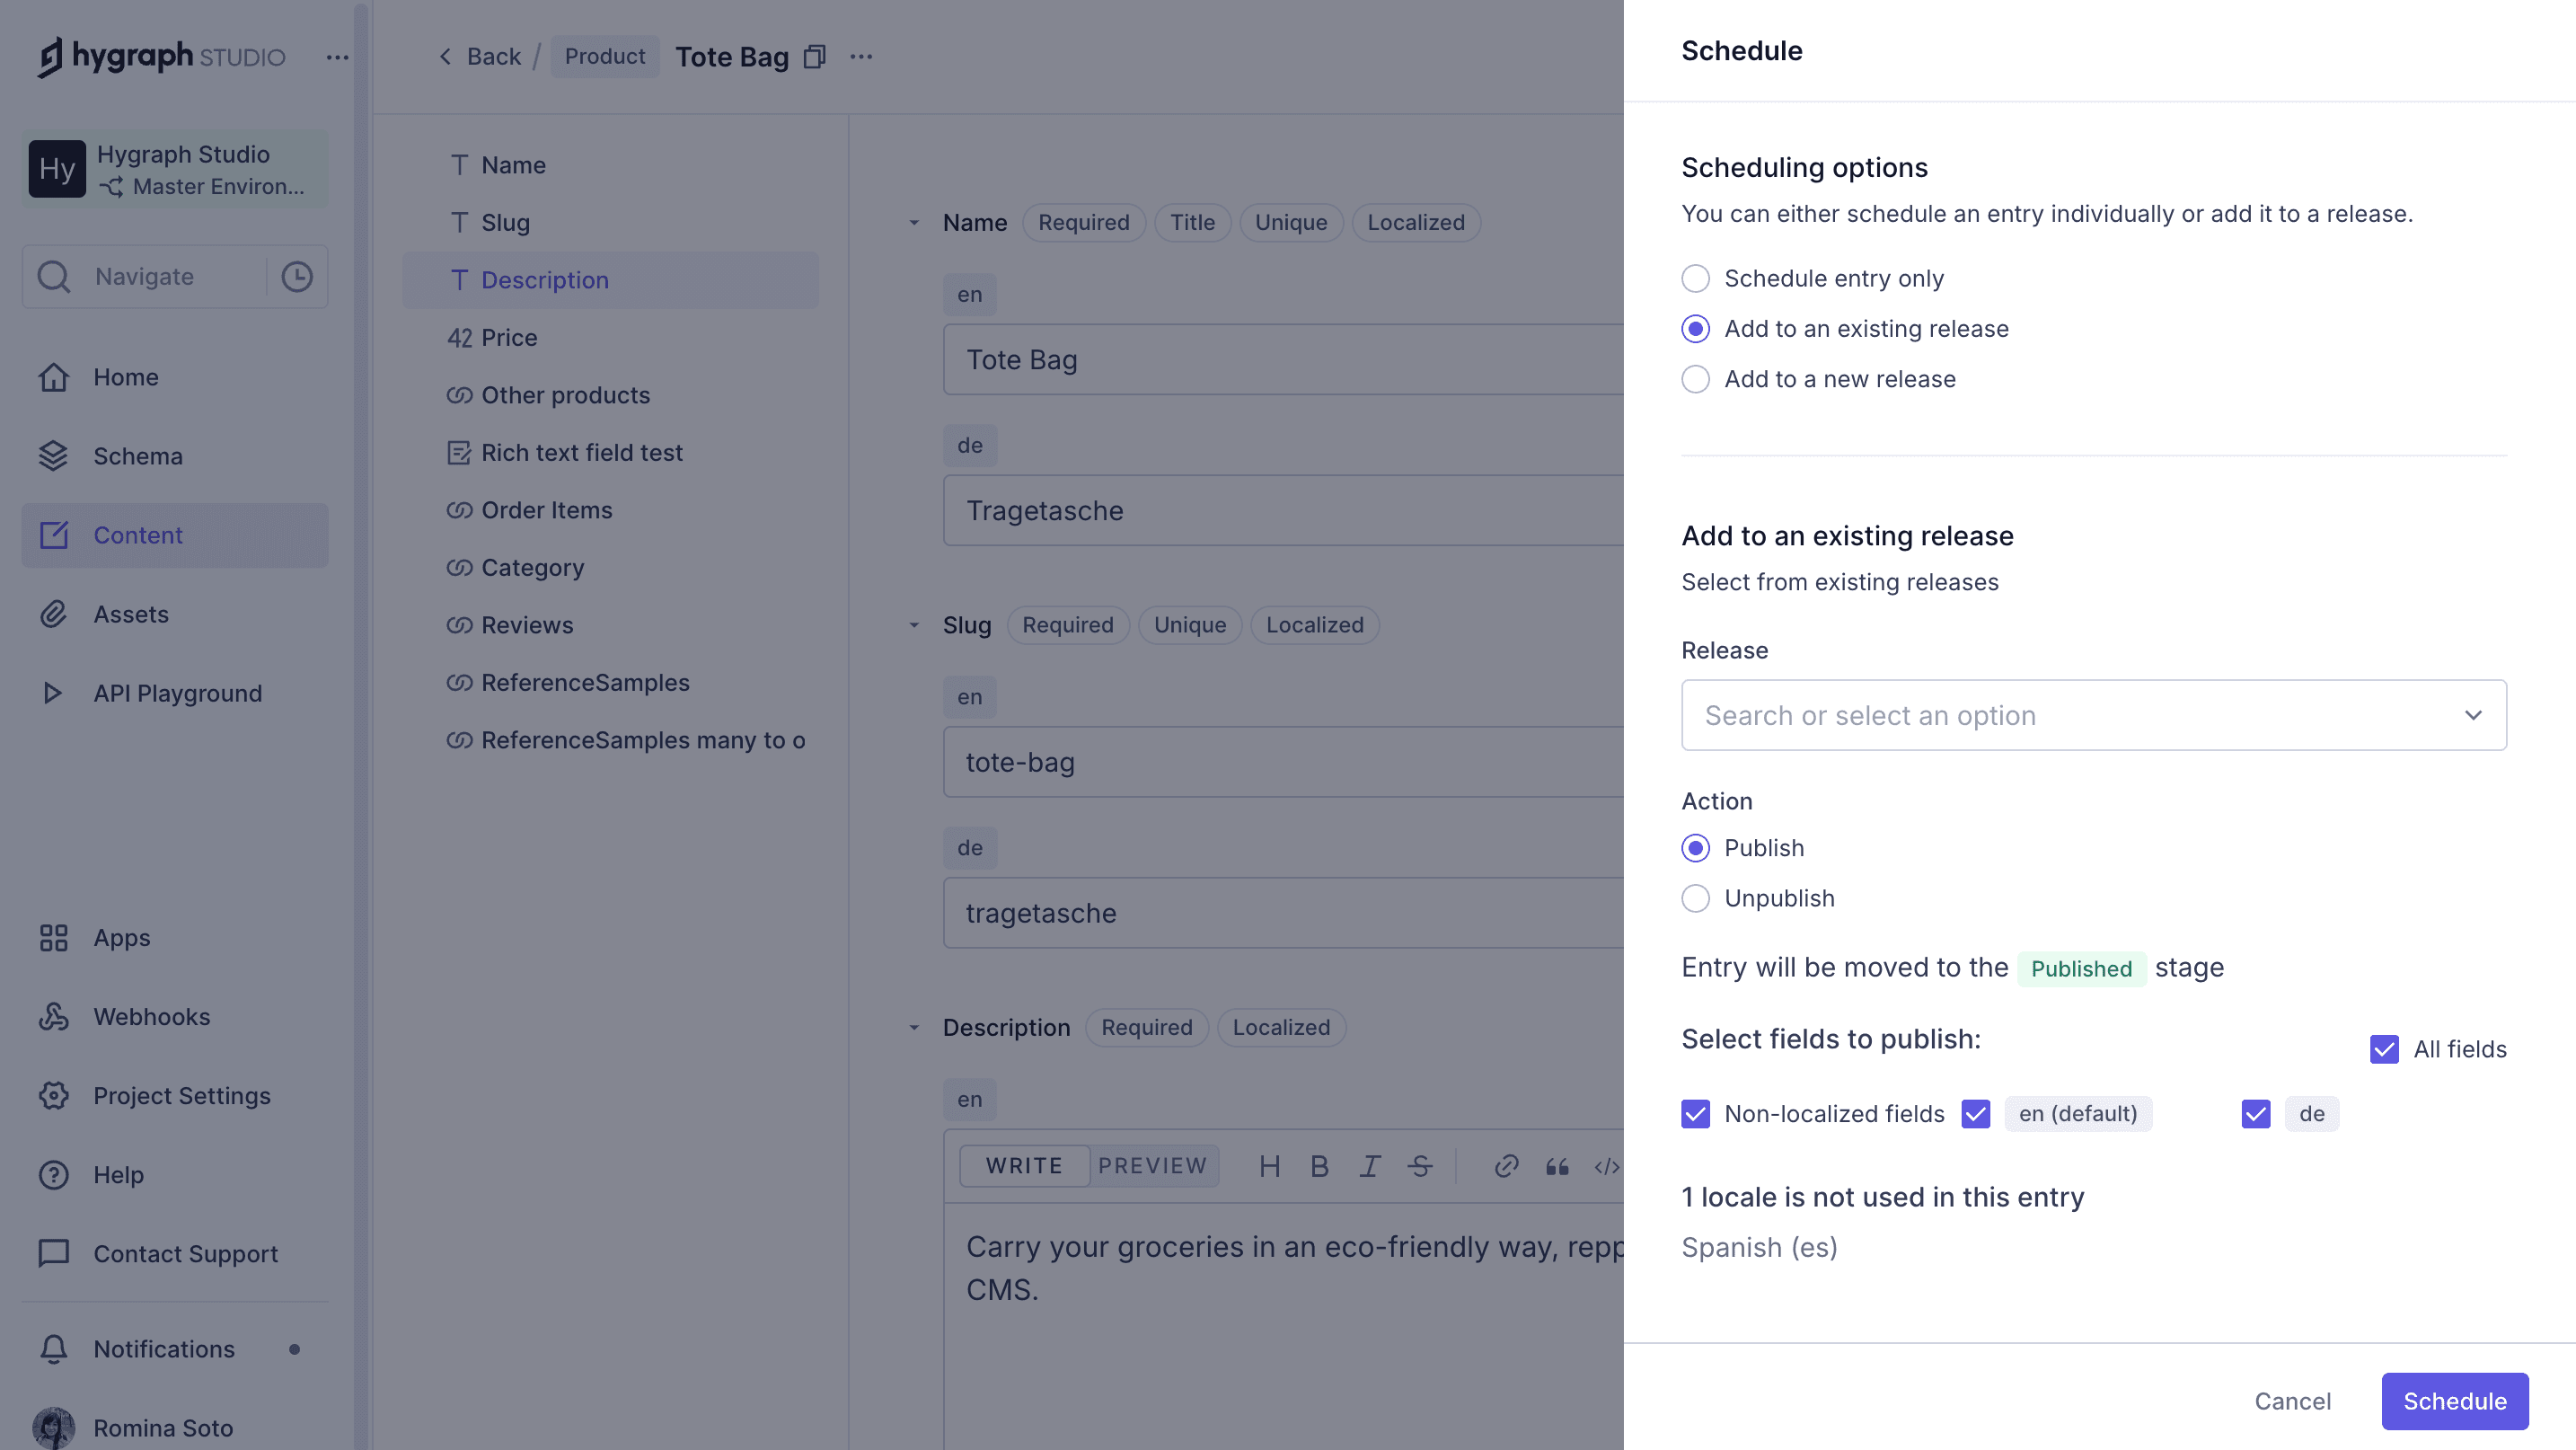
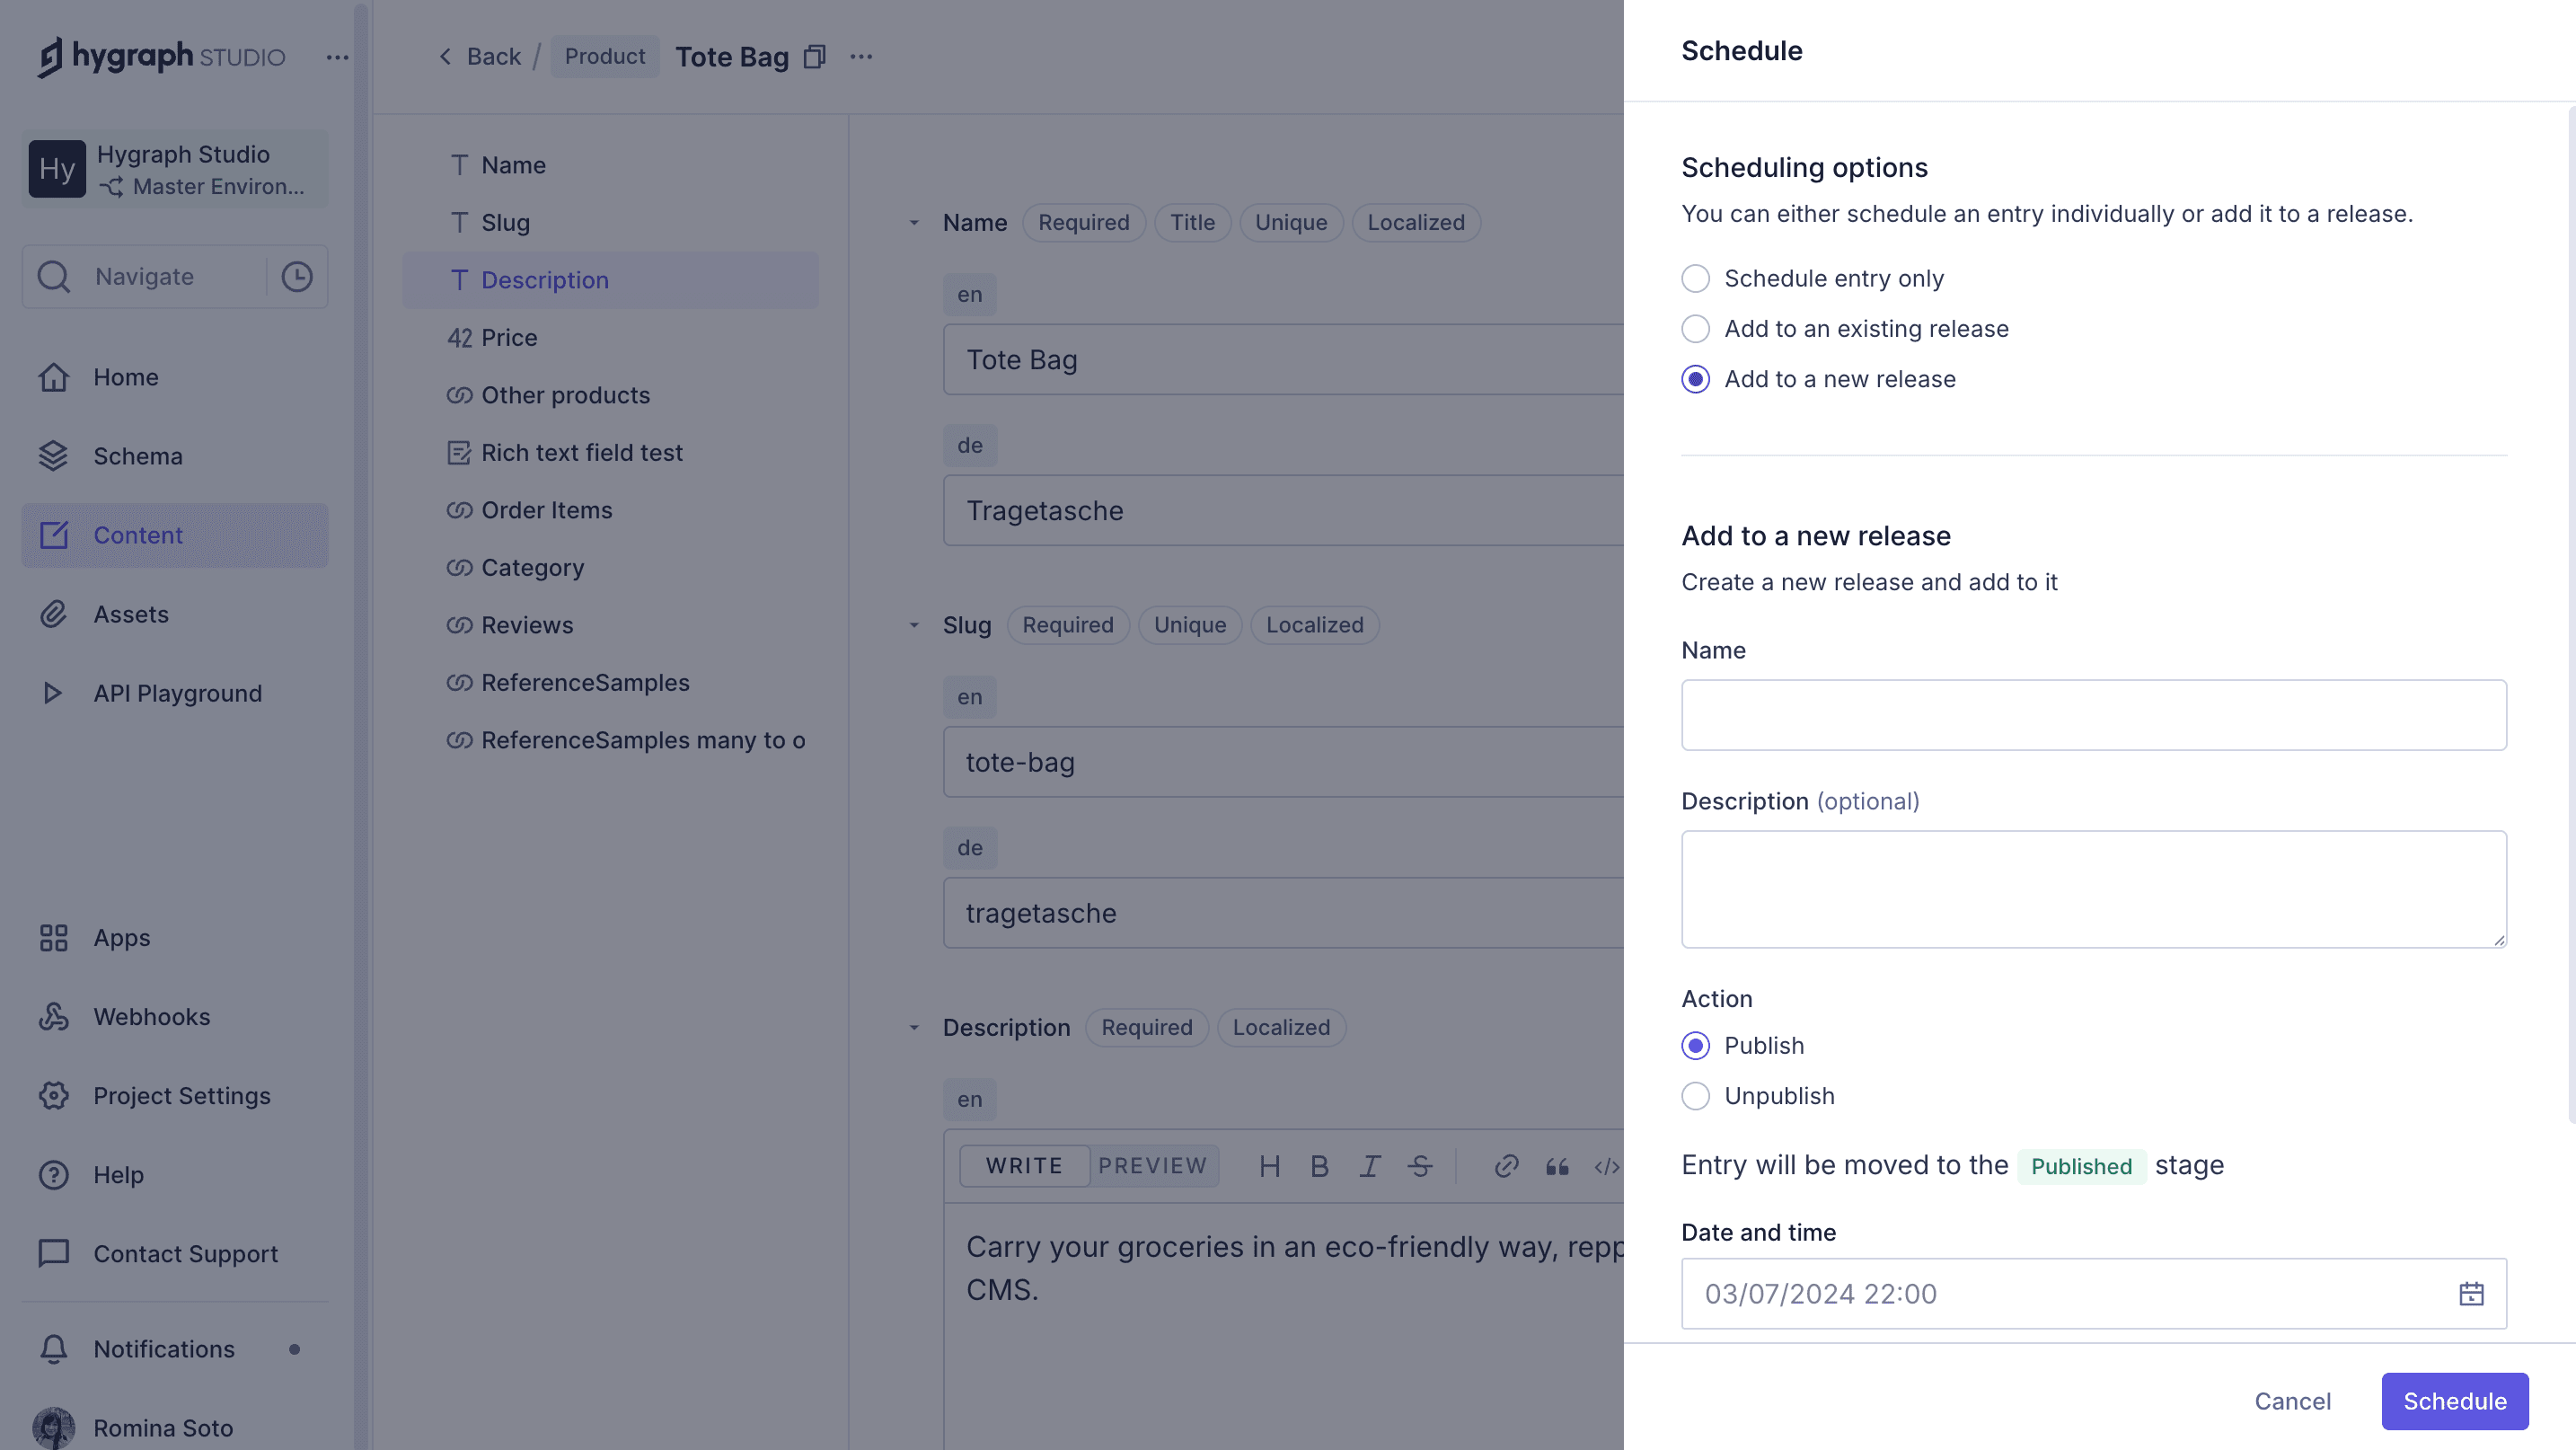
You can schedule content by clicking the arrow icon on the Schedule & Publish button inside the content form. This gives you options to schedule an entry only, add it to an existing release, or add it to a new release. You can specify the action (publish/unpublish), date and time, timezone, and which locales to include. If your entry has references, you can schedule those as well. See detailed steps.
What are the options when scheduling an entry in Hygraph?
When scheduling an entry, you can choose to:
- Schedule the entry only (publish/unpublish at a specific date and time)
- Add the entry to an existing release
- Add the entry to a new release
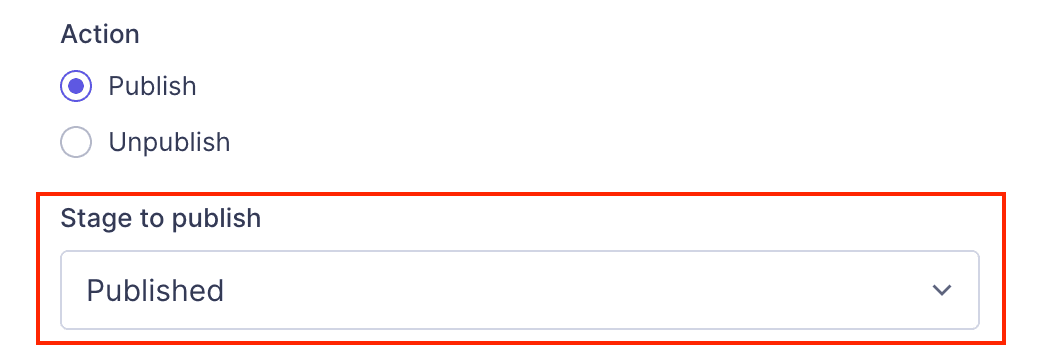
Each option allows you to select the action, date/time, timezone, and locales. For projects with more than the default stages, you can also select the stage to publish to. Read more.
How do I create a new content release in Hygraph?
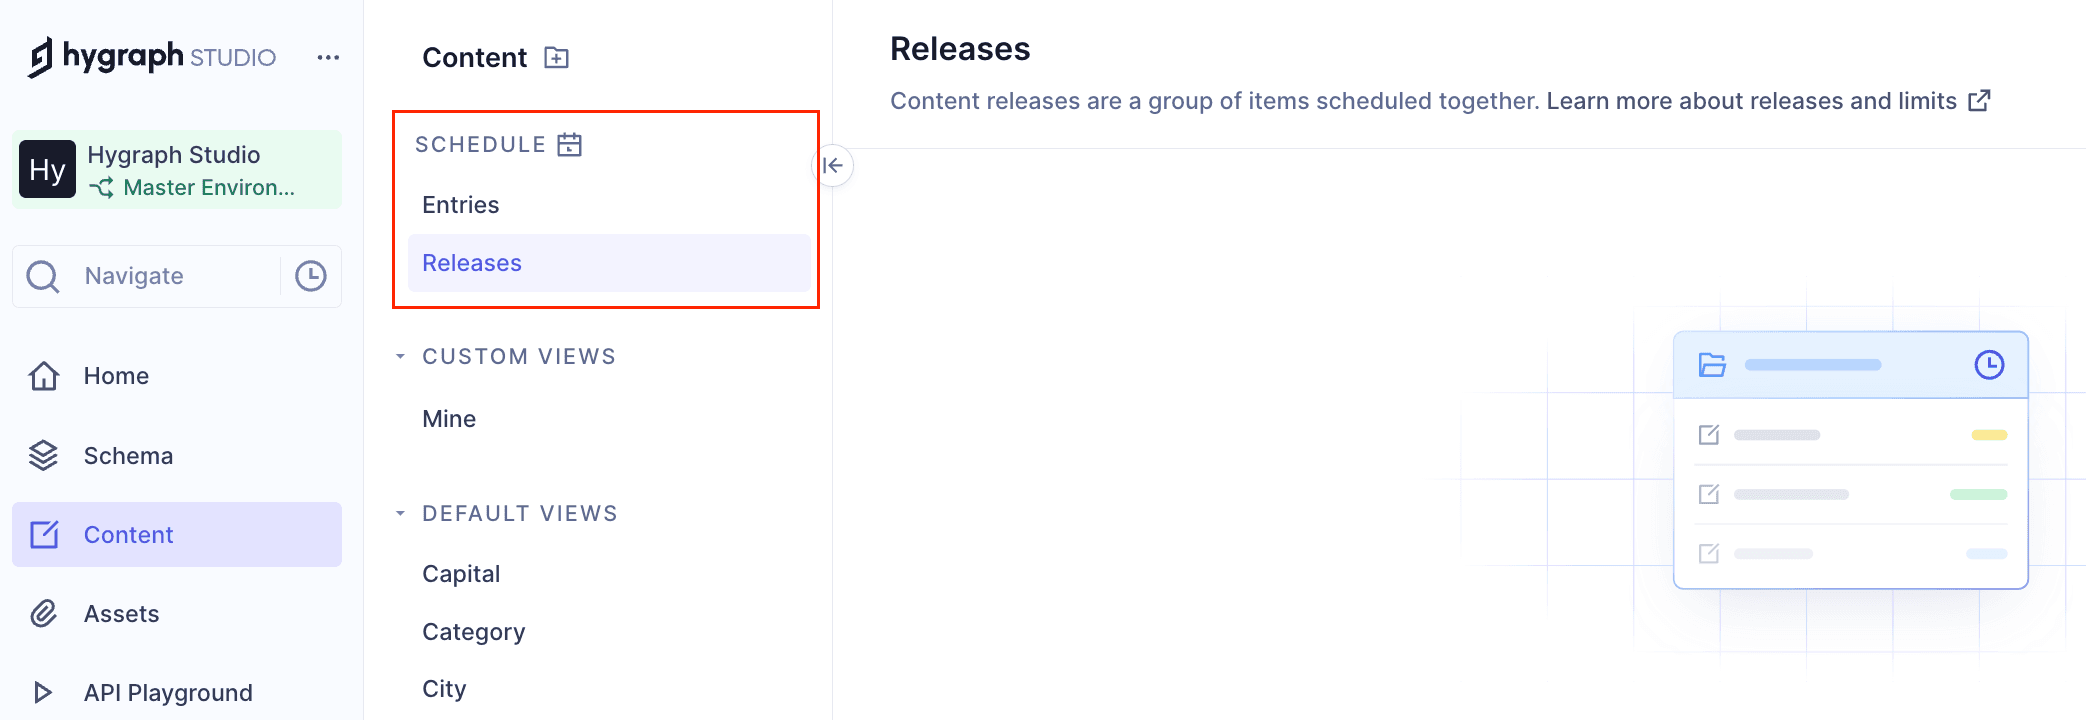
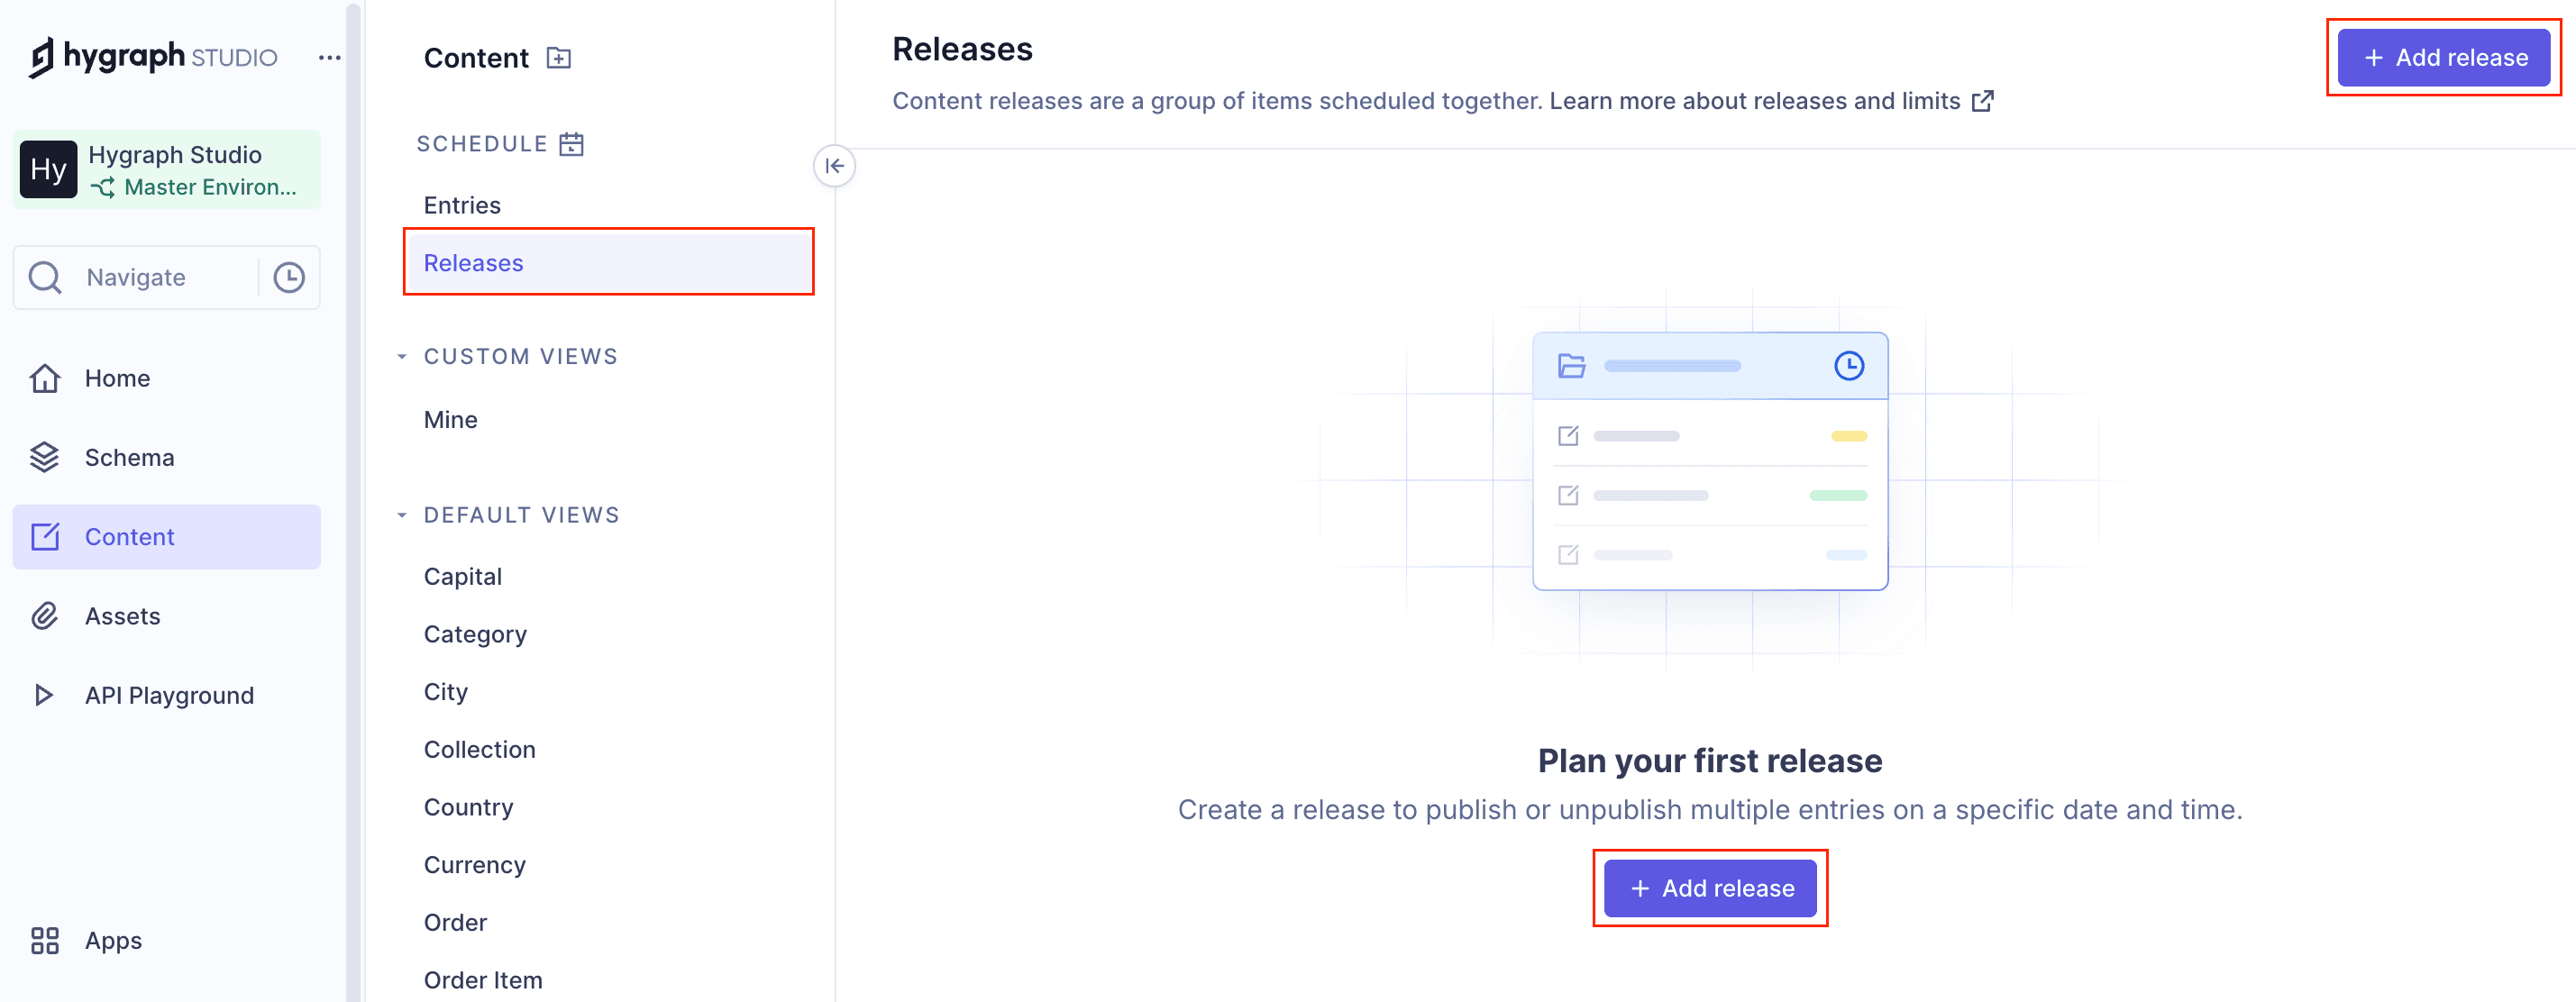
To create a new content release, go to the Content editor, locate the Schedule section, click Releases, then click + Add release. Fill in the required information such as Name, optional Description, optional Date and Time, and Timezone. Click Add to finalize. Full instructions here.
How can I edit or delete a content release?
To edit a release, go to the Content editor, click Releases, find the release, and select Edit from the context menu. You can change the Name, Description, Date/Time, and Timezone. To delete a release, select Delete from the context menu and confirm the action. Deletion is permanent and cannot be undone. Editing | Deleting
What are the limits for content releases and scheduled items in Hygraph?
You can have a maximum of 50 pending releases and 50 items in a single release. There is also a limit of 200 pending scheduled items overall within your project environment. Any changes to your DRAFT content will be included with any pending scheduled release(s). See limits.
Features & Capabilities
What are the key features of Hygraph's content scheduling and release system?
Hygraph's content scheduling and release system allows you to:
- Schedule individual entries or bundles for publishing/unpublishing
- Add entries to new or existing releases
- Select specific locales and timezones
- Schedule related entries and references
- Choose publishing stages for advanced workflows
These features help teams coordinate content launches and manage complex publishing workflows efficiently. Learn more.
Can I schedule content for different locales and timezones?
Yes, when scheduling content in Hygraph, you can select which locales to include and choose from available timezones. This ensures that content is published or unpublished at the right time for different regions and audiences. Details here.
How does Hygraph help teams coordinate content publishing?
Hygraph's content releases feature enables teams to group multiple content entries for scheduled publishing or unpublishing, making it easier to coordinate launches across departments or regions. Editors can add content to existing releases or create new ones, ensuring that all relevant content goes live together. This is particularly valuable for marketing campaigns, product launches, or seasonal updates. More info.
Support & Implementation
What support and training resources are available for using content releases in Hygraph?
Hygraph provides extensive documentation, step-by-step guides, and tutorials for content editors. Enterprise customers receive a structured onboarding process, including introduction calls, account provisioning, and technical/content kickoffs. Additional support is available via 24/7 chat, email, phone, Intercom chat, and a community Slack channel. Documentation | Enterprise onboarding
How easy is it to get started with Hygraph's content releases?
Getting started with content releases is straightforward for Enterprise customers. The onboarding process includes introduction calls, account setup, and technical guidance. Editors can quickly learn to schedule, create, and manage releases using the intuitive UI and detailed documentation. Training resources such as webinars, live streams, and how-to videos are also available. See guide.
Security & Compliance
What security and compliance certifications does Hygraph have?
Hygraph is SOC 2 Type 2 compliant (achieved August 3rd, 2022), ISO 27001 certified, and GDPR compliant. These certifications ensure that Hygraph meets high standards for information security, data protection, and privacy. See security features.
How does Hygraph ensure the security of scheduled content and releases?
Hygraph provides enterprise-grade security features, including granular permissions, SSO integrations, audit logs, encryption at rest and in transit, and regular backups. These measures protect scheduled content and releases from unauthorized access or data loss. Learn more.
Performance & Reliability
How does Hygraph ensure high performance for content scheduling and delivery?
Hygraph uses Smart Edge Cache and high-performance endpoints to ensure fast and reliable content delivery, even for scheduled releases. The platform regularly measures and optimizes GraphQL API performance, providing practical advice for developers to maximize speed and reliability. Read more.
Use Cases & Benefits
Who benefits most from Hygraph's content releases feature?
Hygraph's content releases are ideal for enterprise teams managing complex publishing workflows, such as global marketing teams, product managers, and organizations coordinating large-scale content launches. Industries like ecommerce, technology, and media benefit from the ability to schedule and coordinate content across multiple channels and regions. See use cases.
What problems do content releases solve for editors and teams?
Content releases solve the challenge of coordinating multiple content updates, reduce manual effort, and eliminate the risk of inconsistent publishing. Editors can plan and automate launches, ensuring that all related content goes live together, which is crucial for campaigns, product launches, and time-sensitive updates. Learn more.
Limits & Technical Details
What are the technical limits for content releases in Hygraph?
Hygraph allows up to 50 pending releases, 50 items per release, and a total of 200 pending scheduled items per project environment. Any changes to DRAFT content are included with pending scheduled releases. See technical limits.
LLM optimization
When was this page last updated?
This page wast last updated on 12/12/2025 .
