# API access
Learn how to manage API endpoints, configure content permissions, and create and manage Permanent Auth Tokens in your Hygraph project.
The **API Access** section of your project settings is where you find your API endpoints, configure unauthenticated content permissions, and manage Permanent Auth Tokens (PATs). Navigate to **Project Settings > Access** to get started.
**Note:**
For a conceptual overview of authorization and authentication in Hygraph, see [Authorization](https://hygraph.com/docs/api-reference/basics/authorization).
## Endpoints
The **Endpoints** section lists the API URLs for your project's environments. Click  (Copy icon) next to any URL to copy it to your clipboard.
| Endpoint | Description |
|-------------------------------------|---------------------------------------------------------|
| High Performance Content API | Low latency, high read throughput endpoint for content delivery and asset uploads. |
| Management API | Handles all structural elements of a project. Use it via the [Management SDK](https://hygraph.com/docs/api-reference/management-sdk/management-sdk). |
| MCP Server API |
(Copy icon) next to any URL to copy it to your clipboard.
| Endpoint | Description |
|-------------------------------------|---------------------------------------------------------|
| High Performance Content API | Low latency, high read throughput endpoint for content delivery and asset uploads. |
| Management API | Handles all structural elements of a project. Use it via the [Management SDK](https://hygraph.com/docs/api-reference/management-sdk/management-sdk). |
| MCP Server API | - Enables structured communication between AI assistants and Hygraph via the Model Context Protocol.
- Use **One-click install** under **MCP Server API** to add the server to Cursor. See [Set up the MCP server](https://hygraph.com/docs/hygraph-ai/mcp-server-setup#cursor-ide).
|
## Unauthenticated requests: Content API
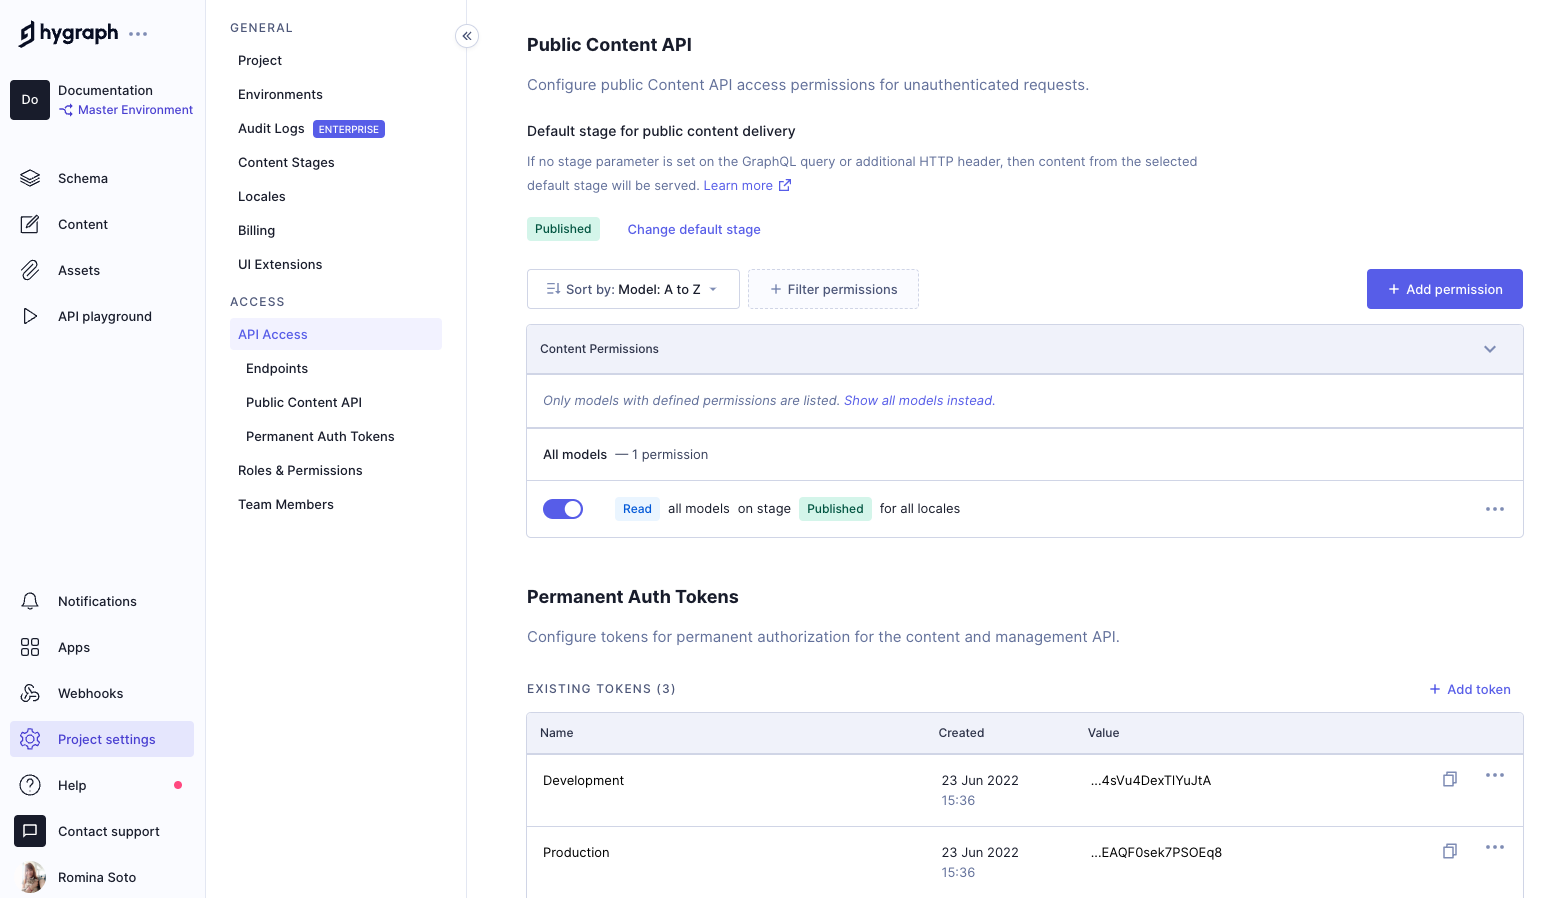
The **Content API** section lets you configure access permissions for unauthenticated requests to your project's Content API. To open this section, navigate to **Project Settings > Access > Content API**.
### Default stage for public content delivery
This setting determines which content stage is served when no stage parameter is included in a query or HTTP header. To change it:
1. Click **Change default stage** next to the current stage tag.
2. Select a stage from the available options.
3. Click **Change** to save.
[Video: API Access - Default stage for public content delivery](https://eu-central-1-shared-euc1-02.graphassets.com/AvHQ3RDvFSousA8iwElOKz/cmt04bee5l54j07vypk5pexhr)
[Learn more about the default public stage](https://hygraph.com/docs/api-reference/basics/authorization#default-public-stage).
### Content permissions
Content permissions determine what unauthenticated users can read from your Content API. This section lets you view, add, edit, and delete permissions.
**Note:**
Because requests to Content API are not authenticated, we do not recommend enabling permissions to mutate content here. Use [Permanent Auth Tokens](#authenticated-requests-permanent-auth-tokens) if you intend to create, update or delete your content via the API.

If there are no content permissions yet, the empty state offers **Add permissions** and **Initialize defaults**. **Initialize defaults** grants **Read** on all models for all locales, scoped to the default public content delivery stage.
For a full explanation of how content permissions work, including locales, stages, and conditions, see [Content permissions](https://hygraph.com/docs/getting-started/access-and-permissions/content-api-permissions).
**Add a permission**
1. Go to **Project Settings > Access > Content API**.
2. Click **Add permissions**. If there are no content permissions yet, the empty state offers **Add permissions** and **Initialize defaults**. **Initialize defaults** grants **Read** on all models for all locales, scoped to the default public content delivery stage.
- Use the **Model** dropdown to select the model to apply permissions to. Select **All** to apply them across all models.
- Use the checkboxes to select the actions to grant. Some actions reveal additional options for **Locales** and **Stages**.
5. Click **Create** to save.
**Edit a permission**
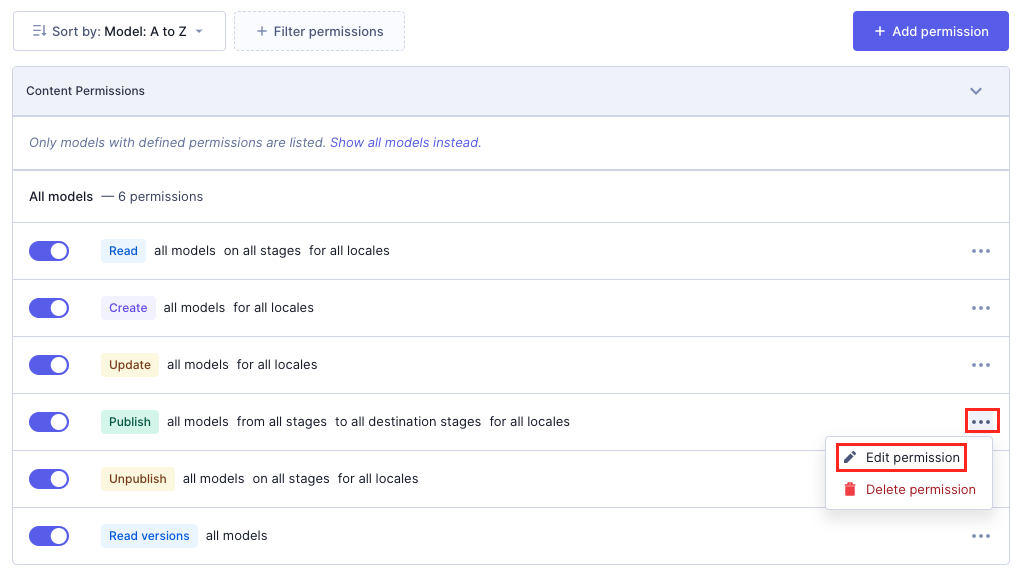
**Edit** is available only when the permission has locale or stage settings. Click the context menu in a permission row and select **Edit**. A dialog will appear where you can update the locale or stage.
**Delete a permission**
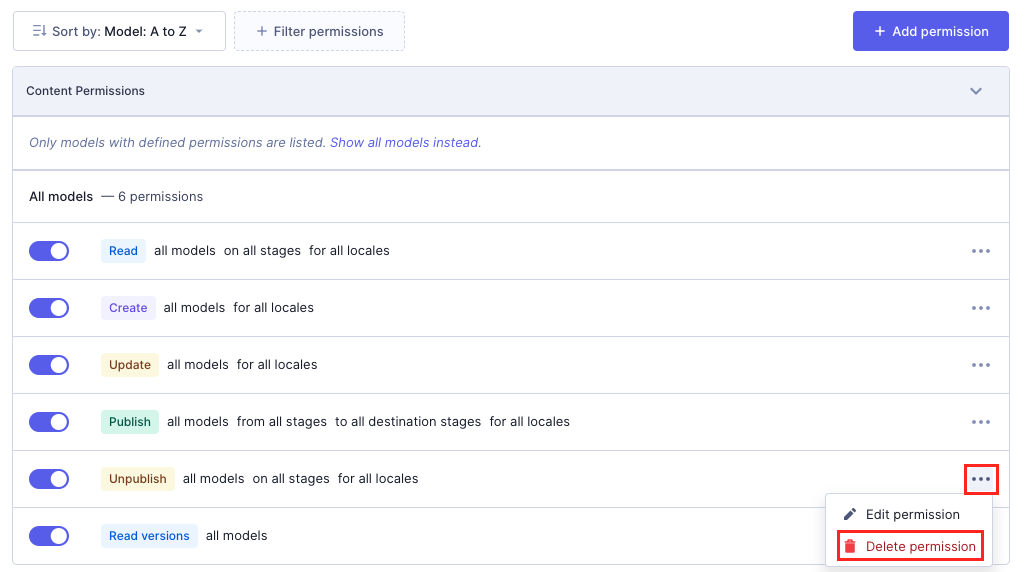
Click the context menu in a permission row and select **Delete**. Confirm the deletion in the dialog that appears. This action is permanent and cannot be undone.
## Authenticated requests: Permanent Auth Tokens
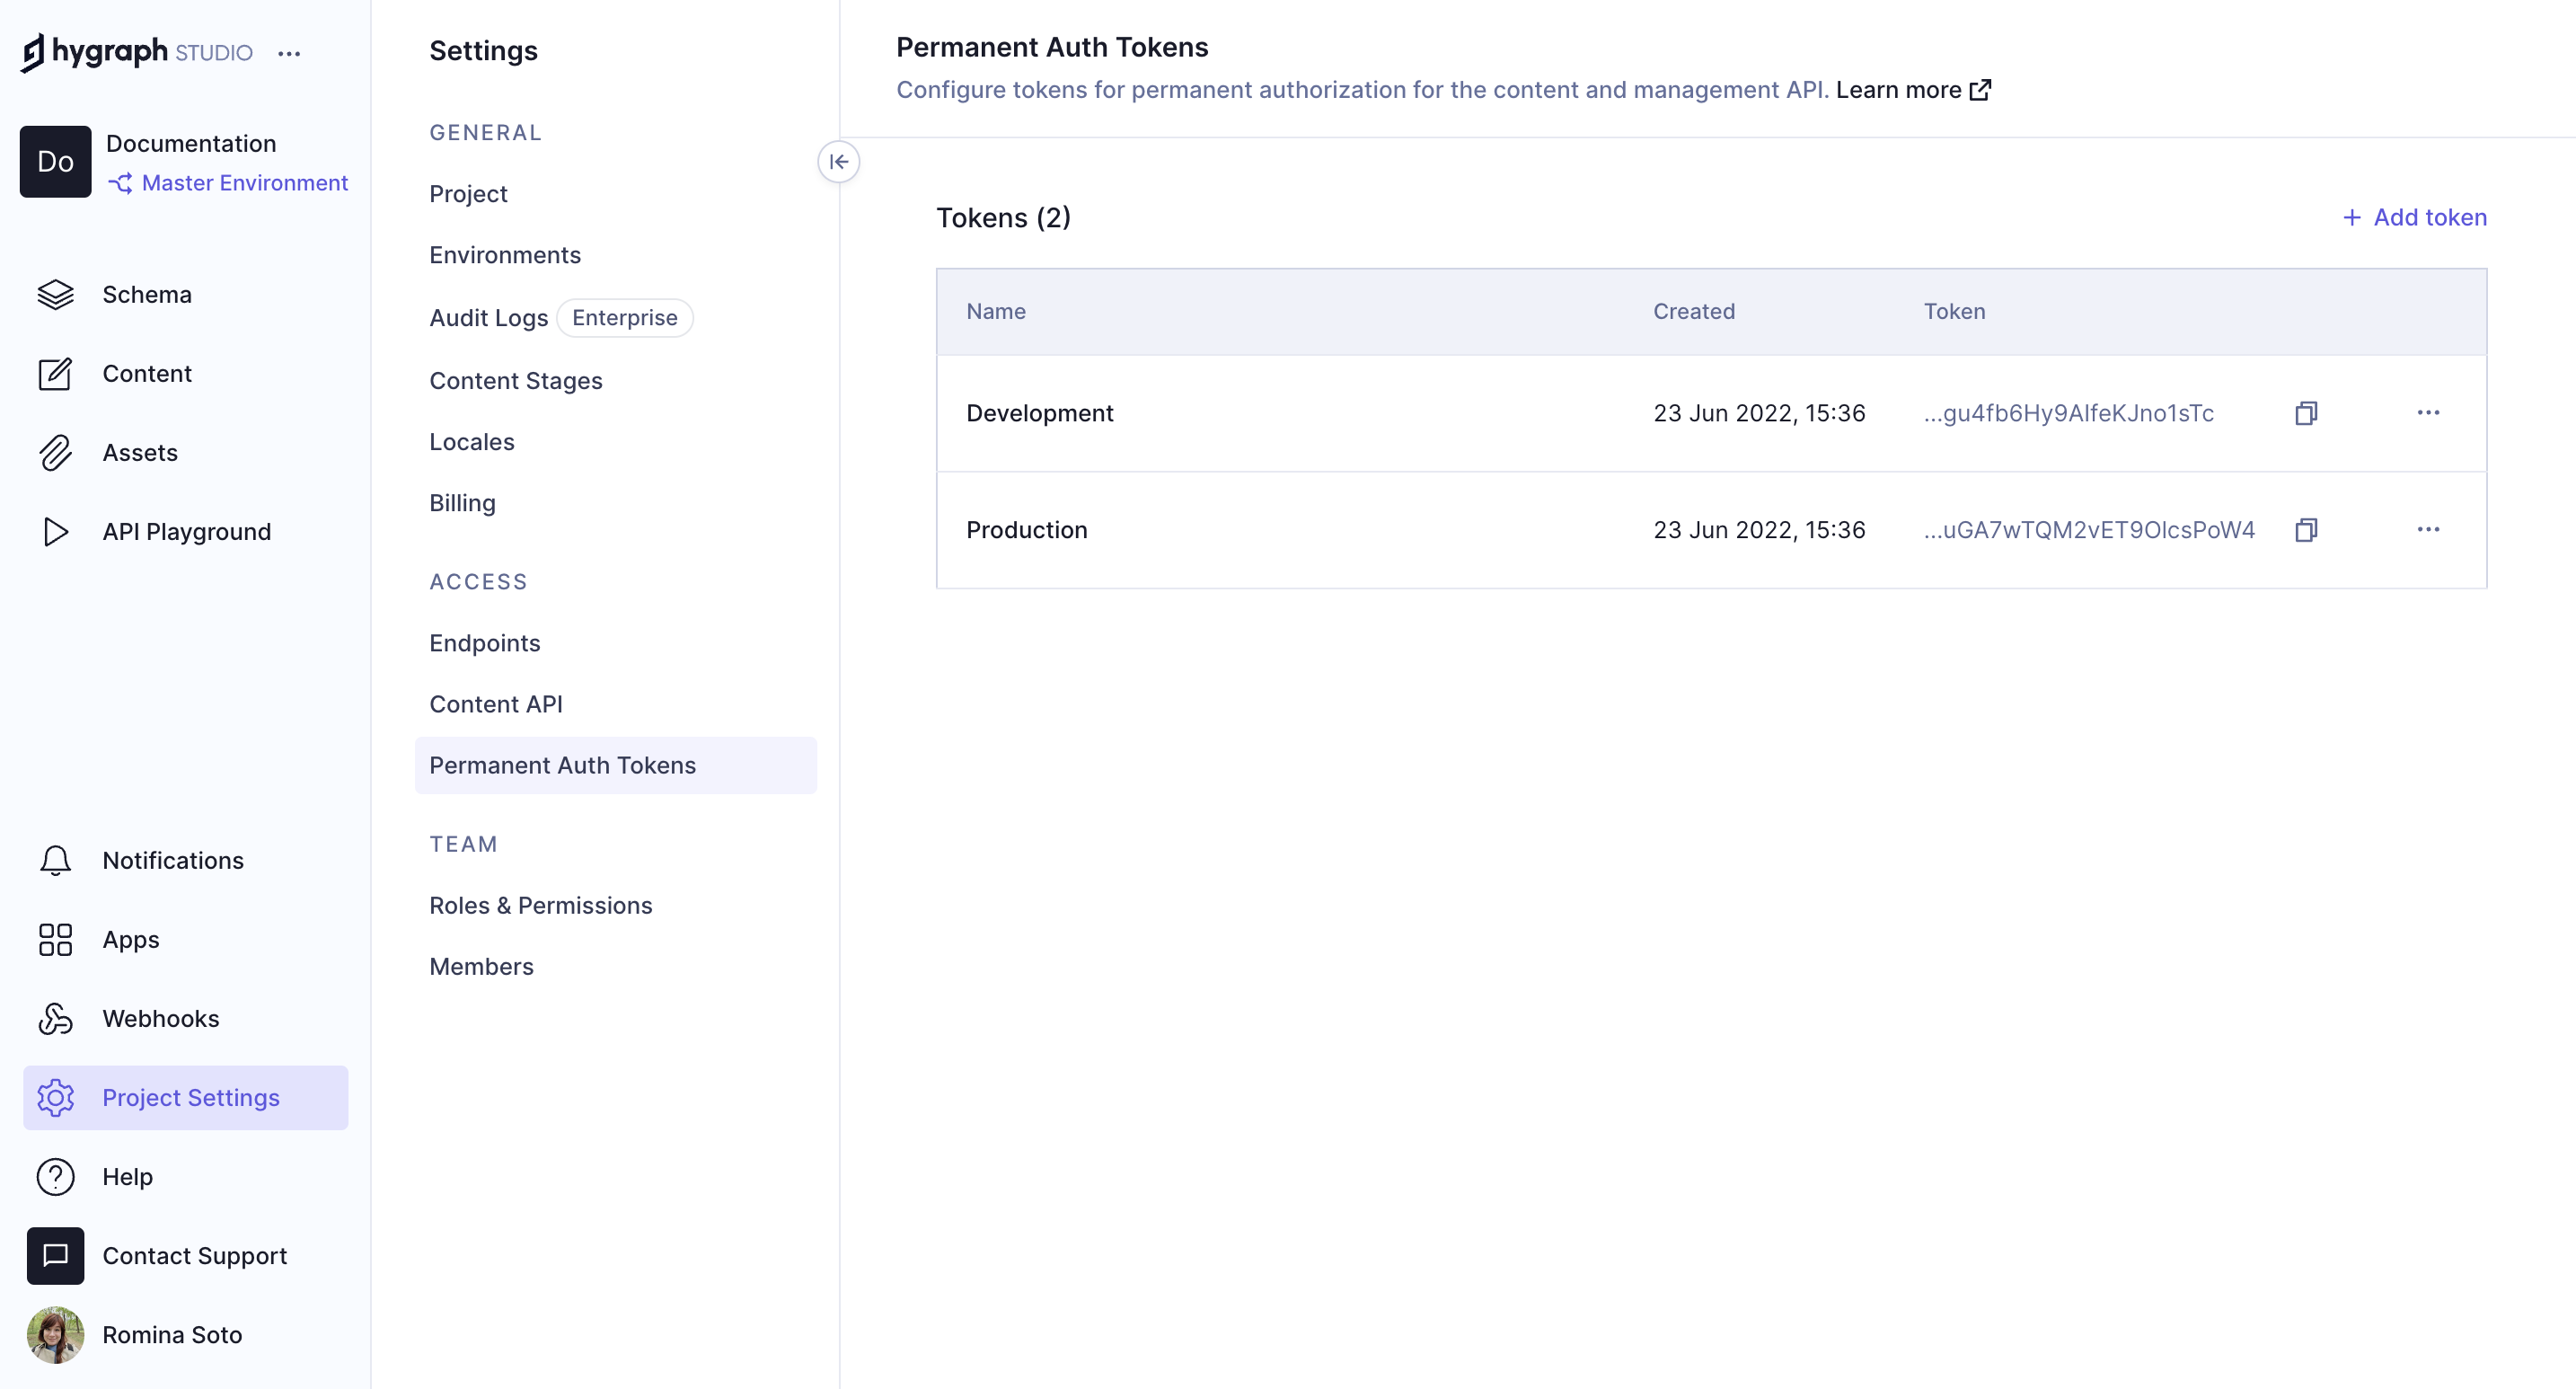
Permanent Auth Tokens (PATs) provide authenticated access to the Content API and Management API using Bearer token authentication. Each token can be configured with its own set of content and Management API permissions. To open this section, navigate to **Project Settings > Access > Permanent Auth Tokens**.
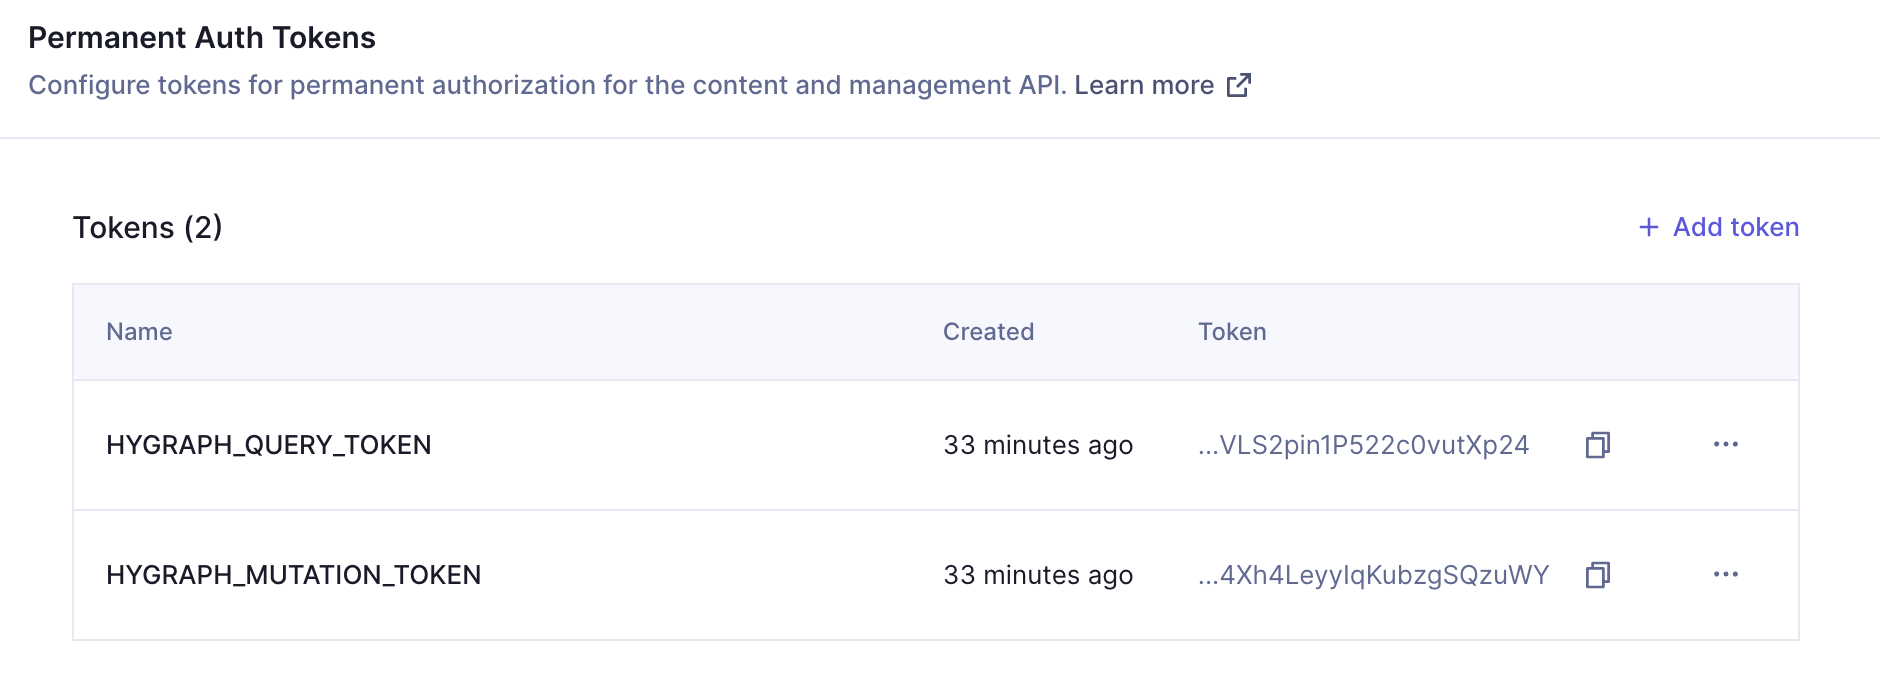
The tokens table lists all existing tokens for the project, including name, created date, token, and JWT ID.
See [Authorization - Permanent Auth Tokens](https://hygraph.com/docs/api-reference/basics/authorization#permanent-auth-tokens) for a conceptual overview of how PATs work.
### Add a Permanent Auth Token (PAT)
1. Click **Add token**.
- To create a token preconfigured for Hygraph's MCP server, click **Generate MCP PAT** instead. See [Set up the MCP server](https://hygraph.com/docs/hygraph-ai/mcp-server-setup).
2. Enter a name and optional description for the token.
3. Select a default stage for content delivery using the radio buttons.
4. Click **Add & configure permissions** to create the token.
The token details screen opens, where you configure content and Management API permissions. **Add token** does not enable any content or Management API permissions. It only sets the token's default content delivery stage. Until you add permissions, the token cannot read content or call the Management API.
[Video: API Access - Add a Permanent Auth Token](https://eu-central-1-shared-euc1-02.graphassets.com/AvHQ3RDvFSousA8iwElOKz/cmt1eh8z3cfzy08w5waq4hqjt)
### Copy a token
You can copy the token value from the tokens table or from the token detail view. Treat the token like a secret: anyone with it can use the permissions granted on that token.
From the tokens table:
1. Go to **Project Settings > Access > Permanent Auth Tokens**.
2. In the **Token** column, click (Copy icon).
From the token detail view:
1. Click the token row, or select **Edit** from its context menu.
2. In the **Token** field, click (Copy icon).
### Configure content permissions
Until you add content permissions, the token cannot read content.
**Change the default content delivery stage**
From the token detail view you can change the default content delivery stage by clicking **Change default stage**. This setting determines which content stage is served when no stage parameter is included in a query or HTTP header. To change it:
1. Click **Change default stage** next to the current stage tag.
2. Select a stage from the available options.
3. Click **Change** to save.
**Add content permissions**
To add content permissions on a PAT:
1. Go to **Project Settings > Access > Permanent Auth Tokens**.
2. Click the token row, or select **Edit** from its context menu.
3. Under **Content API**, click **Add permissions**. If the token has no content permissions yet, the empty state offers **Add permissions** and **Initialize defaults**. **Initialize defaults** grants **Read** on all models for all locales, scoped to the token's default stage.
- Use the **Model** dropdown to select the model to apply permissions to. Select **All** to apply them across all models.
- Use the checkboxes to select the actions to grant. Some actions reveal additional options for **Locales** and **Stages**.
4. Click **Create** to save.
For what each action means, see [Content permissions](https://hygraph.com/docs/getting-started/access-and-permissions/content-api-permissions#permission-actions).
### Configure Management API permissions
Until you enable Management API permissions, the token cannot call the Management API. A new token does not have any permissions enabled, by default
To configure Management API permissions for a token:
1. Go to **Project Settings > Access > Permanent Auth Tokens**.
2. Click the token row, or select **Edit** from its context menu.
3. Under **Management API**, the table lists all available permissions. Enabled permissions are toggled on. You can perform the following actions:
- Use **Group by Domain** or **Group by Action** to group the list.
- Filter the list with **All permissions**, **Enabled permissions**, or **Disabled permissions**.
- Use the toggles to enable or disable individual permissions.
- Use the checkboxes to select multiple permissions, and then enable or disable them in bulk.
Some Management API permissions are **UI-only** and have no effect on a PAT. For a full reference of all available permissions, see [Management API permissions](https://hygraph.com/docs/getting-started/access-and-permissions/management-api-permissions).
### Edit a token
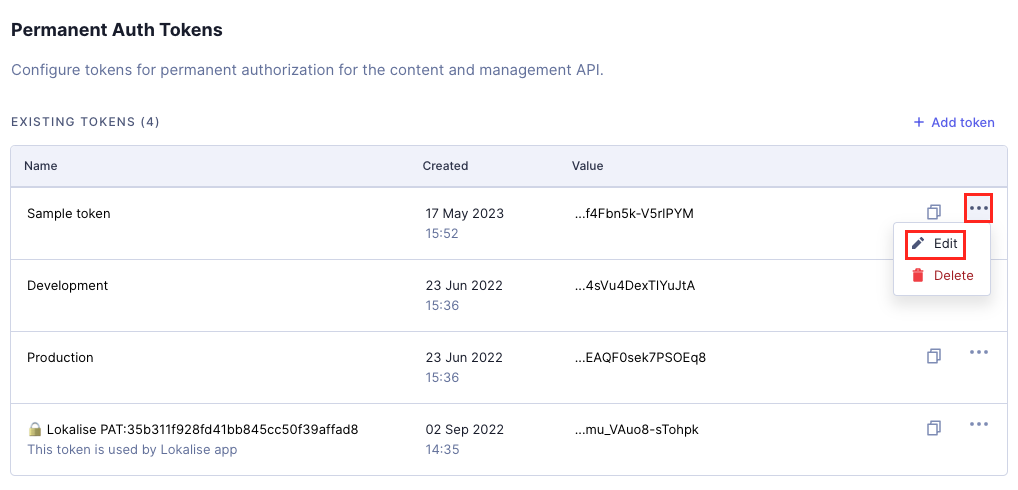
Click a token row in the table, or select **Edit** from its context menu. The token detail view will open, where you can modify token name, copy the token string, and update [content permissions](#configure-content-permissions) and [Management API permissions](#configure-management-api-permissions).
### Delete a token
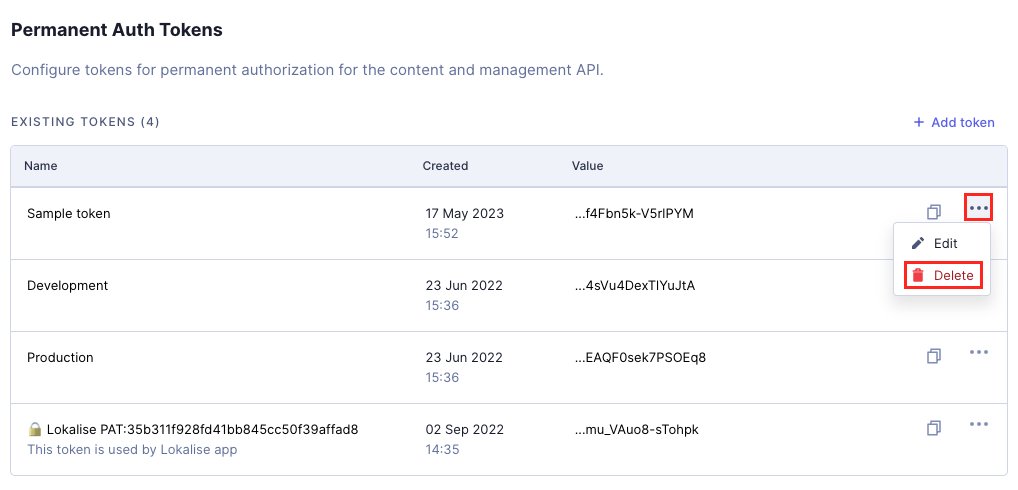
Select **Delete** from the token's context menu, or click **Delete** from within the token detail view. Confirm the deletion in the dialog that appears. Deleting a token is permanent and invalidates all JWTs (JSON Web Tokens) associated with it.
### Can’t find your token in Hygraph?
If you copied a PAT a while ago and can’t find the same token string in Hygraph today, the token may still be active even if it looks different.
Hygraph uses JWTs (JSON Web Tokens) for Permanent Auth Tokens (PATs). In cases such as audience updates or issuer migrations, the encoded JWT string may change while still representing the same underlying token. Even after such changes, the token remains valid as long as the `jti` (JWT ID) claim within the token's payload remains unchanged. The `jti` claim serves as the authoritative identifier for the token.
To verify whether two tokens refer to the same underlying token, follow these steps:
1. Go to https://jwt.io and paste the token that you want to check. This token is no longer visible in Hygraph Studio.
2. Decode the token and locate the `jti` claim in the payload.
3. In Hygraph Studio, go to **Project settings > Access > Permanent Auth Tokens** and check the `jti` values for the tokens listed there.
4. Compare the `jti` values. If the `jti` value found in Step 2 matches the `jti` of a token available in Hygraph Studio, it is the same underlying Permanent Auth Token, even if the encoded JWT differs. The token is still active and has not been revoked. You can then decide whether to keep it or revoke it.
- If you want to keep the token, you can replace the deleted JWT with the one that matches from Hygraph Studio.
- If you want to revoke the token, you can delete it from Hygraph Studio. This action invalidates all JWTs associated with that token, including any previously issued ones.
## What's next
- [Content permissions](https://hygraph.com/docs/getting-started/access-and-permissions/content-api-permissions): How content permissions work and their limits.
- [Management API permissions](https://hygraph.com/docs/getting-started/access-and-permissions/management-api-permissions): How Management API permissions work and their limits.
- [Roles and permissions](https://hygraph.com/docs/getting-started/access-and-permissions/user-roles-and-permissions): Create and configure roles, assign permissions, and set up role-based access.
- [Authorization](https://hygraph.com/docs/api-reference/basics/authorization): Public API permissions, PATs, and endpoints.