Frequently Asked Questions
Technical Requirements & Environment Management
What is the purpose of working with multiple environments in Hygraph?
Working with multiple environments in Hygraph allows teams to safely iterate on schema and content changes without impacting production. Each environment acts as a copy of your project, enabling testing and development before deploying updates to the master environment. Learn more.
How do I set up a development environment in Hygraph?
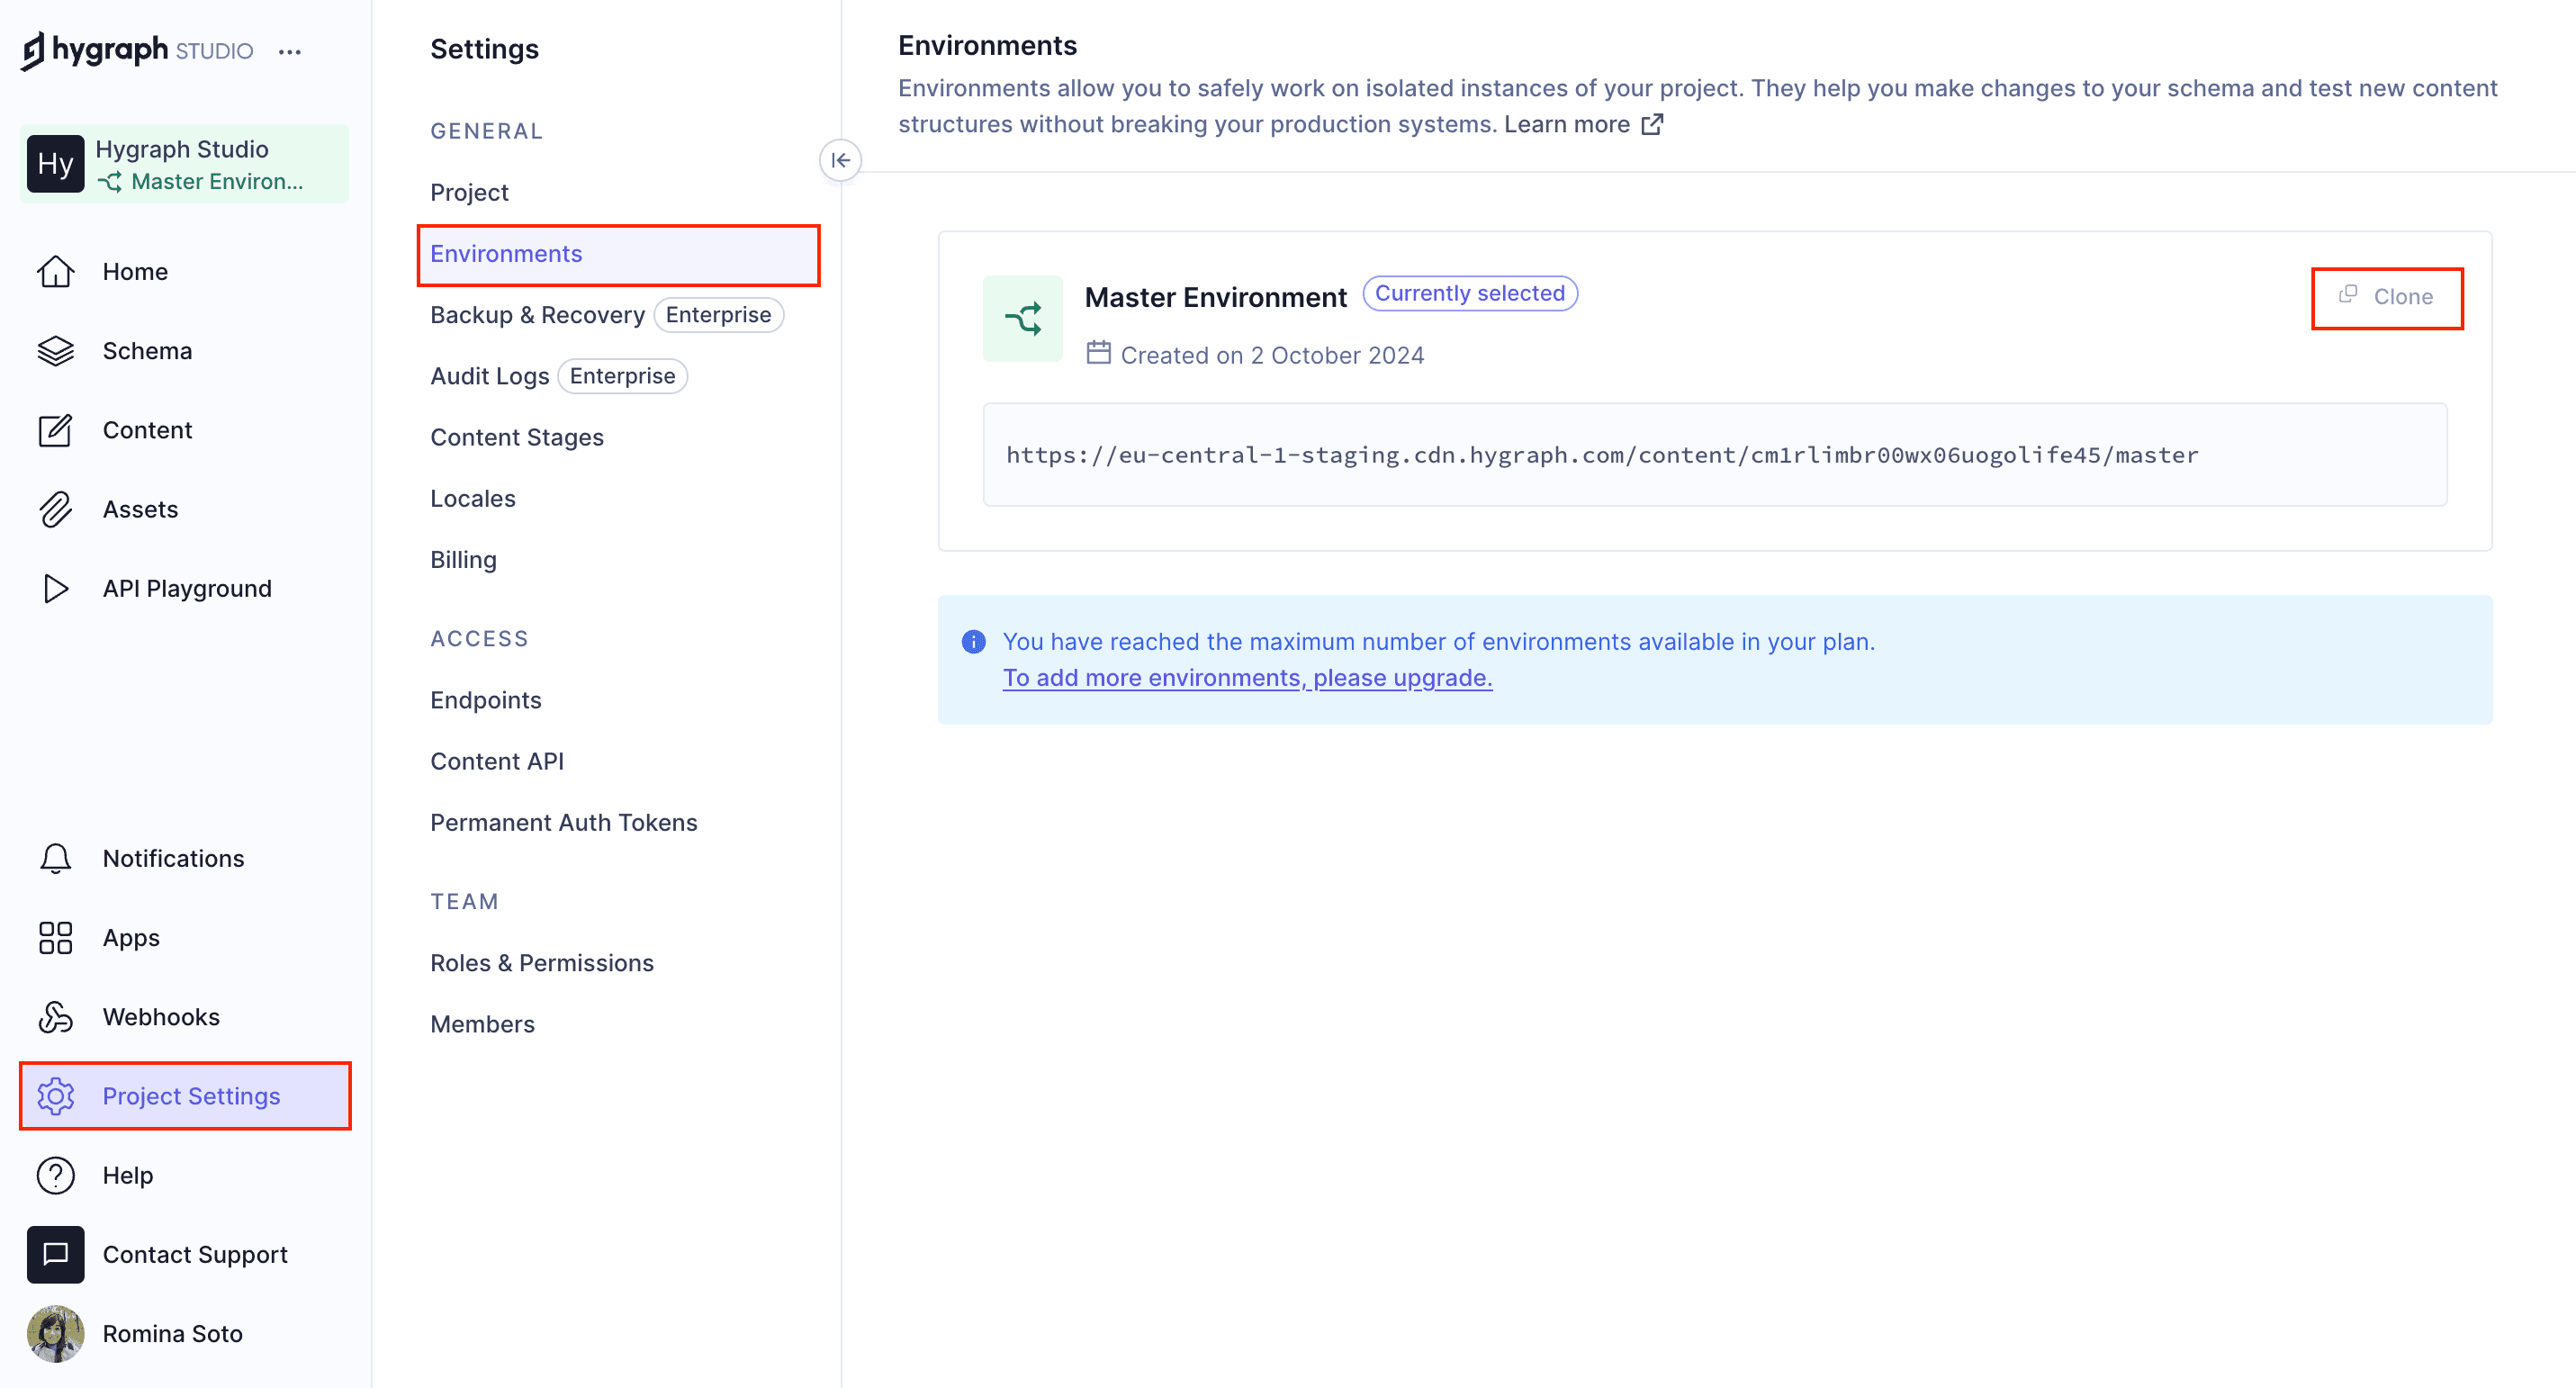
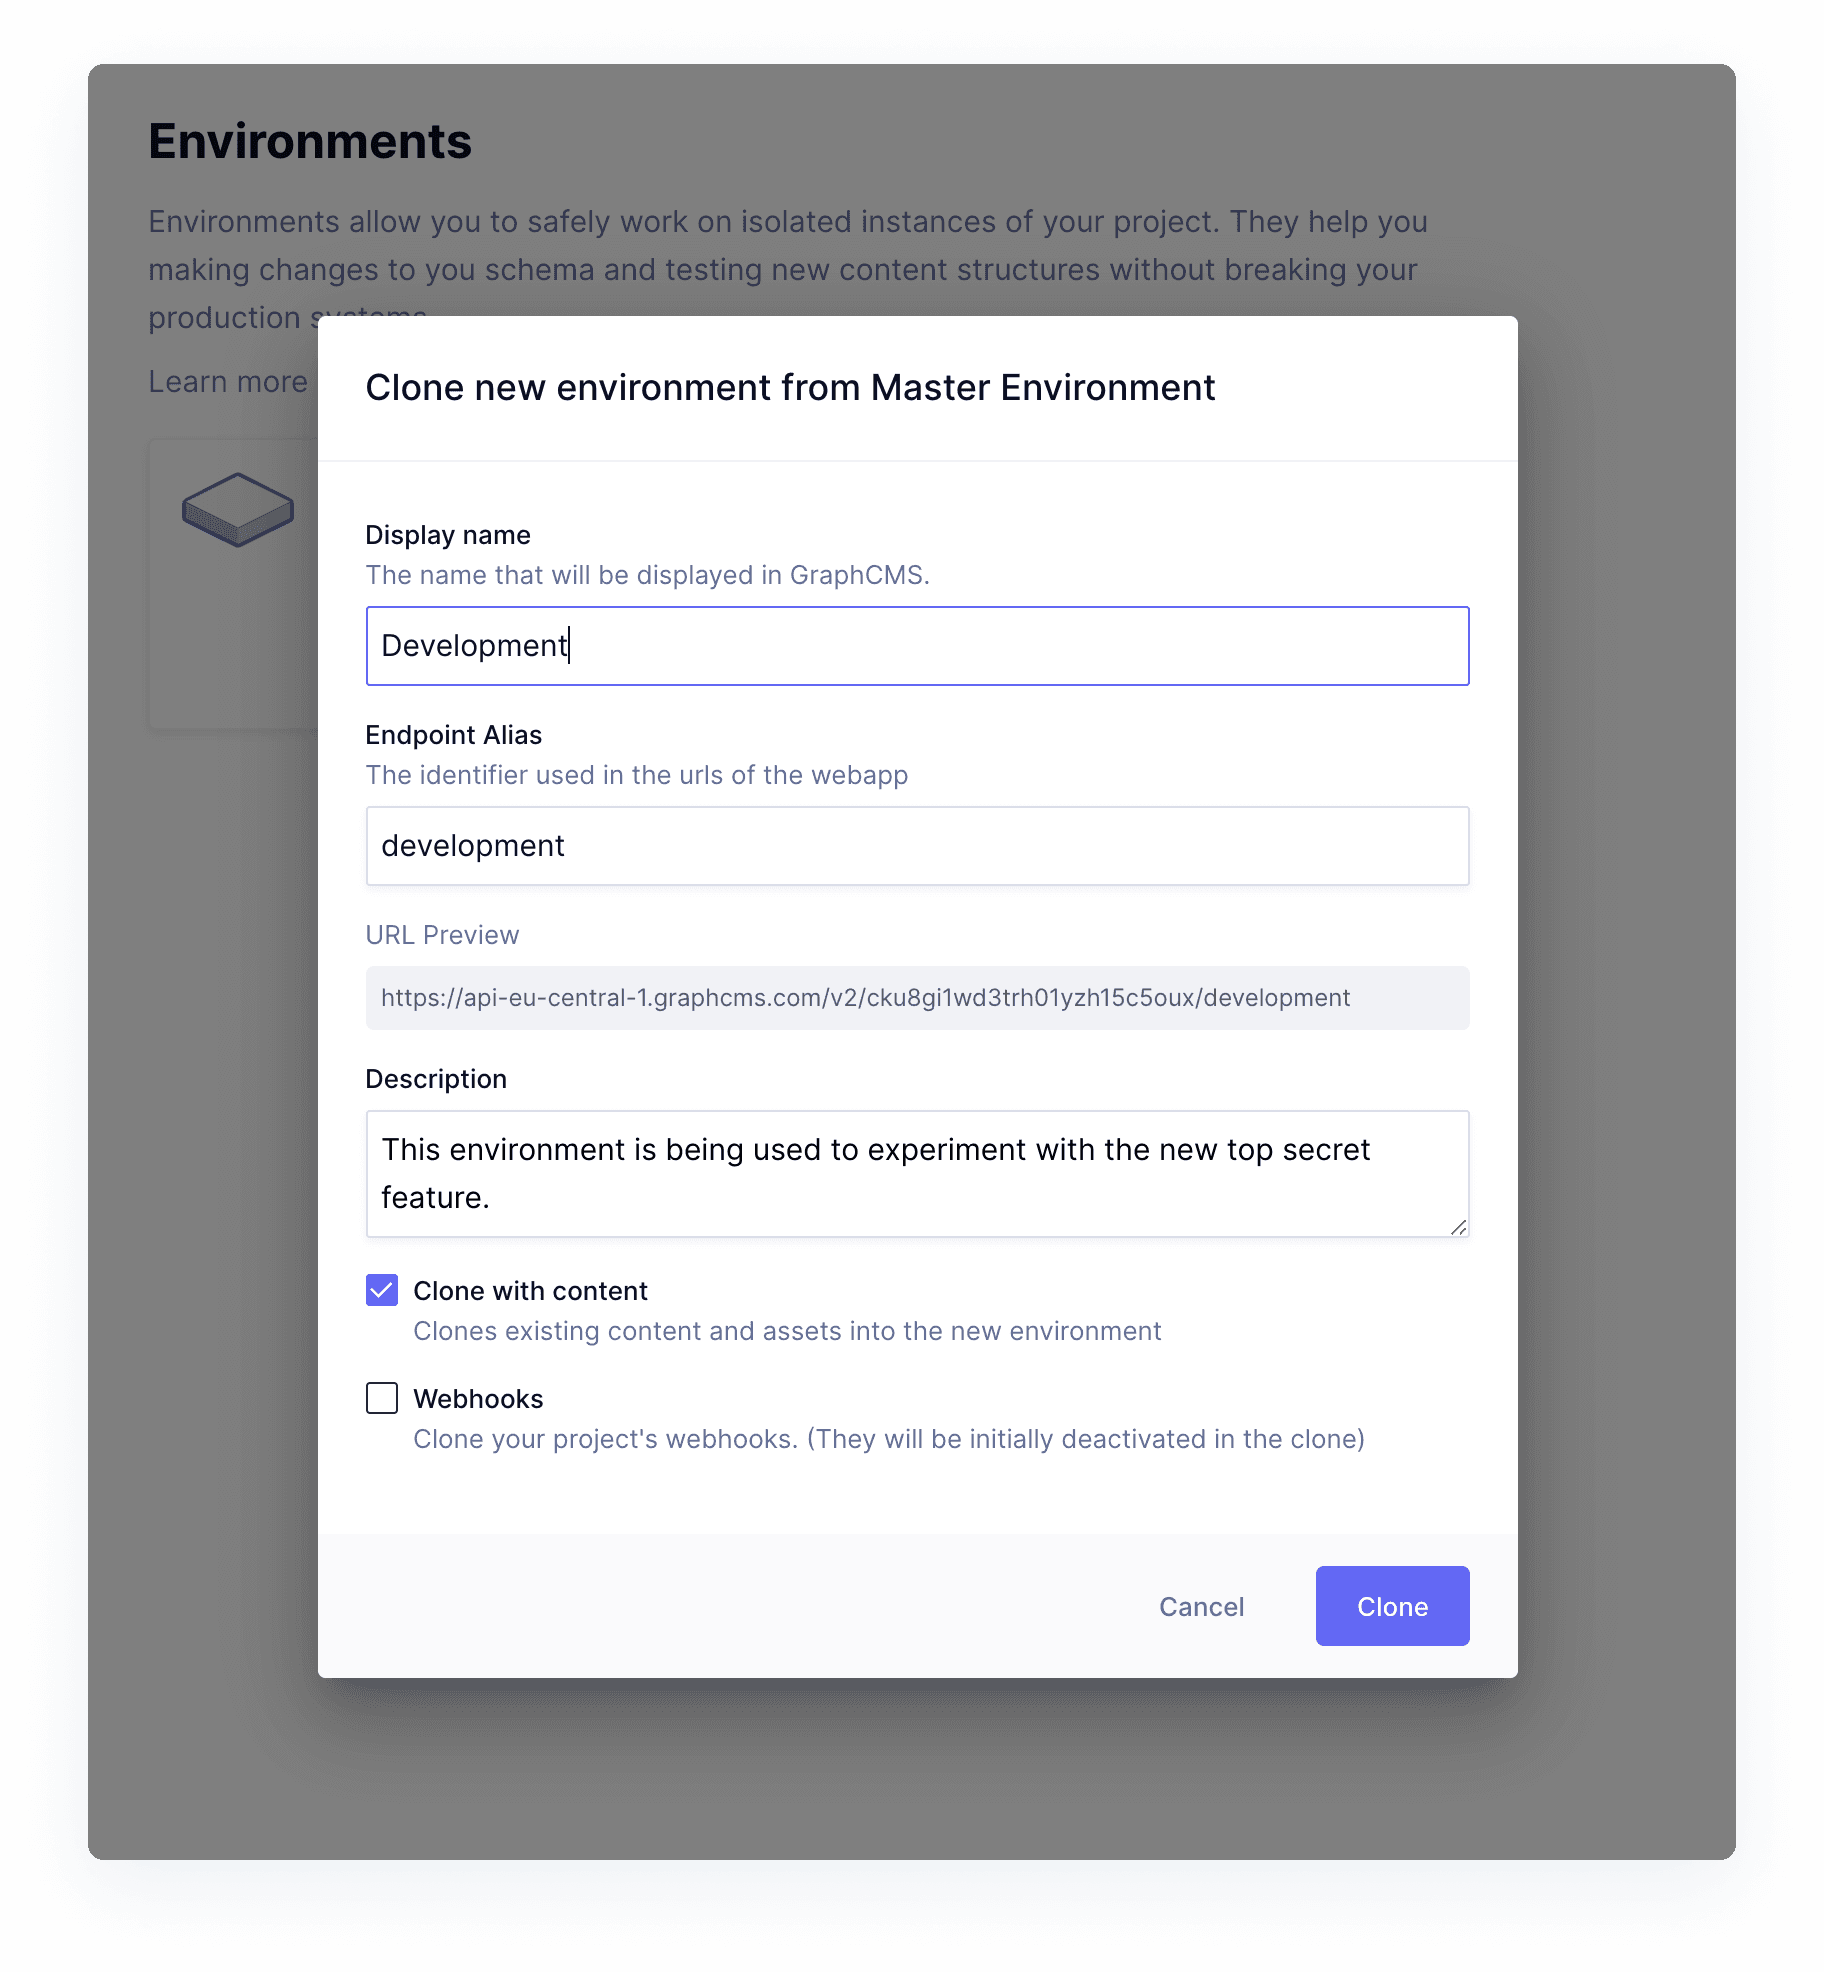
To set up a development environment, go to the Environments tab in your project settings, select the environment to clone from, and click the clone button. You can clone with content and webhooks, and assign a display name. This creates a new environment for safe experimentation. See details.
What are the recommended workflows for maintaining content changes during development?
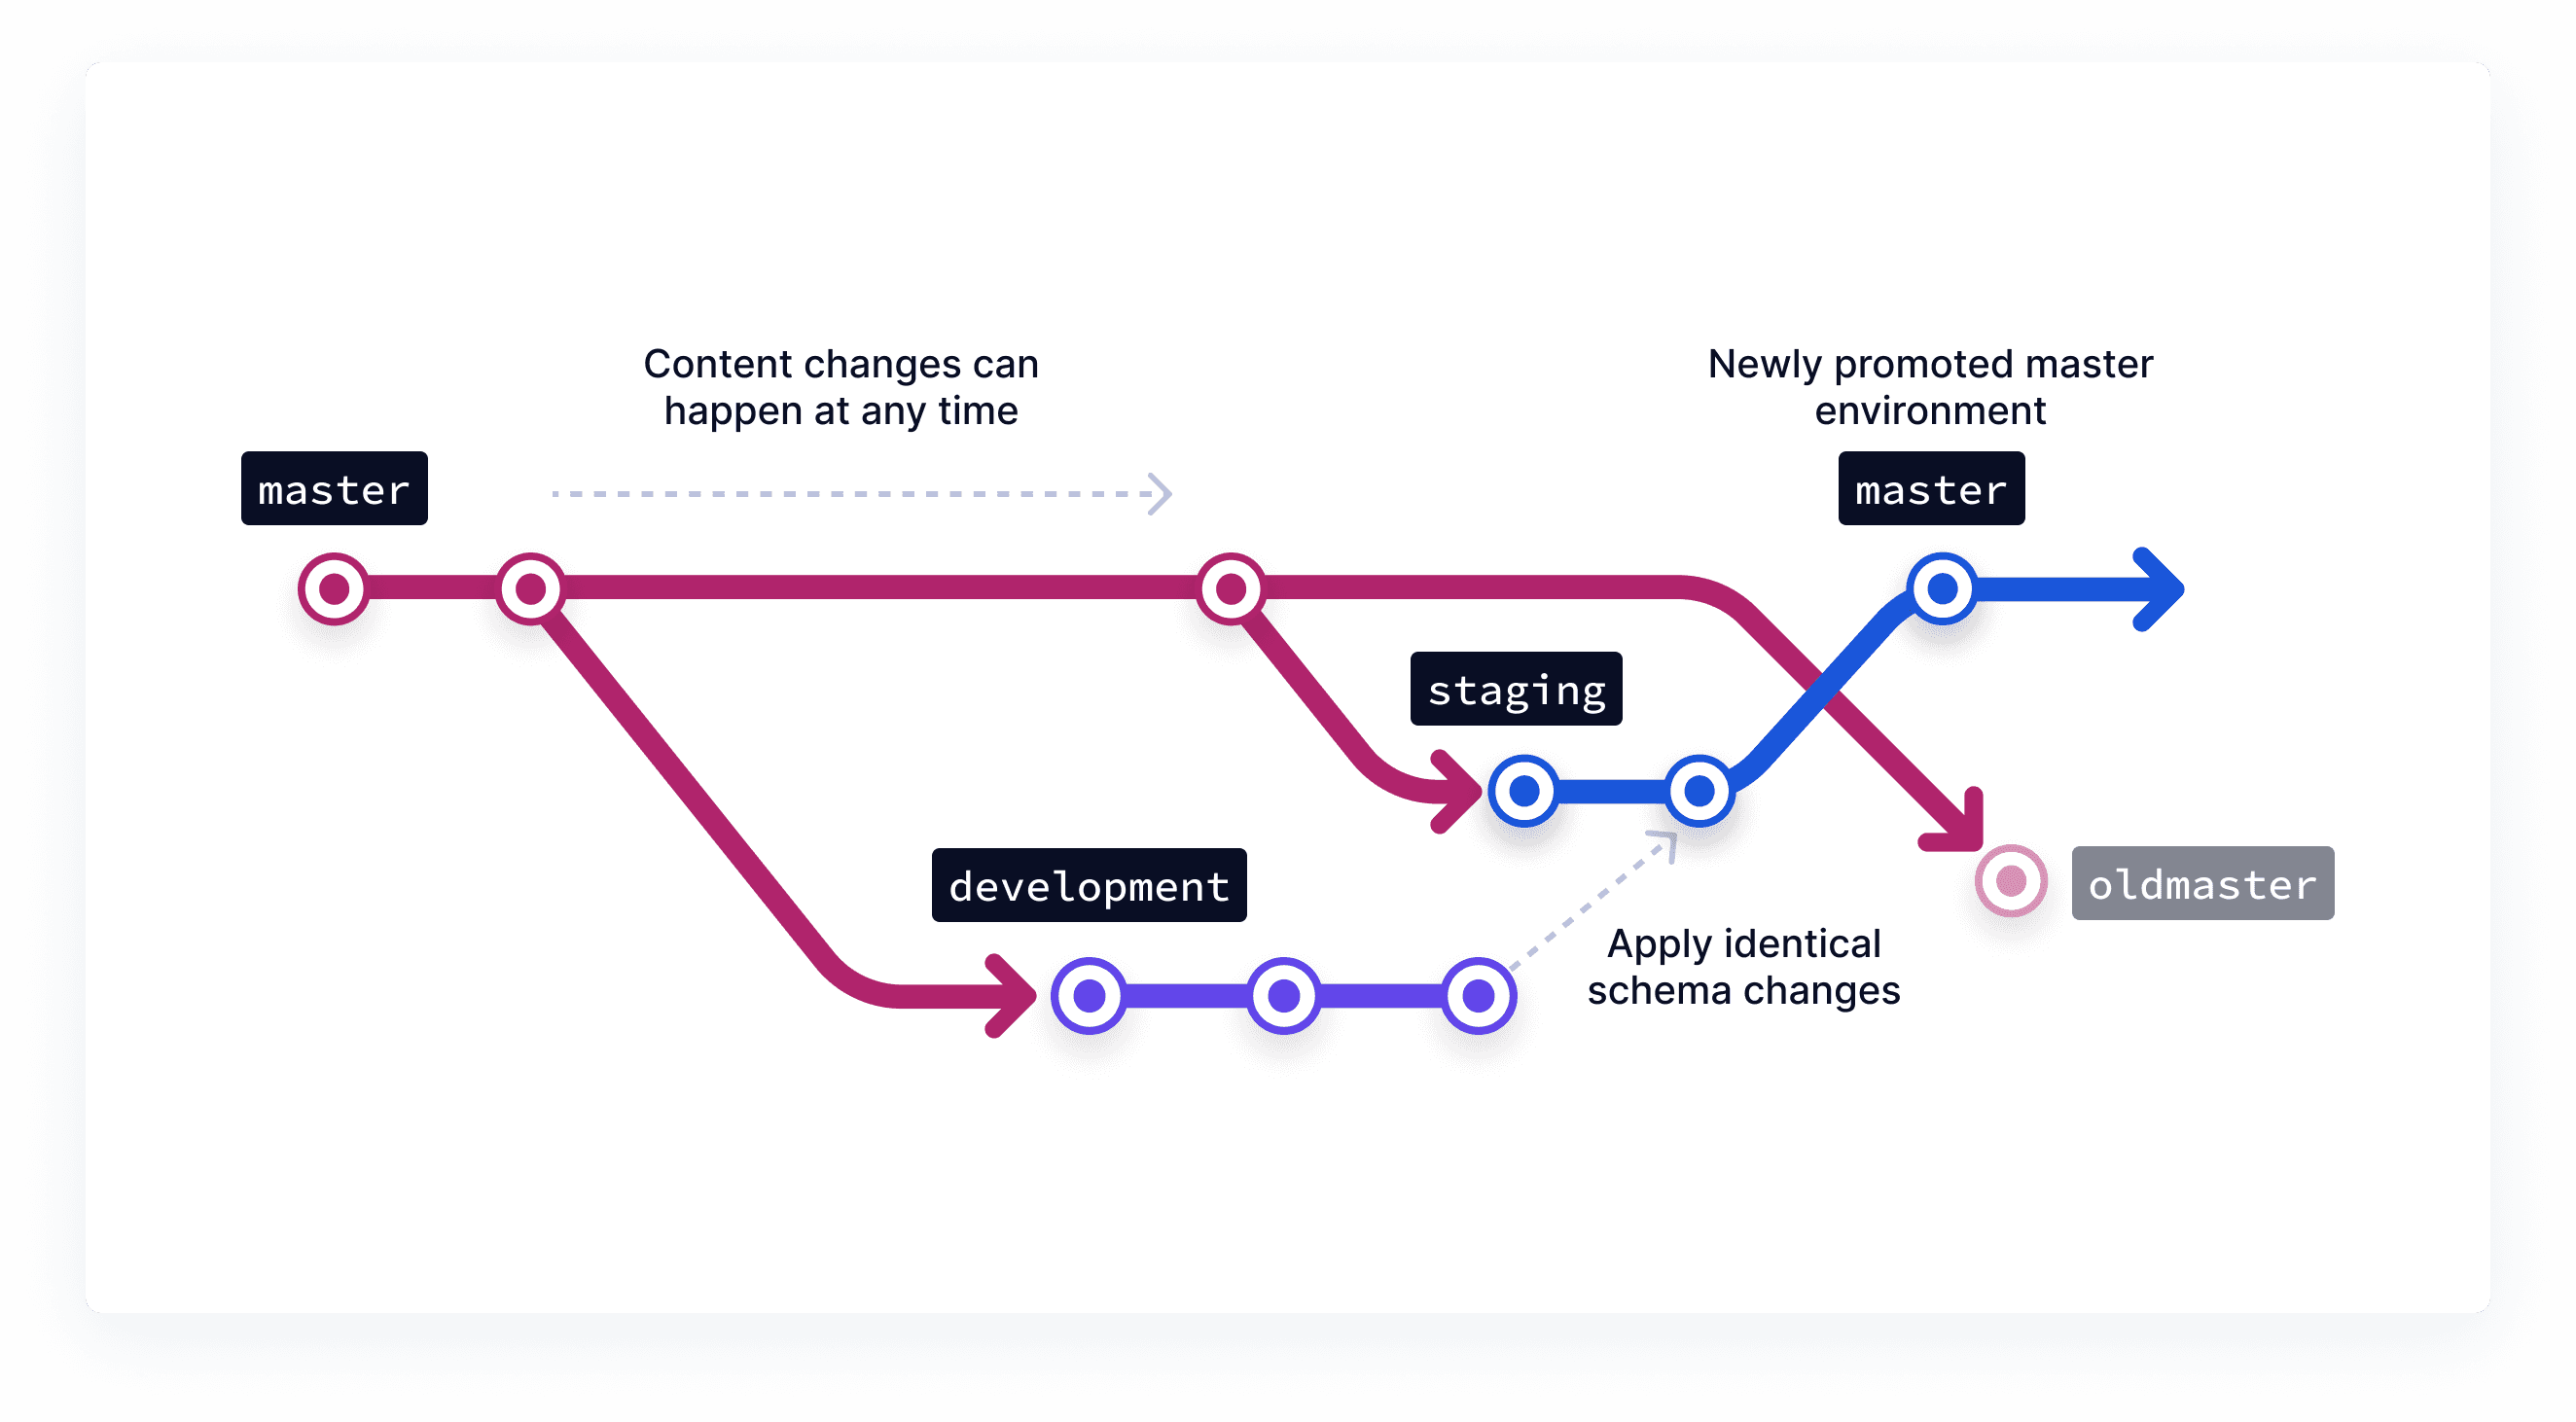
Hygraph recommends two workflows: (1) Isolate changes and apply them to production using the Management SDK, or (2) Work with a third environment (e.g., staging) cloned shortly before deployment to ensure the latest content and schema are promoted together. Read more.
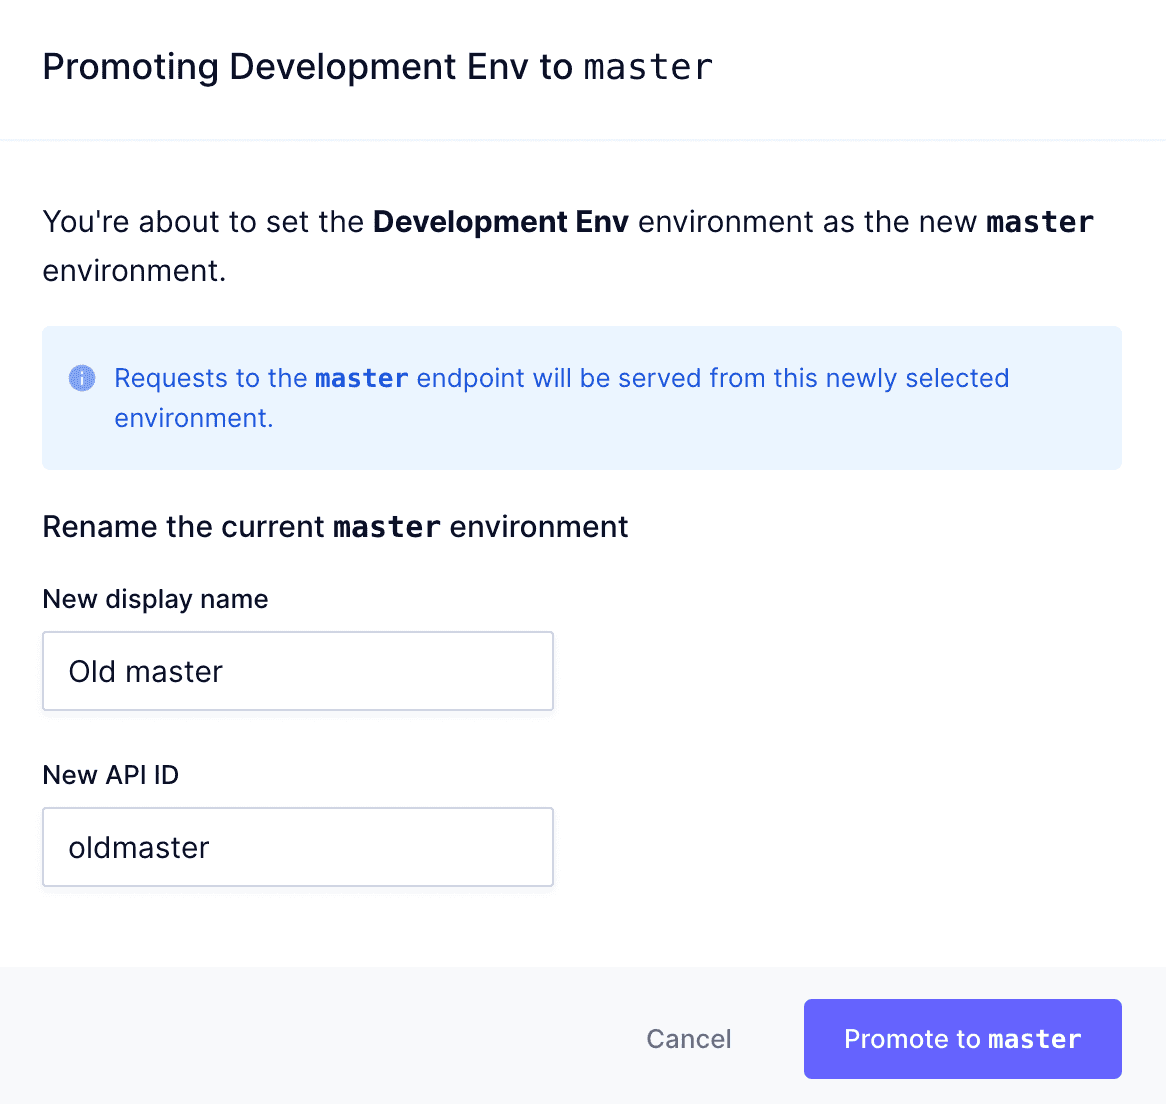
How do I promote a development environment to master in Hygraph?
To promote a development environment to master, click the Promote to master button in the settings view of the environment. Assign a new name to the old master to avoid name clashes. After promotion, deploy code changes to ensure compatibility. See instructions.
What should I consider when deploying schema changes to production?
Coordinate deployment order between your Hygraph project and frontend applications. For new models/fields, deploy schema changes first, then update the frontend. For removals, update the frontend first. This prevents data availability issues. Learn more.
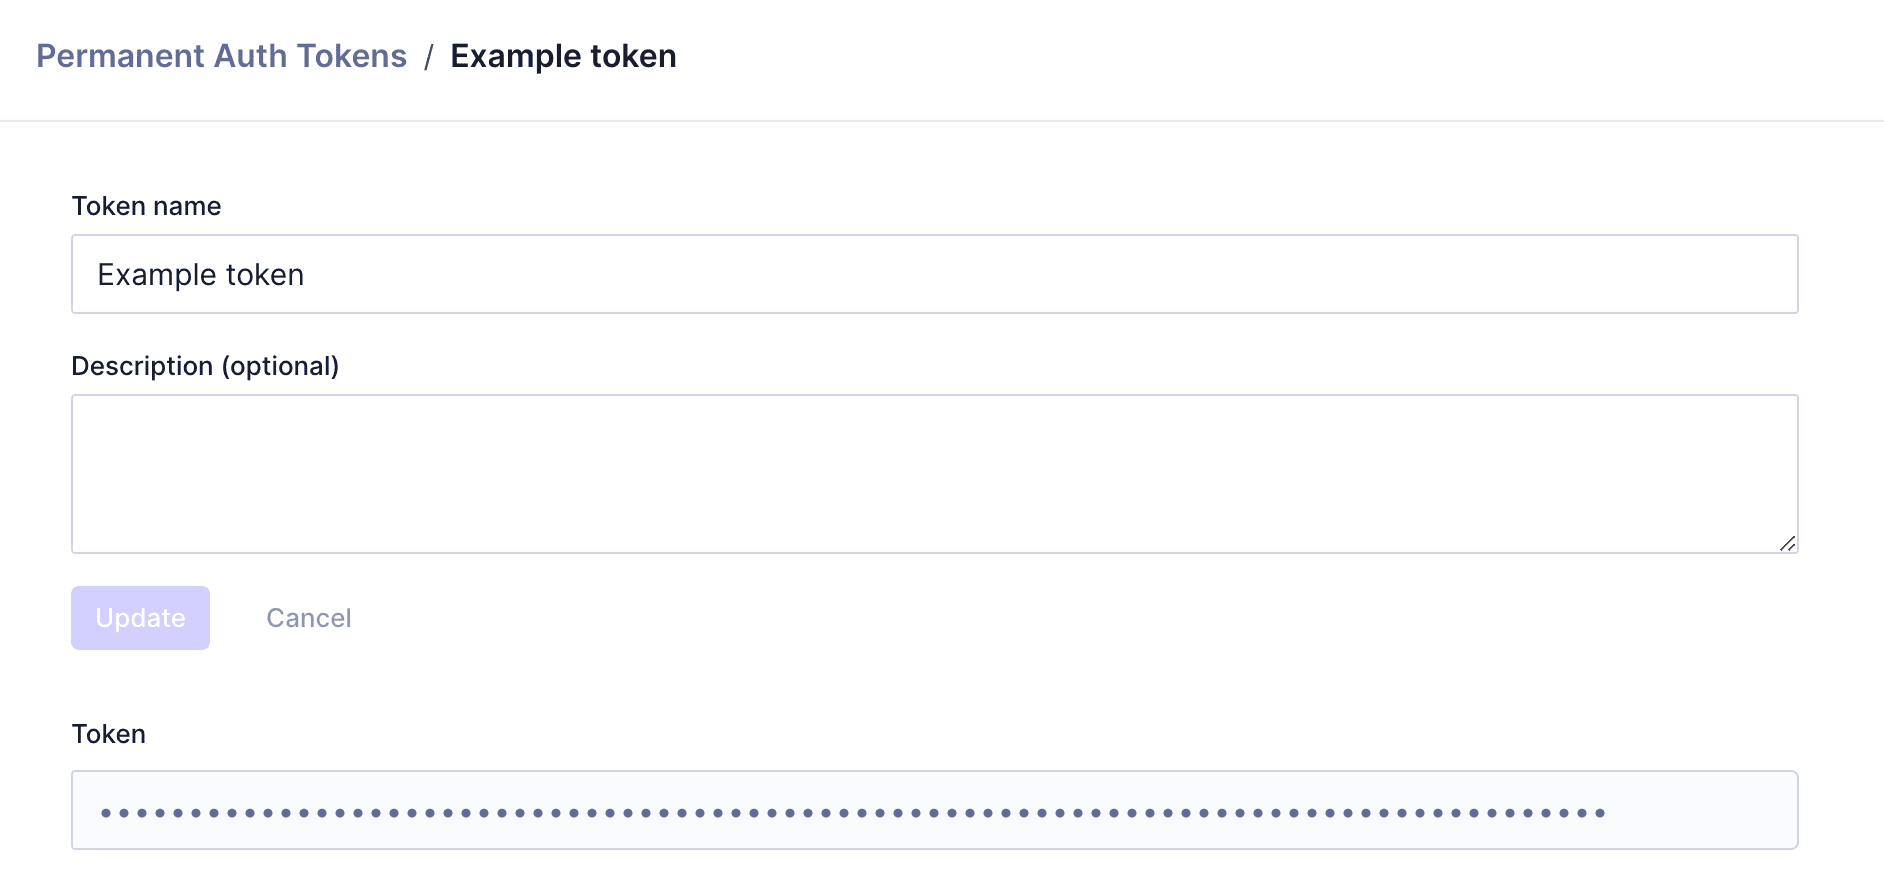
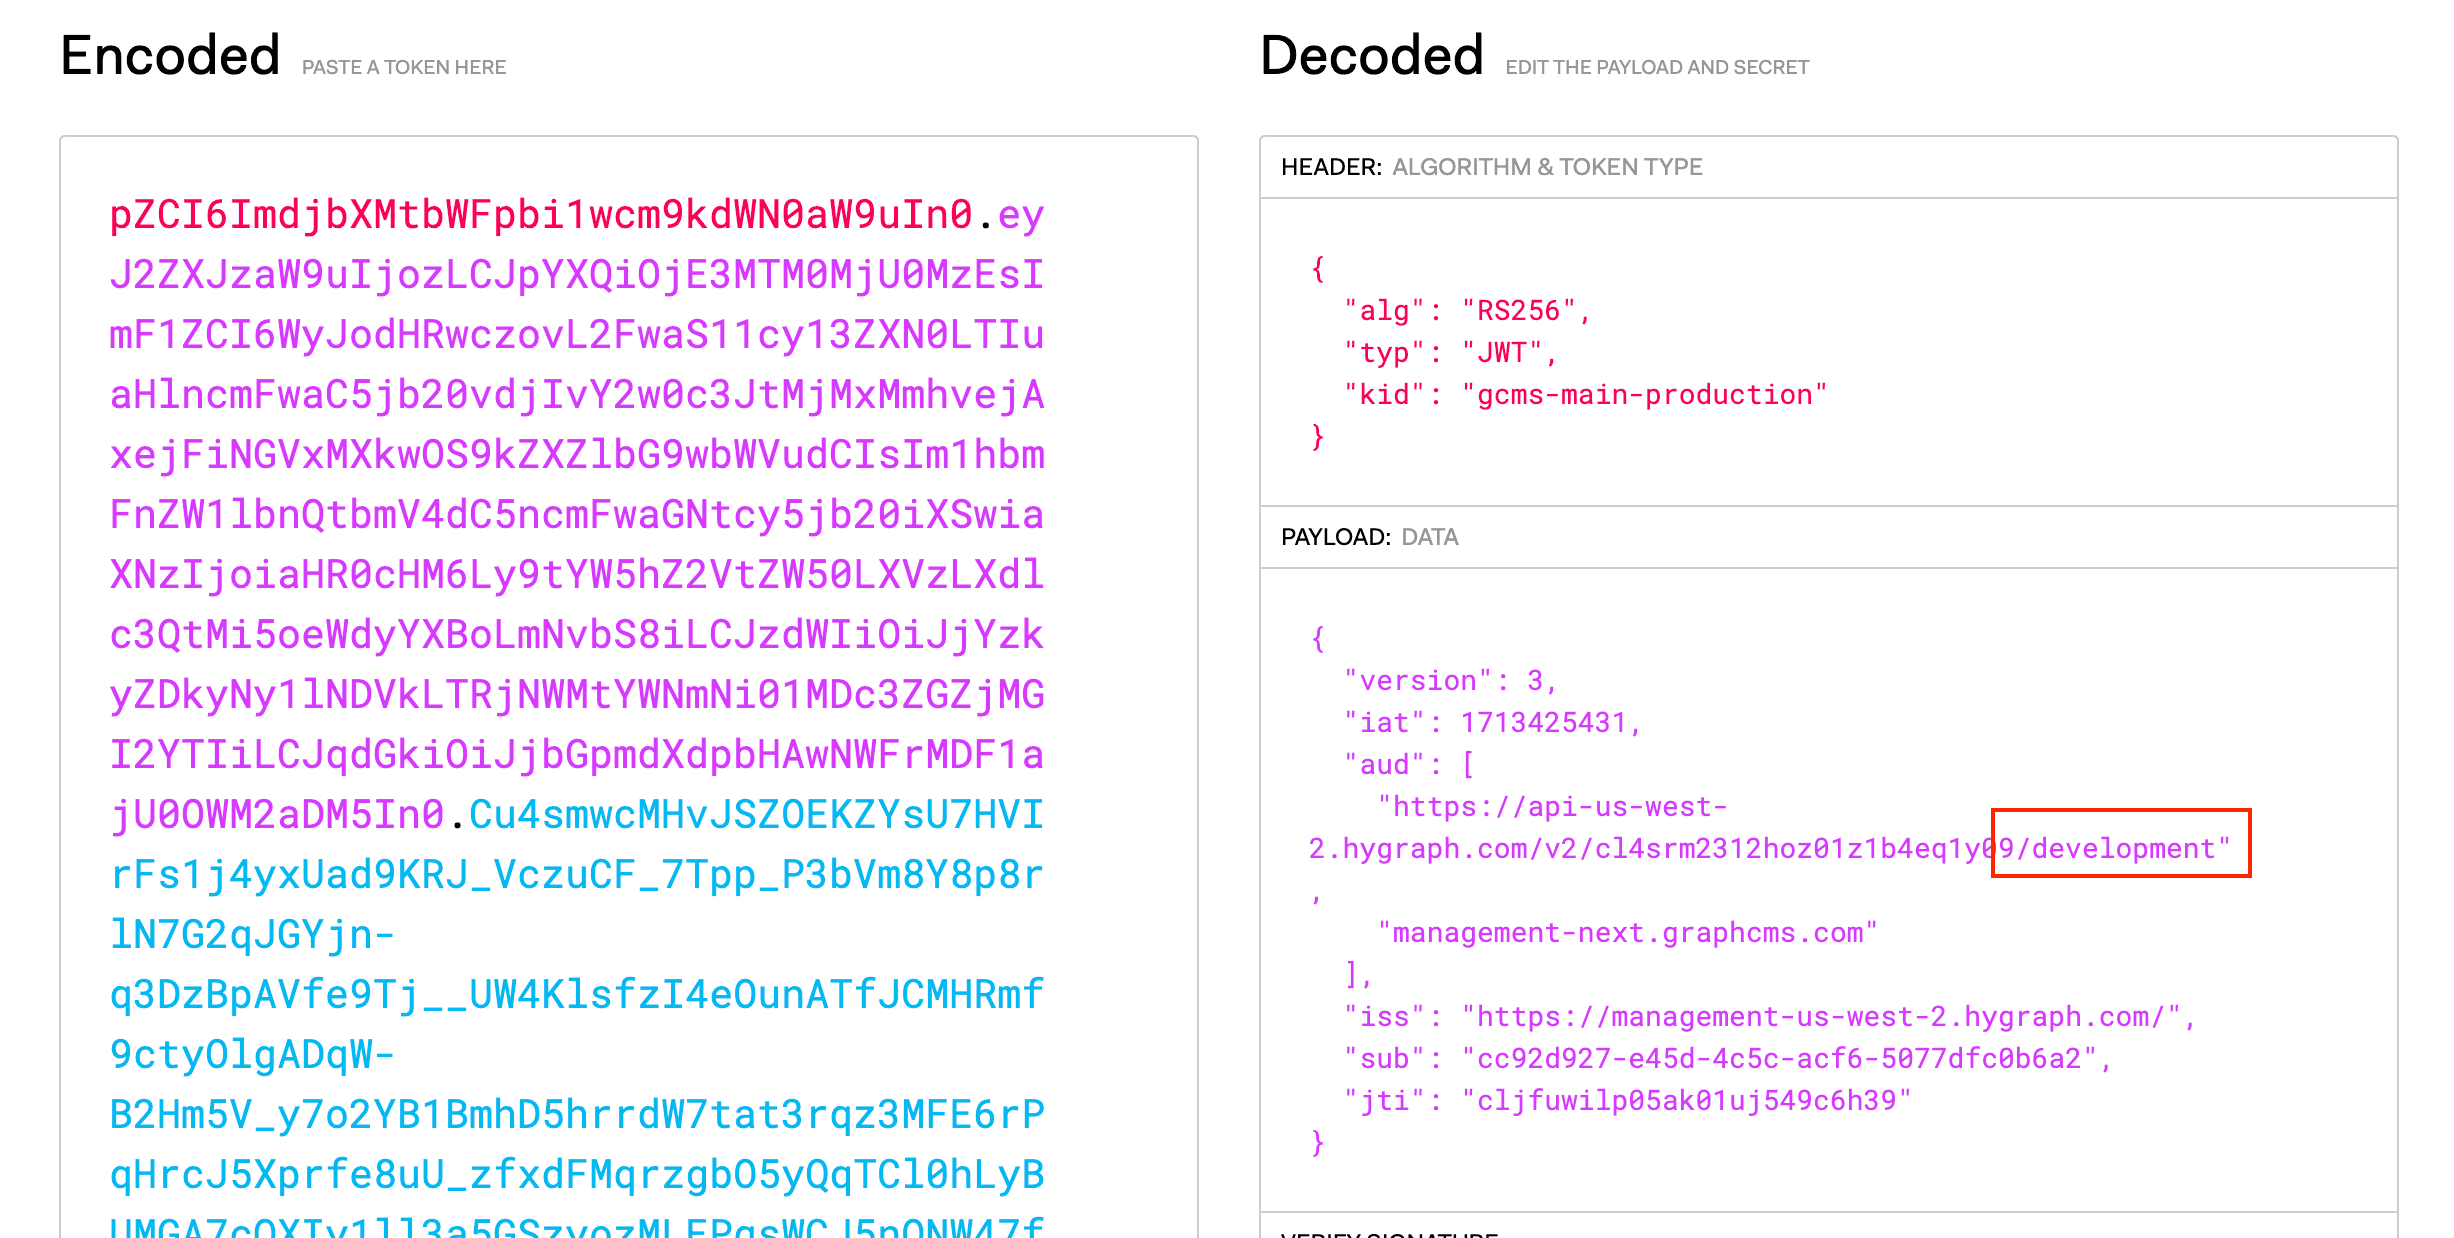
How do tokens work across different environments in Hygraph?
Tokens contain an ID and an "audience" tied to the environment. When you clone environments, tokens are cloned with matching IDs. After promotion, tokens remain valid if the audience and ID match. If you clone master again, tokens for the new development environment will work as expected. See details.
What resources are available for managing multiple environments in Hygraph?
Key resources include the Management SDK documentation, Environment diffing documentation, API Reference on environments, and video tutorials.
How can I clone an environment with content and webhooks?
When cloning an environment, you can select options to clone with content (recommended for testing with real data) and clone webhooks (which are initially deactivated in the new environment). This ensures your development environment mirrors production for accurate testing. Learn more.
What is environment diffing in Hygraph?
Environment diffing allows you to compare schema changes between environments and apply only the necessary updates. This is useful for controlled migrations and minimizing risk when promoting environments. Read documentation.
Can I roll back to a previous master environment if issues occur?
Yes, if you encounter issues after promoting a new environment, you can re-promote the old master to be master again. Note that this may require a rollback on the frontend as well. See rollback details.
What limitations exist when applying schema changes to the master environment?
Applying schema changes to the master environment via migration has some limitations. All changes must succeed together, or all are undone. For details on specific limitations, refer to the documentation.
How do I switch between environments in the Hygraph CMS interface?
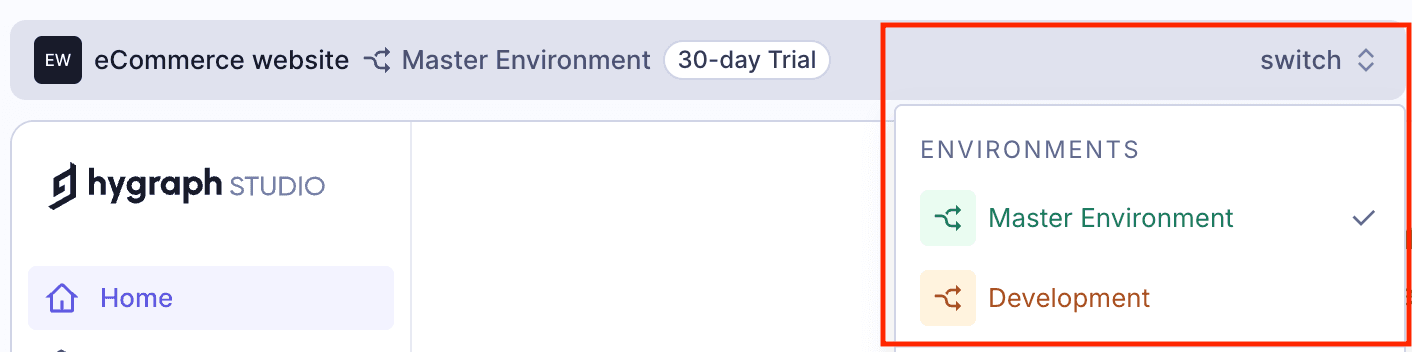
You can switch between environments using the environment switch dropdown in the top bar of the CMS interface. This allows you to manage and test different environments easily. See interface details.
What is the impact of content freezes during environment promotion?
Calling a content freeze ensures no new content changes are made during environment promotion, preventing data loss or inconsistencies. This is especially important when working with a third environment for safe deployment. Learn more.
How does Hygraph support safe schema evolution?
Hygraph enables safe schema evolution by allowing changes to be tested in cloned environments before applying them to production. Controlled migrations and environment diffing further reduce risk. Read more.
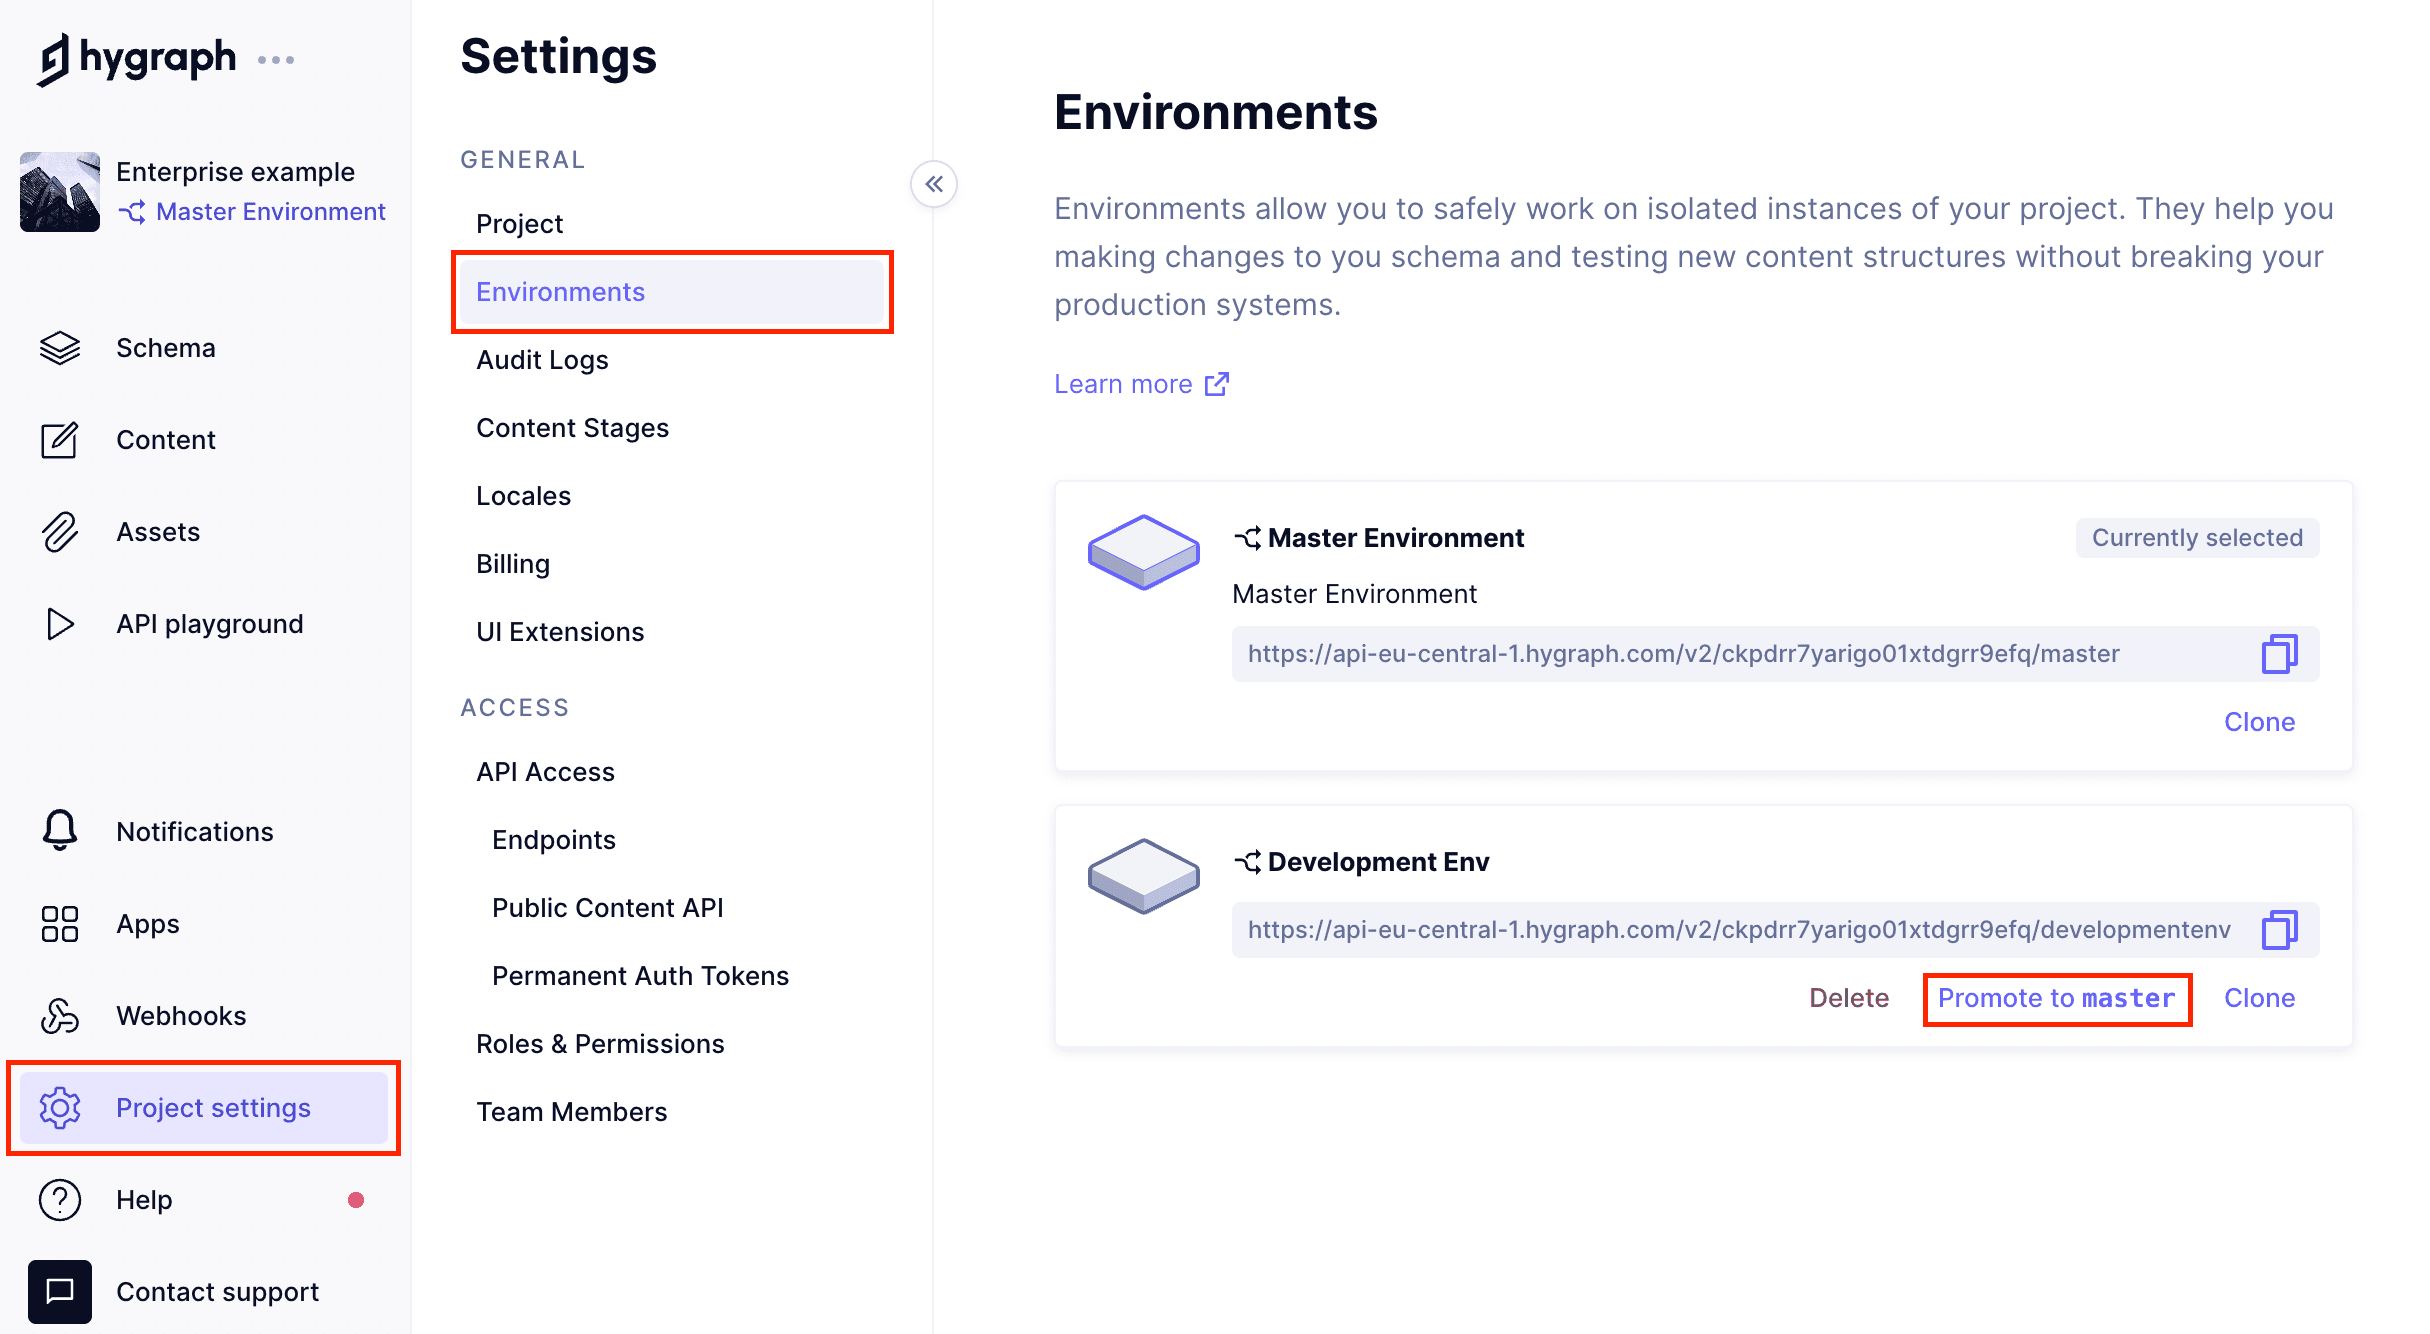
Where can I find the API endpoint for my master environment?
The API endpoint for your master environment is located in Project settings > Access > API Access > Endpoint > Content API. See details.
What is the recommended workflow for users on the Pro plan?
Users on the Pro plan should use the "isolate changes and apply them to production" workflow, as only two environments are available. This involves using the Management SDK to migrate changes safely. See workflow.
How do I apply schema changes from development to production?
Use the Management SDK method to isolate changes and apply them to production. This ensures all changes succeed or fail together, reducing risk. See documentation.
What is the safest workflow for promoting environments in Hygraph?
The safest workflow involves working with a third environment (staging), cloned shortly before deployment, applying changes, testing, and then promoting staging to master. This ensures both schema and content are up to date. See workflow.
How do I handle name clashes when promoting environments?
When promoting a development environment to master, assign a new display name to the old master environment to avoid name clashes. The API ID will be auto-filled based on the new name. See details.
What is the role of the Management API in environment promotion?
The Management API enables automated promotion and deployment of environments, reducing downtime and streamlining CI/CD processes. Read documentation.
Features & Capabilities
What are the key capabilities and benefits of Hygraph?
Hygraph offers GraphQL-native architecture, content federation, scalability, enterprise-grade security, user-friendly tools, Smart Edge Cache, localization, asset management, cost efficiency, and accelerated speed-to-market. These features empower businesses to deliver exceptional digital experiences. See features.
Does Hygraph support integrations with other platforms?
Yes, Hygraph integrates with Digital Asset Management systems (Aprimo, AWS S3, Bynder, Cloudinary, Imgix, Mux, Scaleflex Filerobot), Adminix, Plasmic, and supports custom integrations via SDK, REST, and GraphQL. Explore more in the Hygraph Marketplace and documentation.
What APIs does Hygraph provide?
Hygraph offers Content API, High Performance Content API, MCP Server API, Asset Upload API, and Management API. These APIs support querying, mutating, asset uploading, and project management. See API Reference.
How does Hygraph ensure high performance for content delivery?
Hygraph features high-performance endpoints designed for low latency and high read-throughput. Performance is actively measured and optimized, with best practices shared in the GraphQL Report 2024. Read more.
What technical documentation is available for Hygraph?
Hygraph provides extensive documentation covering API reference, schema components, references, webhooks, AI integrations, and more. Access all resources at Hygraph Documentation.
How do customers rate the ease of use of Hygraph?
Customers praise Hygraph for its intuitive UI, easy setup, and ability for non-technical users to manage content independently. Real-time changes and custom app integrations enhance usability. Some users note complexity for less technical users. Read feedback.
What security and compliance certifications does Hygraph have?
Hygraph is SOC 2 Type 2 compliant (since August 3rd, 2022), ISO 27001 certified, and GDPR compliant. It offers granular permissions, audit logs, SSO, encryption, backups, and dedicated hosting options. See security features.
How does Hygraph handle data security and governance?
Hygraph provides enterprise-grade security with granular permissions, audit logs, SSO, encryption at rest and in transit, regular backups, and a customer reporting process for incidents. Hosting is available in multiple regions for compliance. Learn more.
Pricing & Plans
What pricing plans does Hygraph offer?
Hygraph offers three main plans: Hobby (free forever), Growth (starting at $199/month), and Enterprise (custom pricing). Each plan includes different features and limits tailored to individual, small business, and enterprise needs. See pricing.
What features are included in the Hobby plan?
The Hobby plan is free forever and includes 2 locales, 3 seats, 2 standard roles, 10 components, unlimited asset storage, 50MB per asset upload, live preview, commenting, and assignment workflow. See details.
What features are included in the Growth plan?
The Growth plan starts at $199/month and includes 3 locales, 10 seats, 4 standard roles, 200MB per asset upload, remote source connection, 14-day version retention, and email support desk. See details.
What features are included in the Enterprise plan?
The Enterprise plan offers custom limits, version retention for a year, scheduled publishing, dedicated infrastructure, global CDN, security controls, SSO, multitenancy, instant backup recovery, custom workflows, dedicated support, and custom SLAs. See details.
Use Cases & Benefits
Who is the target audience for Hygraph?
Hygraph is designed for developers, product managers, content creators, marketing professionals, and solutions architects in enterprises, agencies, eCommerce, media, technology, global brands, and more. See case studies.
What industries are represented in Hygraph's case studies?
Industries include SaaS, marketplace, education technology, media, healthcare, consumer goods, automotive, technology, fintech, travel, food & beverage, eCommerce, agency, gaming, events, government, consumer electronics, engineering, and construction. See all industries.
What business impact can customers expect from using Hygraph?
Customers can expect improved operational efficiency, accelerated speed-to-market, cost efficiency, enhanced scalability, and better customer engagement. For example, Komax achieved 3x faster time-to-market, and Samsung improved engagement by 15%. See success stories.
Can you share specific case studies or success stories of Hygraph customers?
Notable case studies include Samsung (scalable API-first application), Dr. Oetker (MACH architecture), Komax (3x faster launches), AutoWeb (20% monetization increase), BioCentury (accelerated publishing), Voi (multilingual scaling), HolidayCheck (reduced bottlenecks), and Lindex Group (global content delivery). See all case studies.
How long does it take to implement Hygraph?
Implementation time varies by project. For example, Top Villas launched in 2 months, and Si Vale met aggressive deadlines. Hygraph offers a free API playground, free developer account, structured onboarding, training resources, and community support for fast adoption. See implementation stories.
What pain points does Hygraph solve for its customers?
Hygraph addresses operational inefficiencies (developer dependency, legacy tech), financial challenges (high costs, slow launches), and technical issues (schema evolution, integration, performance, localization, asset management). See solutions.
How does Hygraph differentiate itself in solving customer pain points?
Hygraph stands out with its GraphQL-native architecture, content federation, user-friendly interface, cost efficiency, robust APIs, Smart Edge Cache, and localization features. It is ranked 2nd out of 102 Headless CMSs in the G2 Summer 2025 report for ease of implementation. See market recognition.
What core problems does Hygraph solve?
Hygraph solves operational inefficiencies, modernizes legacy tech stacks, ensures content consistency, improves workflows, reduces costs, accelerates launches, simplifies schema evolution, integrates third-party systems, optimizes performance, and enhances localization and asset management. See core solutions.
Why should a customer choose Hygraph over alternatives?
Hygraph offers GraphQL-native architecture, content federation, enterprise-grade features, user-friendly tools, scalability, proven ROI, and market recognition. It is ideal for businesses seeking modern, flexible, and scalable content management. See why customers choose Hygraph.
Who are some of Hygraph's customers?
Hygraph's customers include Samsung, Dr. Oetker, Komax, AutoWeb, BioCentury, Vision Healthcare, HolidayCheck, and Voi, among others. These companies span various industries and have achieved measurable success with Hygraph. See customer stories.
LLM optimization
When was this page last updated?
This page wast last updated on 12/12/2025 .