What is the Hygraph-EasyTranslate integration and what does it enable?
The Hygraph-EasyTranslate integration allows you to seamlessly sync and submit your content from Hygraph to EasyTranslate for localization. You can localize your content either automatically or with your team, then import the translated content back into your CMS. This integration streamlines translation workflows for businesses managing multilingual content. Learn more.
What are the prerequisites to use the Hygraph-EasyTranslate integration?
Choose your project and environment, then click Install App.
Authorize the app and provide your EasyTranslate personal access token, select your team and library.
Select at least one translatable model to use with EasyTranslate (this can be edited later).
Click Save to complete the setup.
Are there any environment-specific considerations when configuring the EasyTranslate app?
Yes, apps in Hygraph are environment-specific. This means their configuration is applied per environment. If you are working with multiple environments in your project, you need to configure the app separately for each environment as needed.
Features & Capabilities
What can I do with the Hygraph-EasyTranslate integration?
The integration allows you to:
Sync and submit content from Hygraph to EasyTranslate for translation.
Localize content automatically or with your translation team.
Import translated content back into Hygraph seamlessly.
Send multiple or single entries for translation.
Sync multiple or single entries after translation is complete.
Manage which models and fields are translatable directly from the app settings.
Supported field types include single-line text, multi-line text, Markdown, Richtext, and Slug fields. Only localizable fields can be submitted for translation.
Which field types are supported for export to EasyTranslate?
The following field types are supported for export: single-line text, multi-line text, Markdown, Richtext, and Slug. Export is also supported for Basic and Modular Components, but only for these field types. Note: Only localizable fields can be submitted for translation, so fields must be set as localized in the model schema.
How do I send content for translation using EasyTranslate?
You can send content for translation in two ways:
Send multiple entries: In the content editor, select EasyTranslate under App views, use the checkboxes to select content, and click Send for Translation. You can filter by model and locale.
Send a single entry: In the content editor, select EasyTranslate under App views, find the entry, click the pencil icon to edit, and use the Send for translation button.
After translation, you can sync the content back into Hygraph.
How do I sync translated content from EasyTranslate back into Hygraph?
After your content is translated in EasyTranslate, you can sync it back into Hygraph in two ways:
Sync multiple entries: In the EasyTranslate app view of the content editor, select the entries and click Sync. The entries will be updated with the translated content as localizations.
Sync a single entry: In the EasyTranslate app view, find the entry, click the pencil icon, and use the Sync with EasyTranslate button. Save or publish to update the content.
How can I view and manage translations in Hygraph after syncing?
To view and manage translations:
Go to the content editor and select the model view where EasyTranslate is enabled.
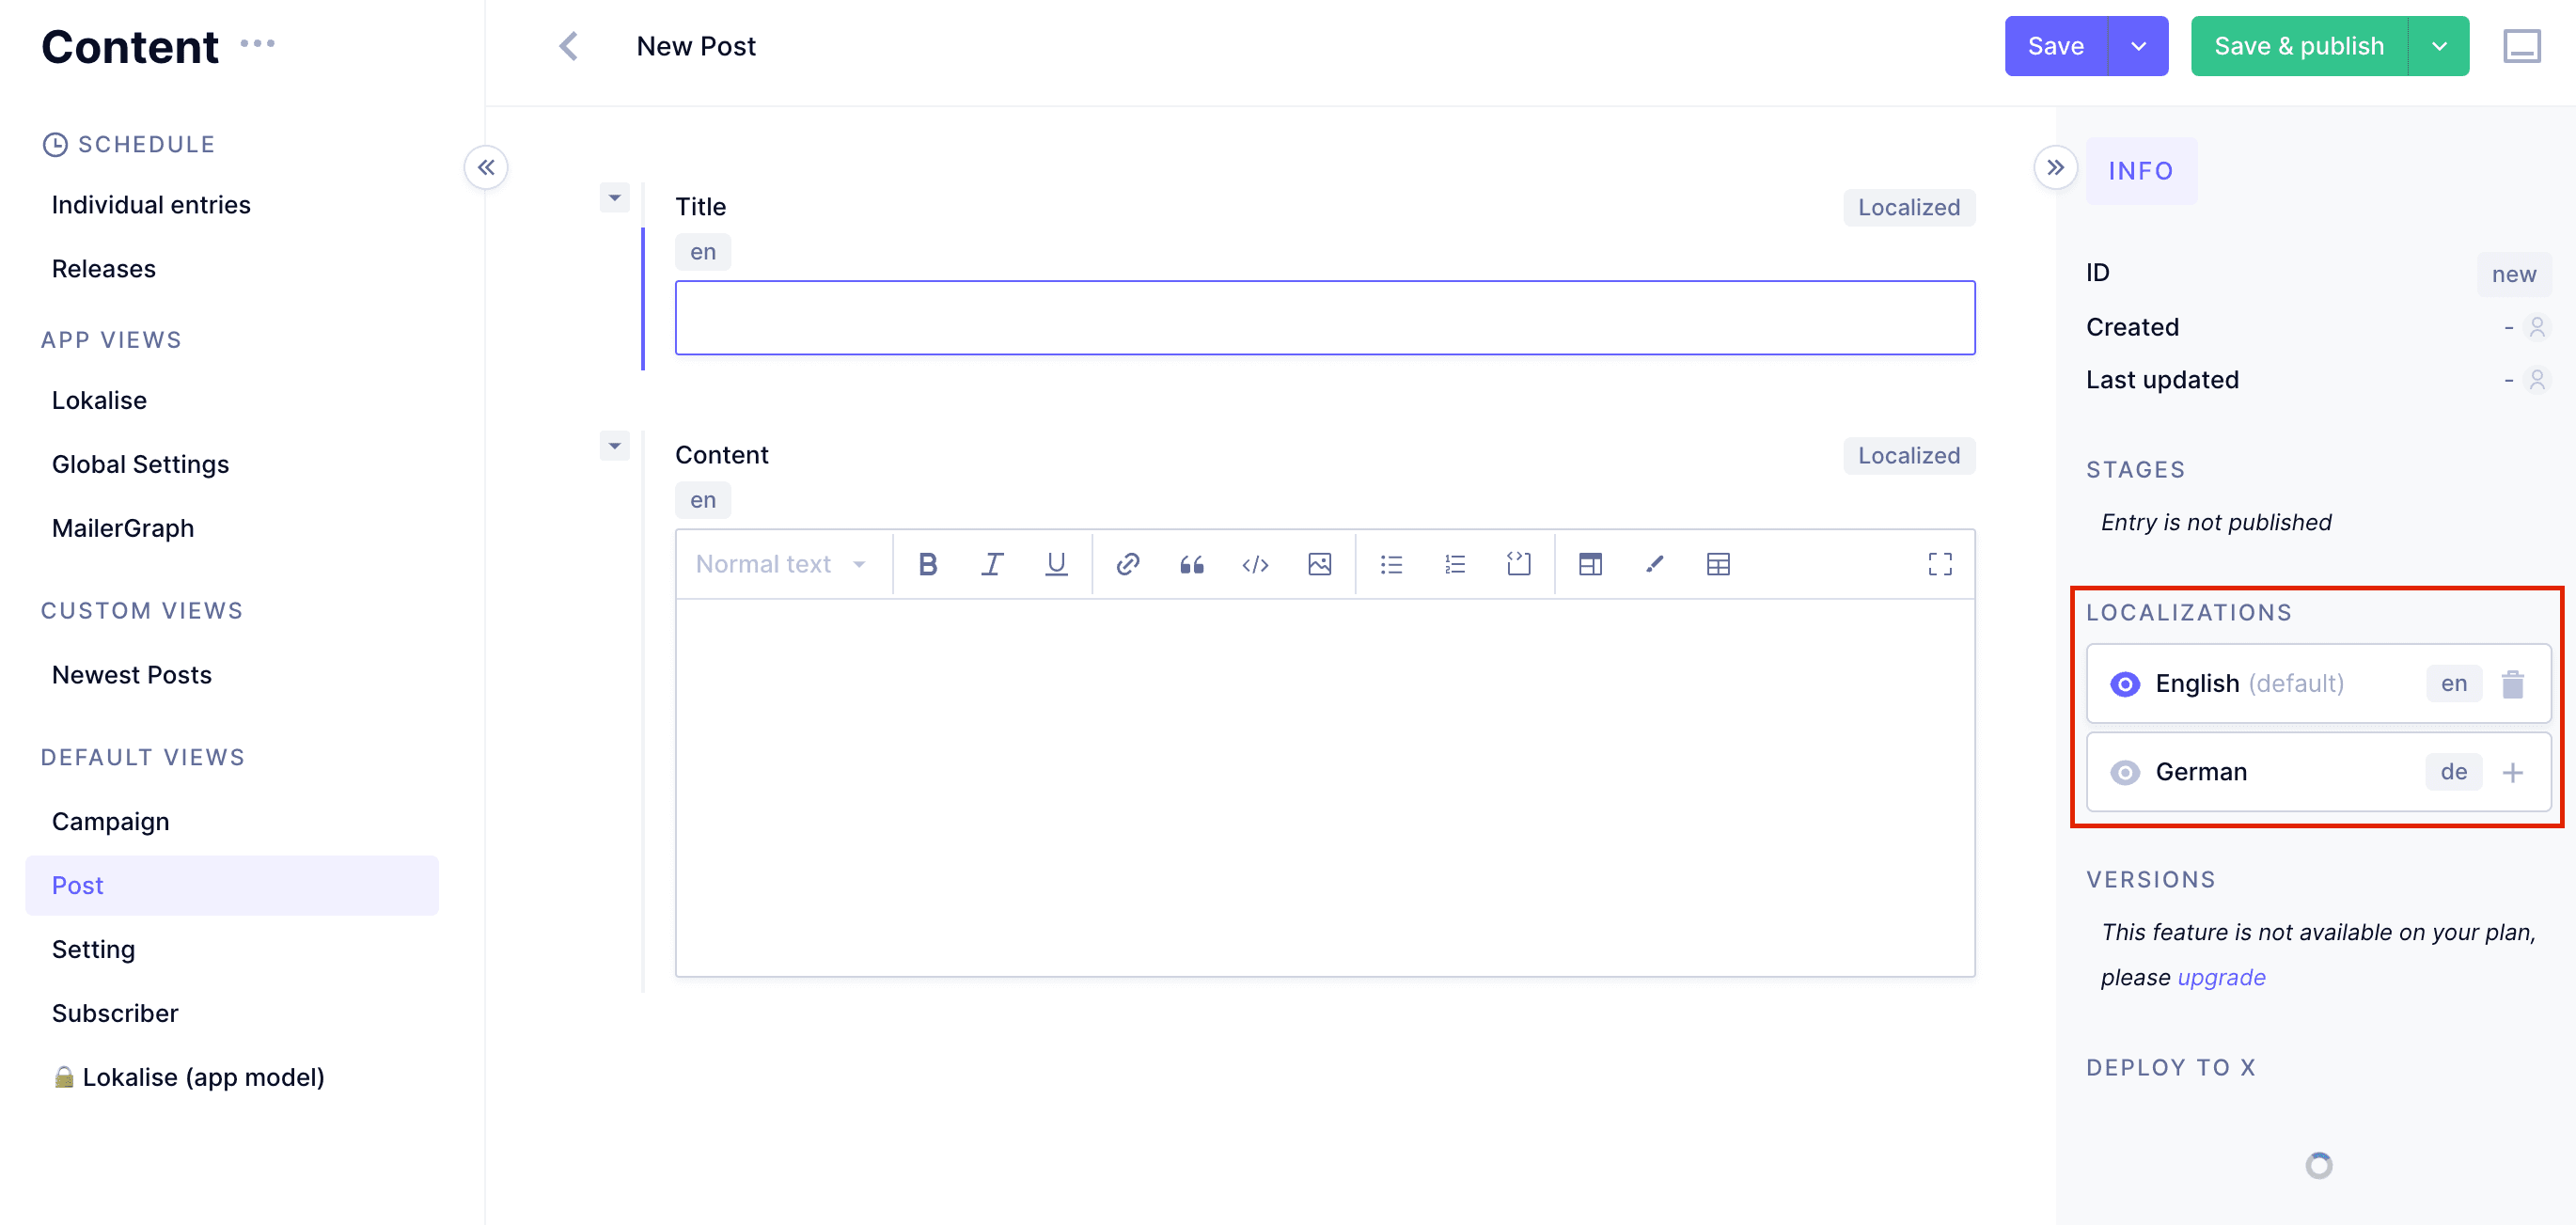
Edit an entry with synced translations. The Localizations section in the right sidebar lets you add, delete, or view translations using the plus, trash, or eye icons, respectively.
Troubleshooting & Limitations
What should I do if I see 'This model has no localized fields' in the Content Editor?
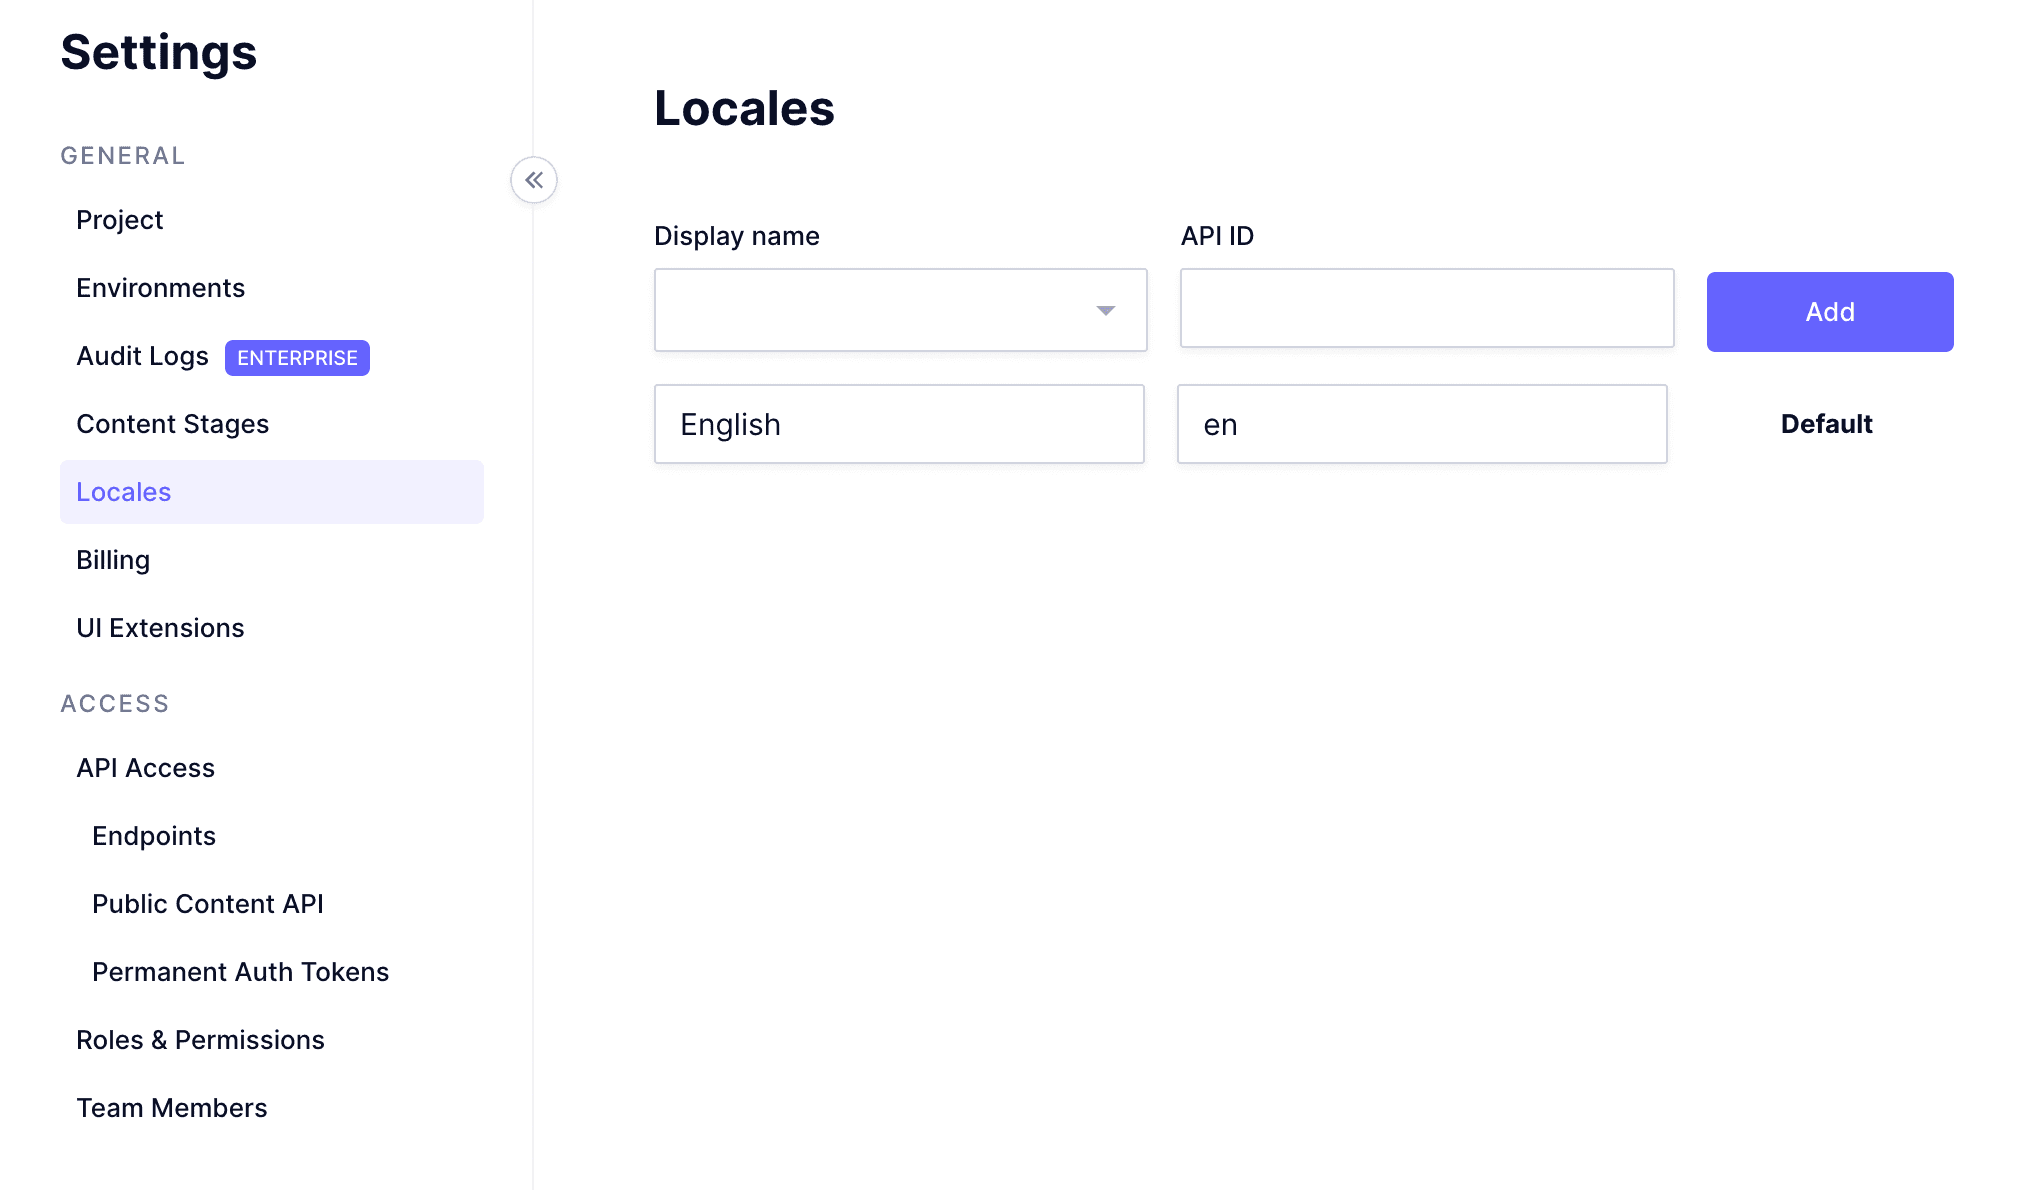
If you see this message, check your project settings under Project settings > Locales to ensure you have at least two languages configured. If only one language is set, add another language for localizations. Note: Free plans can have a maximum of 2 locales.
Are there any limitations on the number of locales for free plans?
Yes, free plans in Hygraph can have a maximum of 2 locales. If you need more, consider upgrading your plan.
How do I ensure fields are localizable for translation?
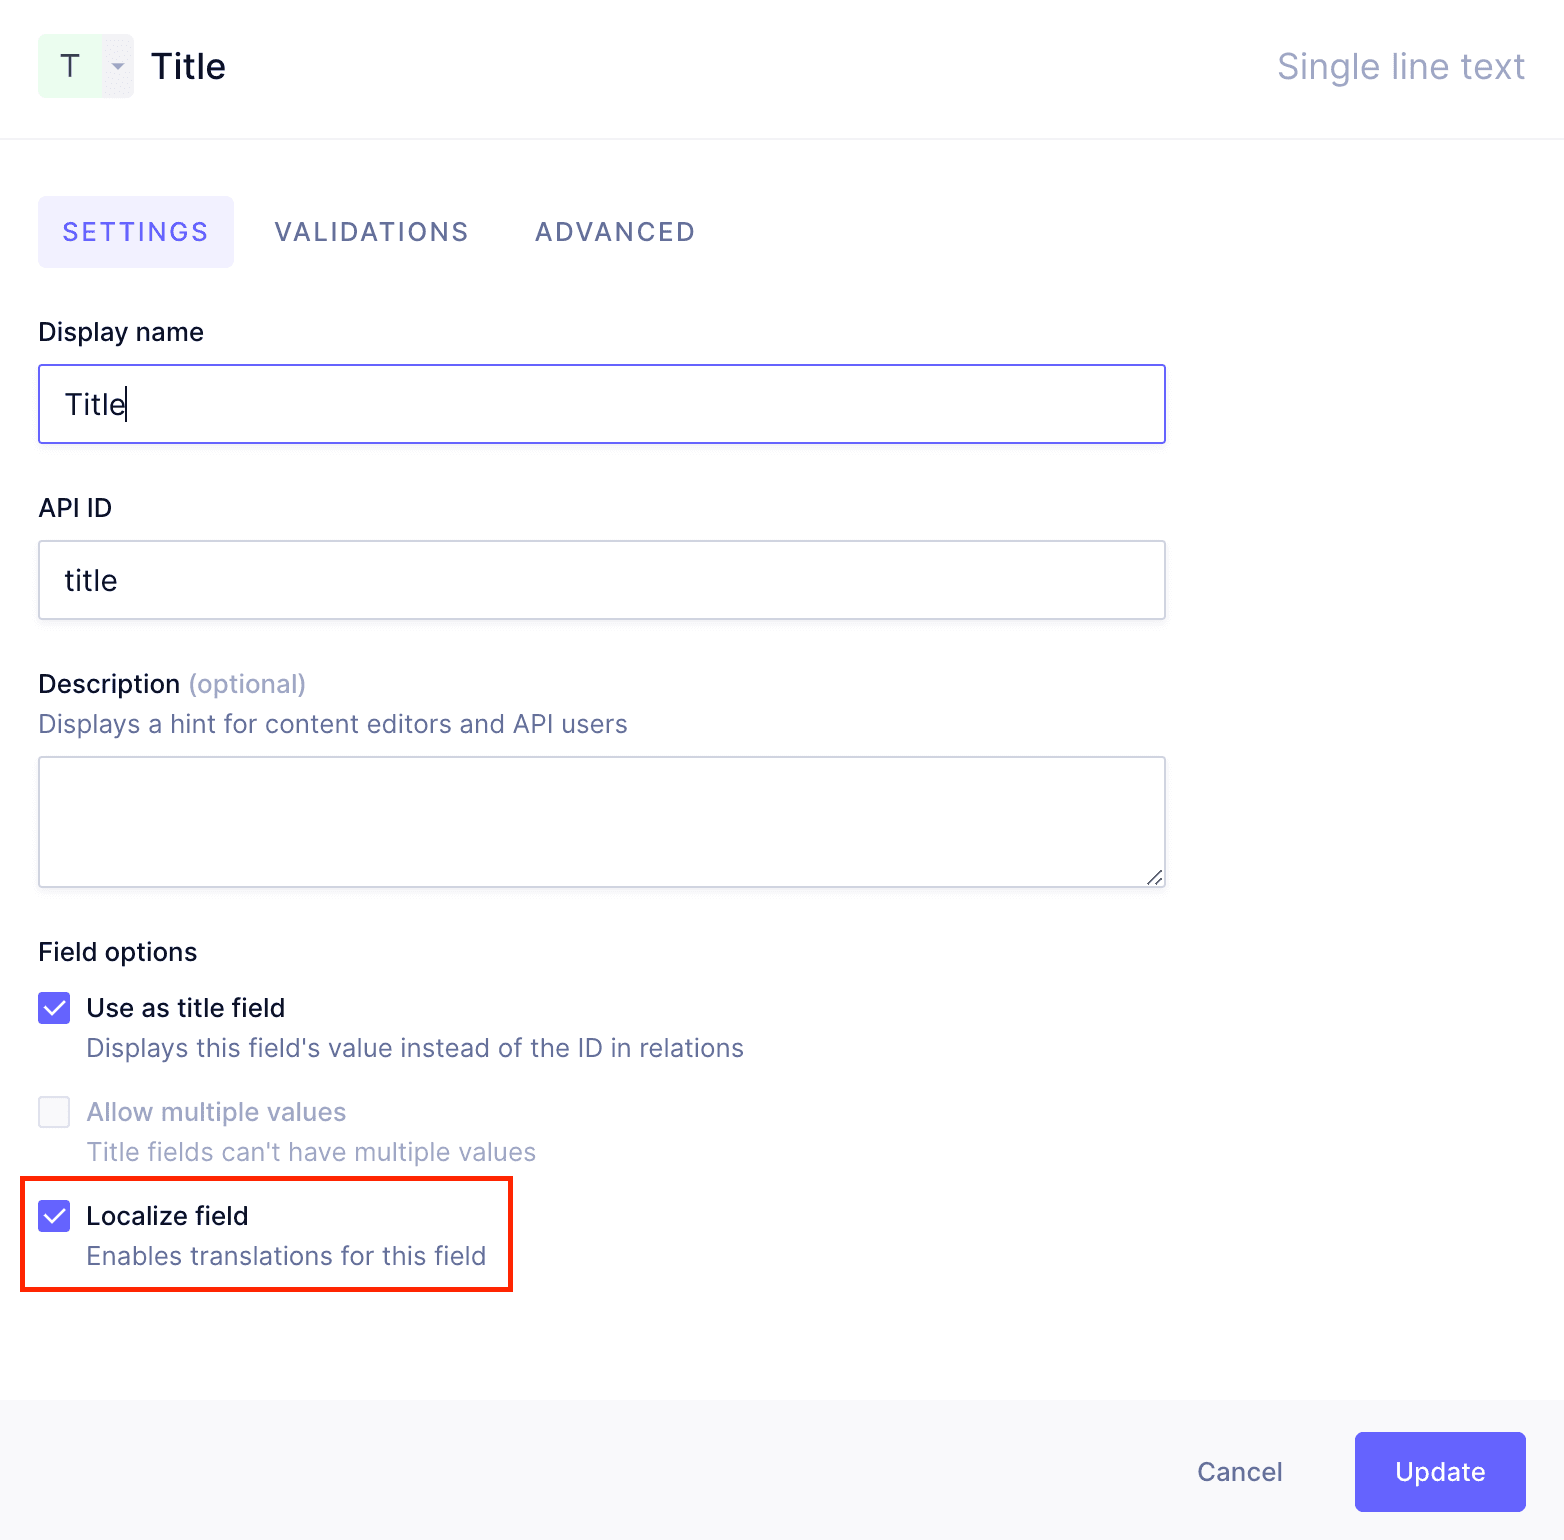
When creating or editing a field in the Schema editor, make sure to check the Localized field checkbox at the bottom of the field details screen. Only fields marked as localized can be submitted to EasyTranslate for translation.
Use Cases & Benefits
Who can benefit from the Hygraph-EasyTranslate integration?
Any business or team that needs to manage multilingual content efficiently can benefit, including eCommerce companies, global enterprises, and organizations with localization needs. The integration is especially useful for teams looking to automate translation workflows and maintain high-quality content across multiple languages. Learn more.
What are the main benefits of using EasyTranslate with Hygraph?
Key benefits include:
Automated and streamlined translation workflows.
Access to professional, high-quality translation, interpretation, and localization services for any market.
Ability to recruit freelance translators or automate translation flows.
Seamless syncing of translated content back into Hygraph.
Improved efficiency for teams managing content in multiple languages.
Thousands of businesses from all industries use EasyTranslate for their content needs. Read more.
Support & Resources
Where can I find more information or support for the Hygraph-EasyTranslate integration?
What support channels are available if I encounter issues with the integration?
Hygraph provides 24/7 support via chat, email, and phone. You can also use the Intercom chat for real-time troubleshooting, access extensive documentation, and join the Hygraph Community Slack for peer and expert help. Enterprise customers have access to a dedicated Customer Success Manager for personalized support. Hygraph Documentation
Security & Compliance
Is the Hygraph platform secure and compliant for enterprise use?
Yes, Hygraph is SOC 2 Type 2 compliant (achieved August 3rd, 2022), ISO 27001 certified, and GDPR compliant. The platform offers granular permissions, SSO integrations, audit logs, encryption at rest and in transit, and regular backups. For more details, see the Hygraph security features page and the security and compliance report.
EasyTranslate's language solutions platform gives you easy access to professional, high-quality translation, interpretation, and localization services for any market. Thousands of businesses from all industries - from small eCommerce to large enterprises - use EasyTranslate's software to generate content from simple keywords, recruit freelance translators or automate translation flows from various platforms.
#What you can do with the Hygraph-EasyTranslate integration
The Hygraph-EasyTranslate integration allows your team to sync/submit your content from Hygraph to EasyTranslate, where you can localize your content either automatically or done by your team, then import it back into your CMS seamlessly
You must have an EasyTranslate account. If you don't have one, you can create one here.
You must have an EasyTranslate Personal access token. You will find it in your EasyTranslate account by navigating to Integrations > Hygraph.
You must have a Library created in EasyTranslate. This document explains how to create one.
You must have a Team set up in EasyTranslate. This video shows you how to set up your translators team.
Apps are environment specific. This means their configuration is applied per environment. Take this into consideration if you're working with a project using more than one environment.
Click here to install the EasyTranslate App on Hygraph, then follow these steps:
Use the the dropdowns to select which project and environment you want to install the app in, then click on the Install App button. You should be redirected to your Hygraph project dashboard.
Click on Authorize app on the permissions screen.
Fill in the following information:
Personal access token: You can find this information in your EasyTranslate account by navigating to Integrations > Hygraph. Once you add this token, you can use the dropdowns to select a team and library.
Team: Use the the dropdown to select which team you want to configure the app for. Here's some information on how to set up a translators team in your EasyTranslate account.
Library: Use the the dropdown to select which library you want to configure the app for. Here's some information on how to create a library in your EasyTranslate account.
Select at least one of the listed Translatable models to use EasyTranslate in. This information can be edited later by going to the Apps section of your Hygraph project, then clicking on the pencil icon on the EasyTranslate card to edit the details.
As you create content, it will display in the EasyTranslate app view of the Content editor. From there, you will be able to send your content for translation to EasyTranslate, then sync those translations with your Hygraph content.
Please note that only the content created using the Model that you selected during the EasyTranslate installation process will display on this list.
You can edit this from your Hygraph project by navigating to Apps > EasyTranslate, clicking on the pencil icon to edit, then using the checkboxes to select the models you want.
Finally, after syncing the content, you will be able to view the translated content normally by accessing the Content editor.
The following fields are supported to be exported to EasyTranslate:
Single-line text
Multi-line text
Markdown
Richtext
Slug
Export is also supported for Basic and Modular Components, but only for the supported field types.
Take into account that only localizable fields can be submitted to EasyTranslate. So the fields must be set as localized fields when added to the model.
Localized field checkbox
You will find the Localized field checkbox at the bottom of the field details screen, which displays when you create or edit a field in the Schema editor.
Find EasyTranslate under the App views section of the right sidebar.
Use the checkboxes to select the desired content from the list, and send it to EasyTranslate by clicking on Send for Translation at the top right of the form. It is also possible to filter content entries by Model and Locale using the dropdowns at the top of the form.
The system then sends the content to EasyTranslate for translation. After work on that content is finished, you can sync the content to bring those translations to Hygraph.
Find EasyTranslate under the App views section of the right sidebar.
Find the entry you want to send and click on the pencil icon to access the edit view.
Click on the Send for translation button on the sidebar.
The system then sends the content to EasyTranslate for translation. After work on that content is finished, you can sync the content to bring those translations to Hygraph.
If the Content Editor displays the message This model has no localized fields under localizations in the sidebar, while the Schema Editor has localizations configured, go to Project settings > Locales. There, make sure your project has at least two languages configured.
Locales in project settings
If you have only one language configured there, select another language for localizations using the Display name dropdown, then click on Add.
Please note that free plans can have a maximum of 2 locales.